The other day was defined by my to-do list. Run to the store. Pick kids up from school. Finish folding that laundry that’s been piling up for a few days. Email invoices. Call my sister. Write recipes. Finish this blog post.
It wasn’t abnormally busy, but I was overdone. I knew I needed some time to reconnect with me as a person and not with me as a machine that gets stuff done.
I knew my heart craved something slower for just a minute. But how could I justify this when I HAD SO MUCH TO DO. It was a night for homemade pasta. That was the best solution. Why would I neglect the box of pasta in my pantry, you ask? That’s just it. I needed to lose my mind for just a few minutes so that I could find it again on the other side of sticky hands and a little bit messy meal.
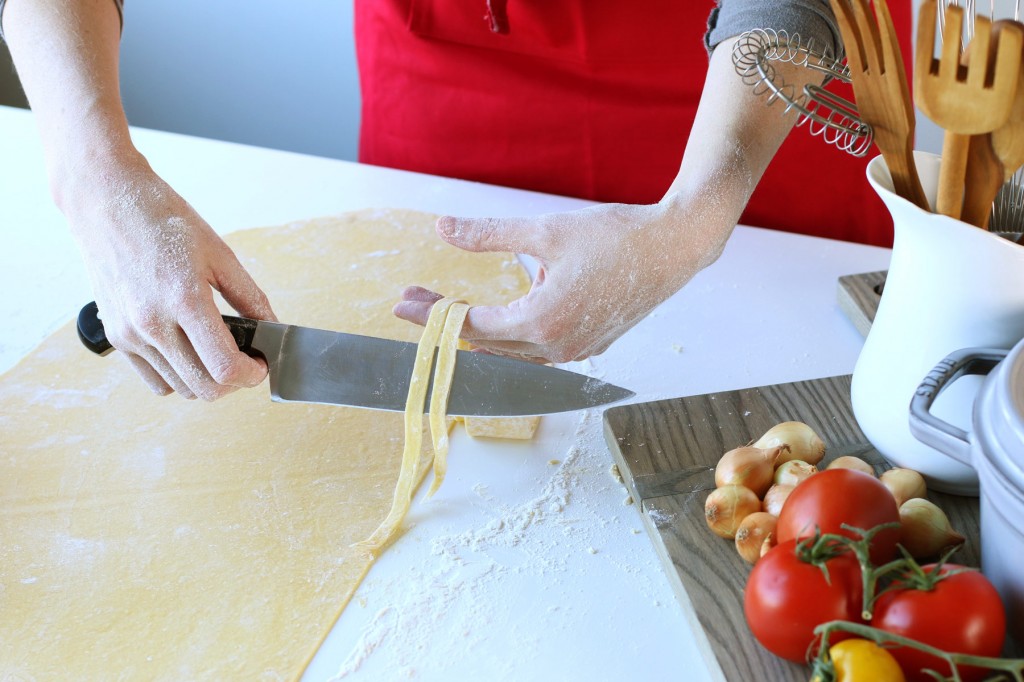
I grabbed my apron, canister of flour, carton of eggs and got to work. Pretty quickly my three-year old couldn’t resist and his hands were kneading the pasta dough. My mind was re-prioritizing my day. With my hands covered in dough, I knew that a delicious, real, fulfilling meal was just minutes away. And my heart was closer to being able to take on life with a little more love. I knew that I had done more than made dinner. I had made a space for myself to find the calm I needed in the chaos.
We finished our pasta with some roasted veggies straight from the oven. Creamy burrata. A squeeze of lemon. Or a shaving of strong cheese. Go heavy on the kosher salt. And there’s never enough fresh, cracked black pepper to round off the dish.
The next time you’re needing a reason to connect, I hope you find a little more of yourself in the kitchen making up a quick and easy batch of homemade pasta. You might just find that it does more than fill your belly.
It only takes two ingredients to make home made pasta! You'e just minutes away from fresh, simple, tasty noodles. Pour flour into a mound on a workable surface. Use your finger to make a well in the middle. Crack eggs into the middle of the well and mix with a fork. If the egg breaks out of the well and starts to run, cover it with a little flour and incorporate it back into the pile. Optional to drizzle 1 tsp olive oil and 1 tsp kosher salt. Or you can add in fresh herbs or aromatics into the pasta. Start to mix the dough by hand and knead it until it comes together in a smooth, firm mound of dough. Takes a few minutes of kneading to get it just right. If the dough is crumbly and falling apart, add 1/2 a tsp of water at a time to help it bind together. If the dough is incredibly sticky, and not adhering in a ball, you can add a small amount of flour, 1 Tbsp at a time to make it easier to knead and work with. Cover ball of dough with a piece of plastic wrap and allow it to rest about 15 minutes. Separate dough into 4 pieces. Cover the three remaining pieces with plastic wrap again, and use the palm of your hand to flatten your dough into a disk. Starting with the thickest setting on your pasta machine, send the dough through one time. Fold it in thirds, and send it back through three more times, folding the dough in between each rolling. Then start decreasing the thickness on your machine and run the dough through until you've reach your desired depth to your noodle. Set your machine to a cutting setting, prepare a baking sheet lined with a towel, rub both sides of the pasta with a little flour and run the pasta through the machine. Lay the cut pasta on the baking sheet and cover with a towel to keep it from drying out. Prepare a pot of salted water and bring to a boil. Lower pasta into pot and cook. Taste until it has reached the perfect al dente doneness. Enjoy your pasta with sauce, in soups, or even with a little butter and melted cheese. If at anytime your pasta is sticking to the machine, you can always sprinkle on a little flour to prevent it from sticking.
If the pasta is drying out and cracking, knead in a splash of water, and allow it to rest while covered to prevent the cracking. Homemade Pasta with a pasta maker
Ingredients
Instructions
Notes
Are you without a pasta machine? Never fear. Read this blog post to see step-by-step pictures of the process all done by hand. No machine needed!


No Comments