The most satisfying bite combines sweet + salty + creamy + chewy + crunchy! Which means you’ll find the utmost satisfaction from these caramel twist pretzel rods! Plus, they couldn’t be easier to assemble! If you’re new to candy making, this project is great place to start. Or, if you’re looking for a recipe to get the kids involved, they’ll love making these pretzels. And if you’re an experienced candy connoisseur, you’ll love the unique twist on the classic dipped pretzel rod.
Gather the Supplies
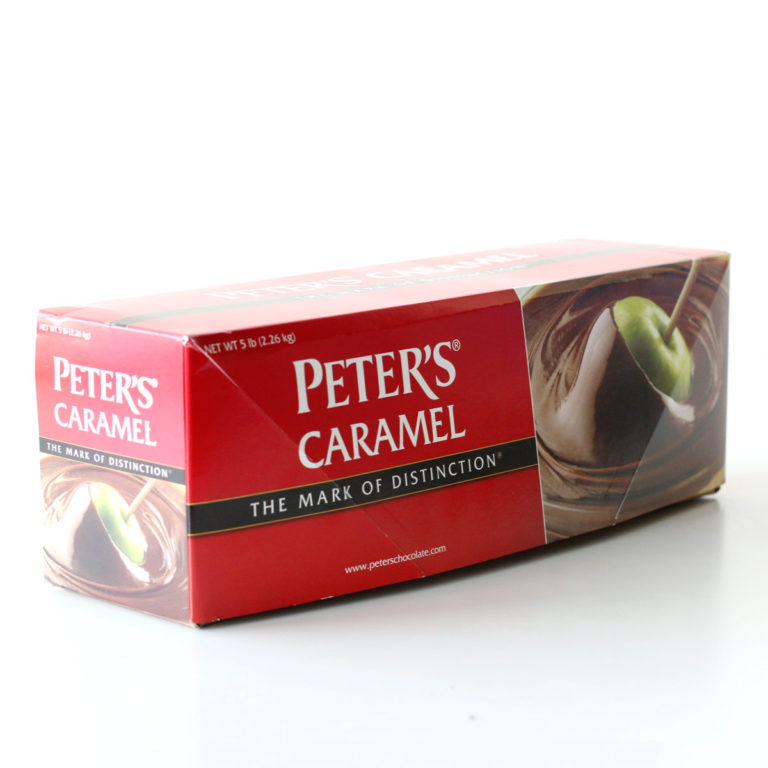
You need just a few ingredients to get started. Start with a block of Peter’s Caramel. It’s the perfect texture and consistency. And it’s delicious. You can make about 150 caramel twist pretzel rods with one block of caramel! Amazing.
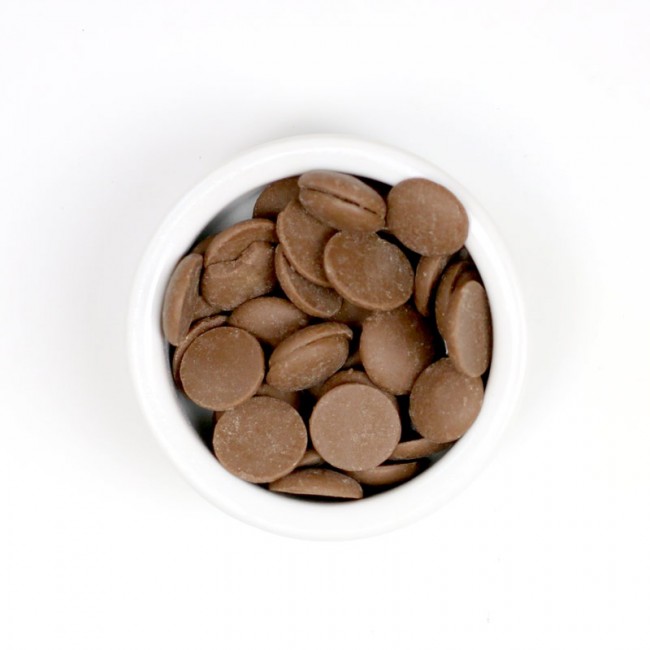
Next, you’ll need some melting chocolate. I love these easy-to-use Chocolate Snaps! Simply melt and dip! You’ll have great success, even if you’re new to chocolate. But if you’re looking or a more gourmet treat and you’re feeling up to tempering your chocolate, I love these Callets!
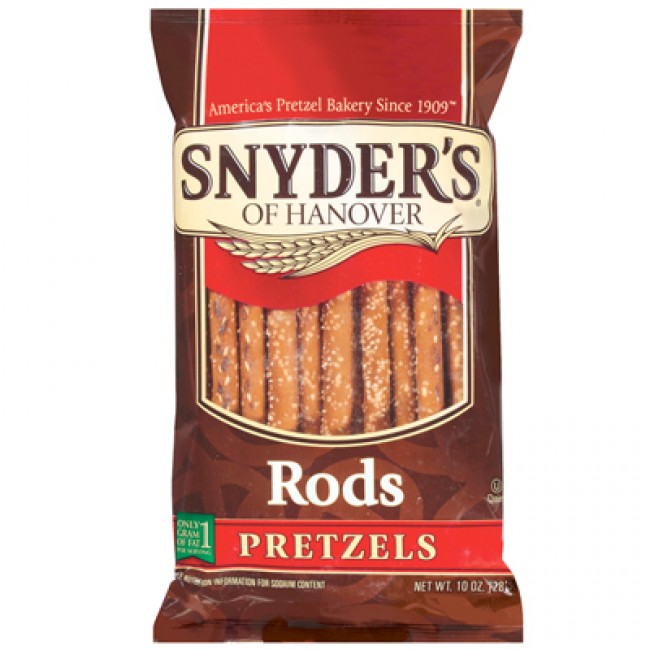
Last, you’ll need a package of pretzel rods. These pretzels are guaranteed to be crunchy and fresh, which is important in this chewy + crunchy equation.
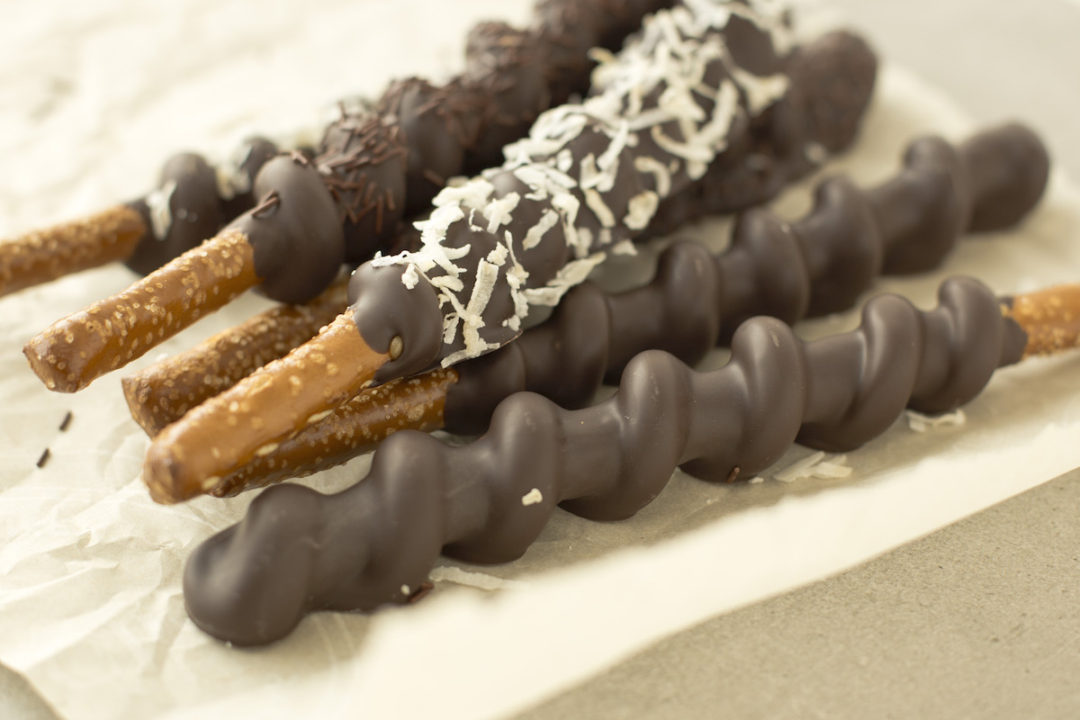
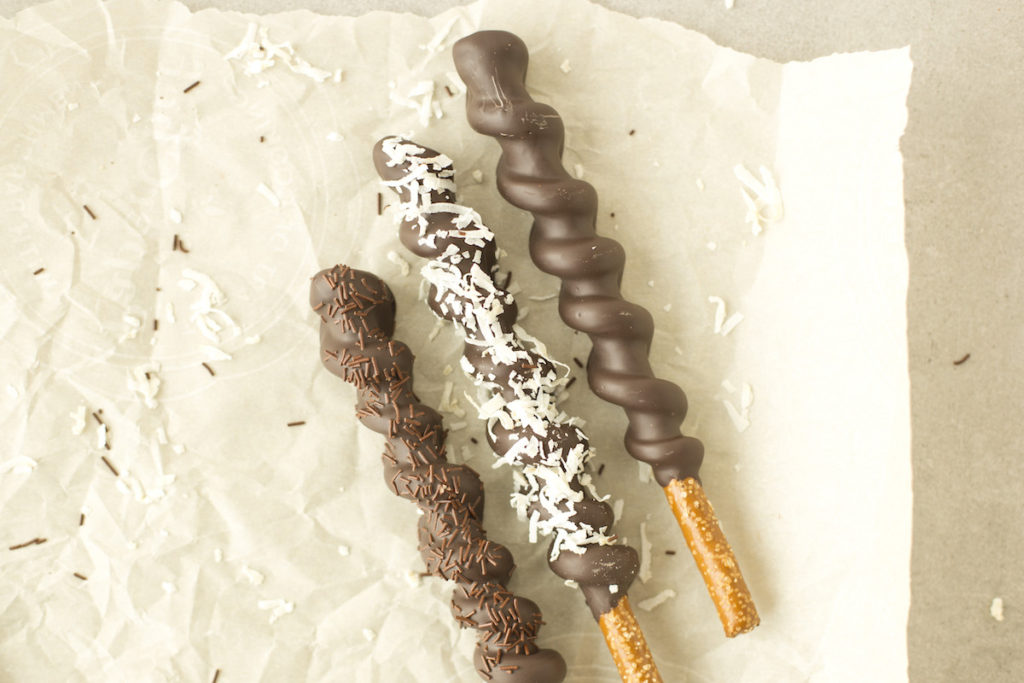
An optional addition is toppings. Think sprinkles (love this pretty chocolate option). Also coconut, nuts, a drizzle of chocolate, etc. You definitely don’t need to add any toppings. But they are sure pretty. And fun. And delicious!
Now, gather some supplies. You’ll need a knife to cut your caramel and a smooth surface to work on. You’ll also need a bowl for melting your chocolate and a large cup for dipping. And I love this spoon or this spreader for stirring the chocolate. Finally, some sheets of parchment paper!
Let’s Get Twisty!
Okay. The process for making these rods seems tricky – but it’s not! You can do this!!!
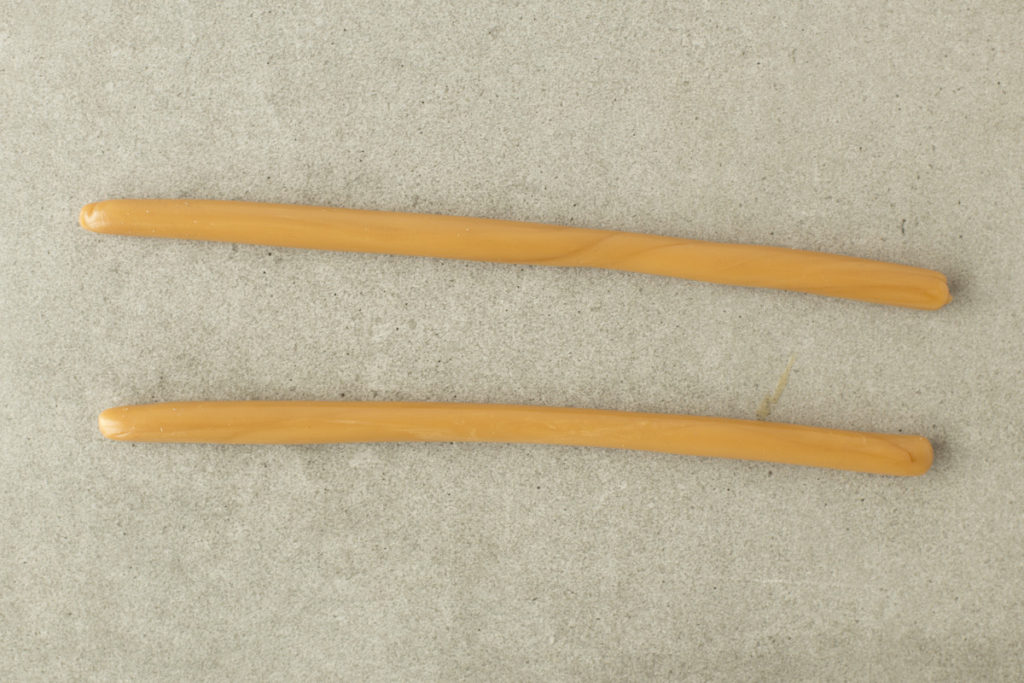
Start by cutting a 1/2″ slice of caramel from the block of Peter’s Caramel. Now, cut that slice into 6 equal pieces. You’ll be left with a square of caramel about 1.5″ x 1.5″.
Now, start smushing the caramel to make it soft and pliable. When it feels easier to work with, begin rolling the caramel into a long, snake-like shape. You’ll want the piece of caramel to be about 1/4″ thick and 8″ long.
Now, take your piece of caramel and one pretzel rod. Press the caramel to the top of the pretzel and twist the caramel around the rod, twisting as you go. When the caramel rope runs out, press the caramel to the pretzel to hold it in place. Leave a few inches uncovered so you have a handle.
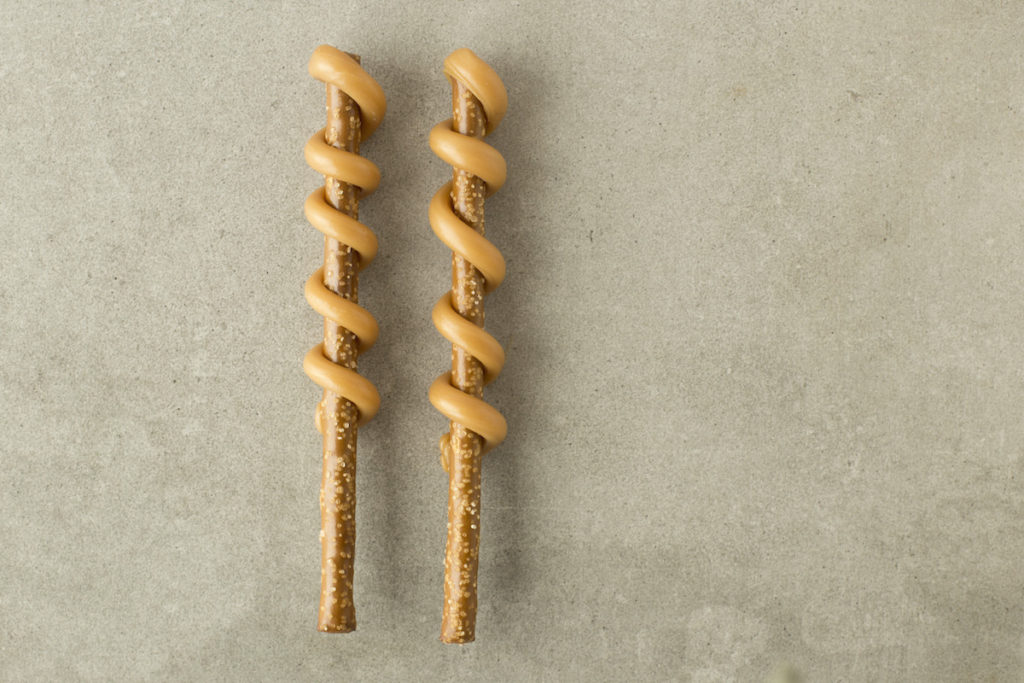
Tada!!! You’ve done it!! A couple tips to help, if the caramel seems a bit wonky. First, you can weigh your pieces of caramel to ensure you are starting with the same amount of caramel. Next, roll all your pieces of caramel before twisting. This will guarantee your pretzels will all look uniform. You can decide if you want thinner or thicker pieces of caramel on the rod – the end result will be a bit different, but both options are beautiful. Last, wearing a pair of gloves will keep your fingerprints off the caramel!
Let’s Dip!
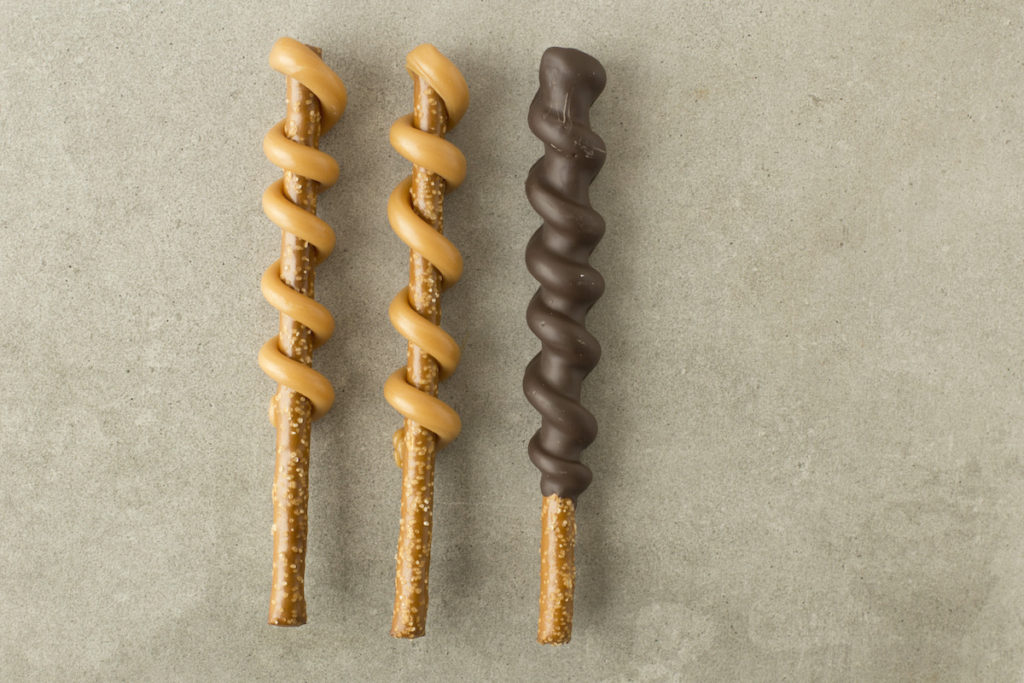
Once all your rods are twisted, you’ll want to melt your chocolate. If you have easy-to-use compound chocolate, follow these instructions. If your using gourmet couverture chocolate, follow these tempering instructions.
Once your chocolate is melted, move your chocolate to a large cup. This size works great. This will give you a deep reservoir of chocolate to dip in.
Now, holding your pretzel rod in your dominant hand and the cup of chocolate in your non-dominant hand, tip the cup toward your pretzel rod. Dip the pretzel into the chocolate, covering all the caramel, but leaving a handle on the pretzel. Now, place the cup on the counter and pull the pretzel rod straight out of the chocolate. Let the chocolate drip back into the cup, until chocolate is no longer coming off in a stream. You can gently shake the chocolate to speed up the process. The longer they drip, the cleaner your pretzel rod will look. If your chocolate starts to cool, warm it gently in the microwave for 10-15 seconds and resume dipping!
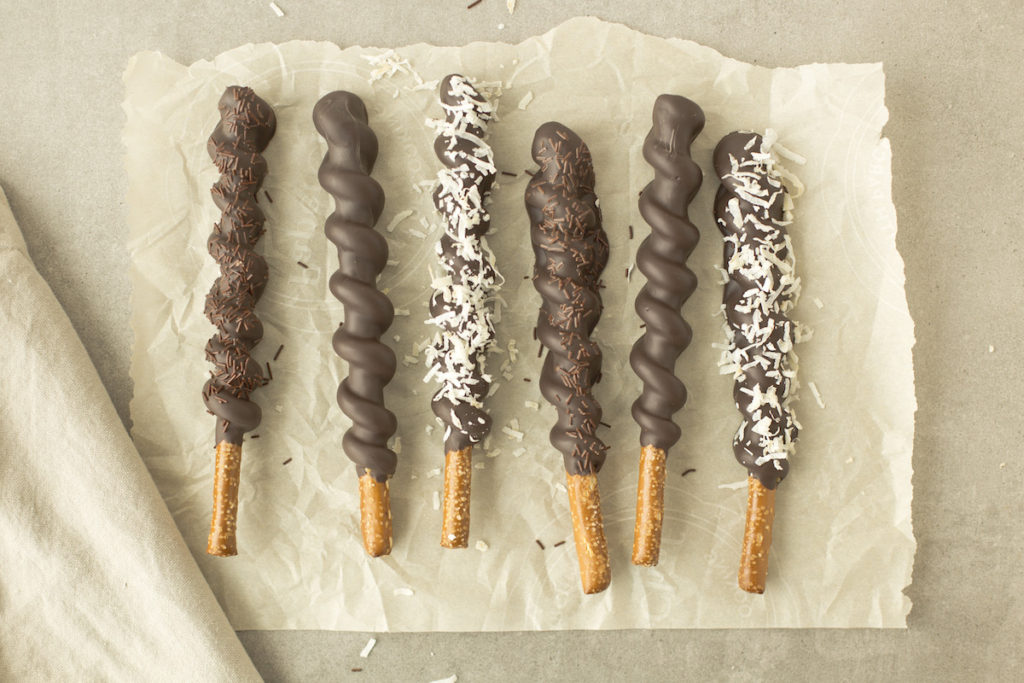
After dipping, place the pretzel rod on a piece of parchment paper and sprinkle with desired toppings. Now, let the chocolate cool and set up. You can move the pretzels to the fridge to expedite the cooling, reducing the amount of chocolate that will pool at the base. Look at the picture below. Two of the pretzels have larger chocolate “pools.” I did not let enough excess chocolate drip off before placing on the parchment. Can you spot the difference?
Enjoy!
Once your chocolate has cooled, you are ready to enjoy your Caramel Twist Pretzel Rods. Or you can save them for a later day! These rods will stay fresh for 2-3 weeks! So, make them prior to your party for an easy favor or treat. I love them for neighbor Christmas gifts, because I can prep them before the holiday madness sets in! They are also a great activity to keep little hands busy during a your festivities! Basically, they are good – always!
A fun twist on the classic dipped pretzel rod. Cut the caramel into 1.5" x 1.5" squares. Smush the caramel until it is soft and pliable. Roll into a 1/4" x 8" caramel snake. Starting at the top of the pretzel, twist the caramel around the rod. Leave a couple inches at the bottom of the pretzel for a handle. Melt your chocolate. Dip the pretzel into the chocolate. Let the excess chocolate drip back into the bowl or cup. Place pretzel on a piece of parchment paper and sprinkle toppings, if desired. Let chocolate cool. You can place pretzel in the fridge for 5-10 minutes to expedite the cooling. Enjoy! Or package to enjoy later. Pretzel rods will remain delicious for a few weeks! Caramel Twist Pretzel Rods


 (38 votes, average: 3.71 out of 5)
![]() Loading...
Loading...Ingredients
Instructions


Karen A
April 6, 2024 at 10:09 amWhat size is the block of caramel? 1 ounce or bigger.
london
May 9, 2024 at 4:28 pmThe block of Peter’s Caramel is 5lb.
Sandi
May 2, 2022 at 9:06 pmWhat kind of gloves are you using to roll caramels that won’t stick to the gloves?
Whitney
May 12, 2022 at 2:28 pmWe haven’t needed to wear gloves if we are using Peter’s Caramel. But if we were prepping a lot of pretzels for a crowd, we would wear powder-free vinyl gloves.