It’s time for another Gygi Guide. This time we’re grabbing one of the most universal kitchen tools: THE WHISK. And while every kitchen likely has one of these tools jamming up their utensil drawer, there are many different styles, materials, and techniques whipping around. For this reason, we wanted to delve into the world of whisks to see which ones really earn their keep in our homes.
Before we get into the research, let’s start at the very beginning: Where did the whisk come from?
The first record of whisks started showing up in recipes around the 1600’s – one early recipe calls for a beating with a “big birch rod”. Can you even imagine? The whisk as we know it came around in the 19th Century when Victorians created the Rotary egg beater. There was no mention of the whisk until the legend, Julia Child, brought the whisk to the USA teaching American housewives how to buy a whisk and use it properly.
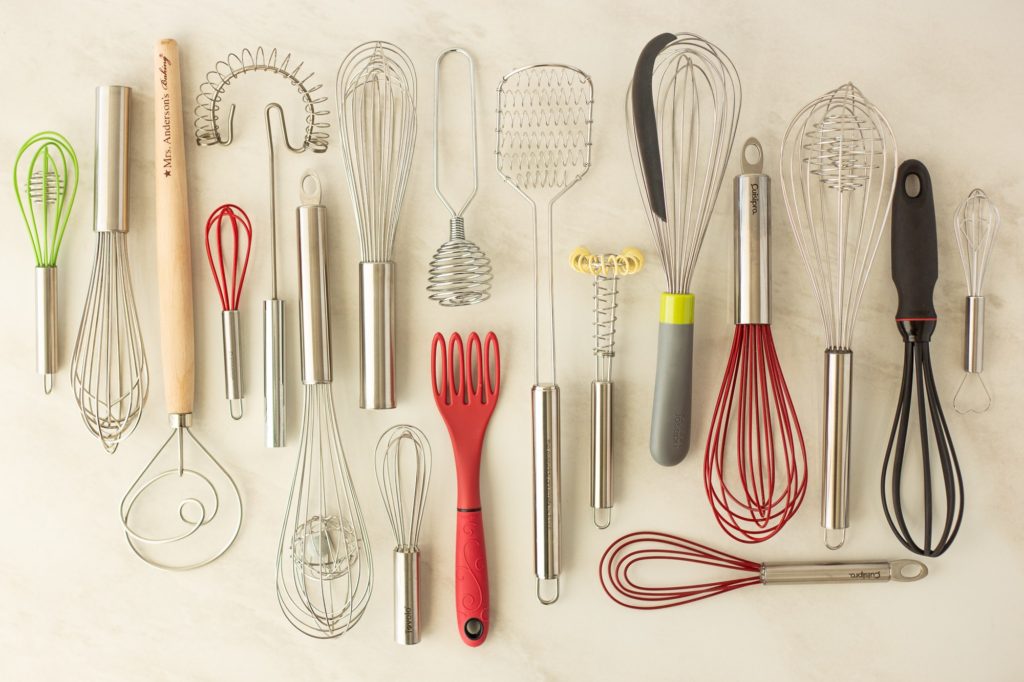
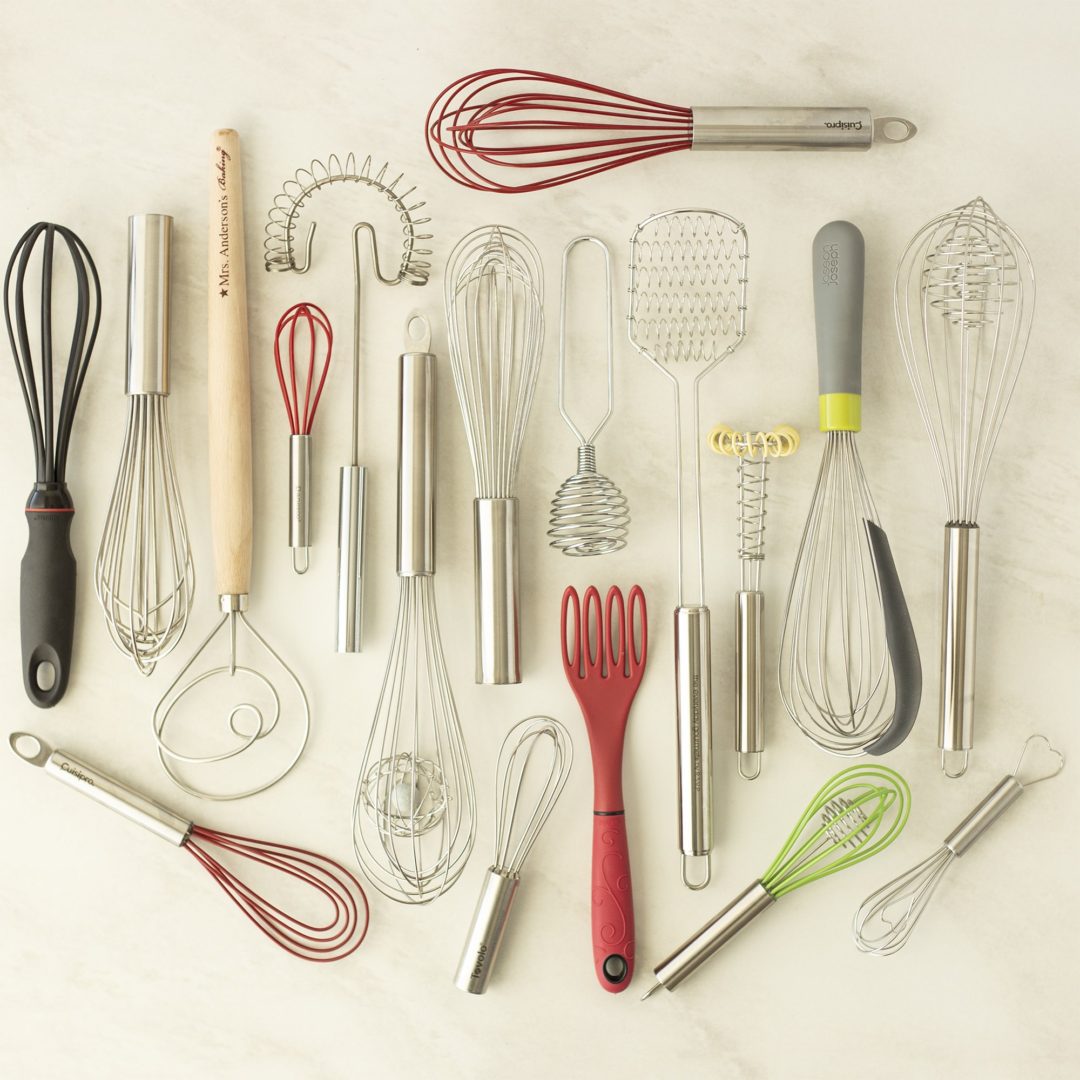
Whisks have been evolving constantly over the years. New models have been introduced and old ones have been perfected. There are so many whisks out there… how on earth are we supposed to know which to get for our kitchen? Enter: The Gygi Guide to Whisks.

We sell so many different styles and versions of whisks. Need something that is perfect for whipping cream? We’ve got you covered! How about a whisk that doesn’t scratch your pan when you are making gravy? Yep, we have those too! We’ve tested every style of whisk to help you stock your kitchen with the whisks you need.
The Types of Whisks
#1 : Whipped Cream- Testing the Whisks
The first thing that popped into our heads when we thought of whisks was WHIPPED CREAM! We were determined to find out which whisk works the best when the goal is to incorporate more air. We were looking for a whisk that is efficient, cutting down on the effort it takes to whip cream from scratch. While we love our stand mixer, it feels good to just stick with the basics and do this simple task without lugging out the Ole Kitchenaid.
We grabbed ourselves 1/2 cup of cream and a metal bowl and set to whisking away. We measured the temperature of the bowls and the cream, used a metronome to keep the whisking all the same speed, and even made poor Spencer do all the whisking to keep the motions the same.
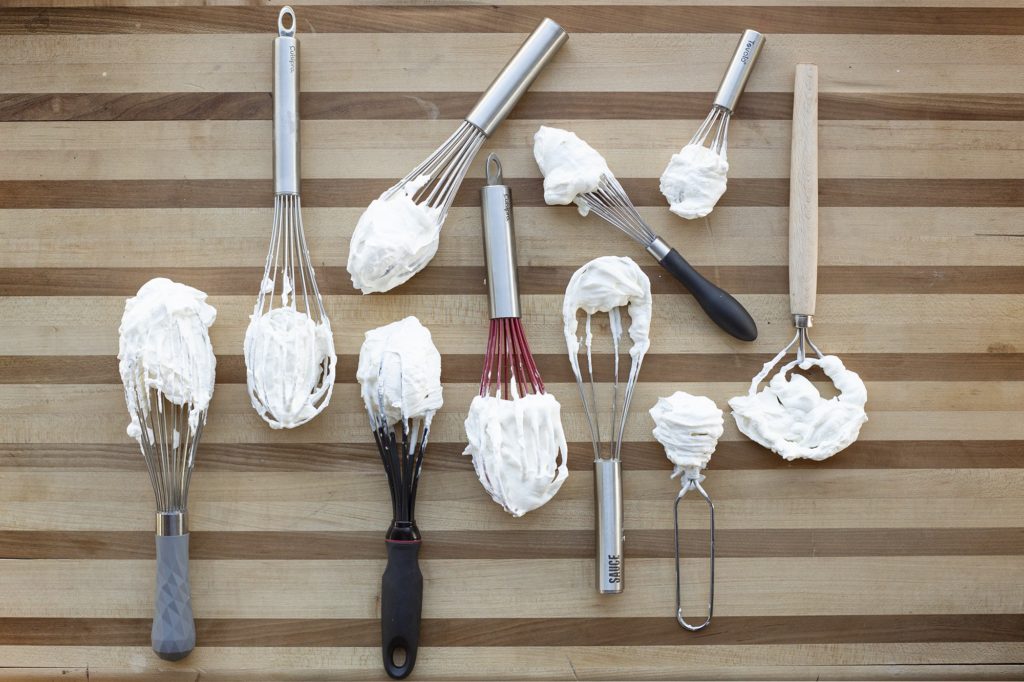
We found that Whipping Cream by hand is remarkably easy if you have the right tools of course! We took a lot into account: Shape of the tines, how many there are, and how flexible they are. This plays a huge part in the time it took to whip the cream because the right amount of tine flexibility and the number of tines helped us whip more air into the cream at a quicker rate. We set out to whisking and here were the results:
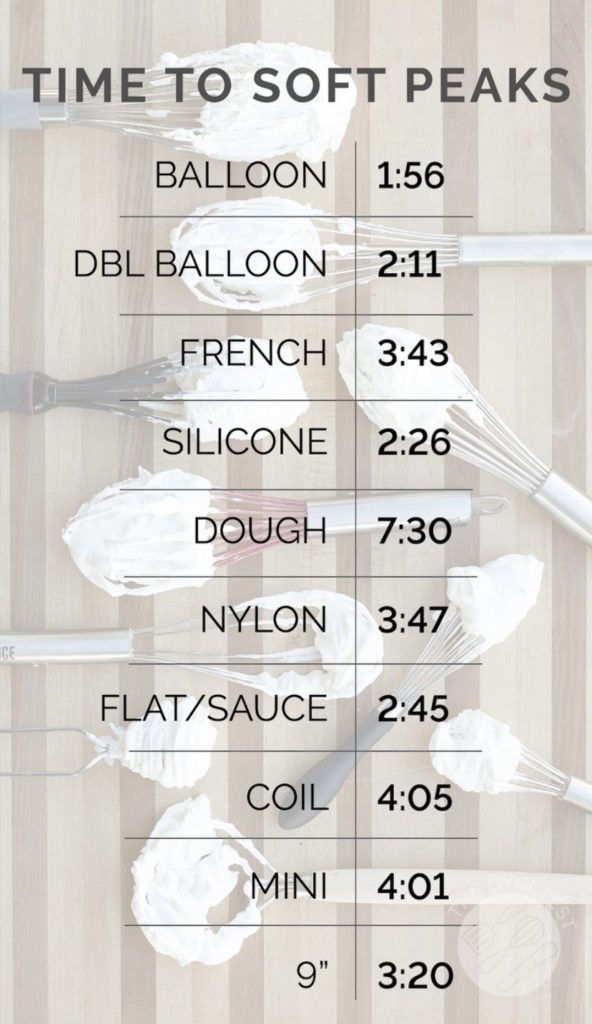
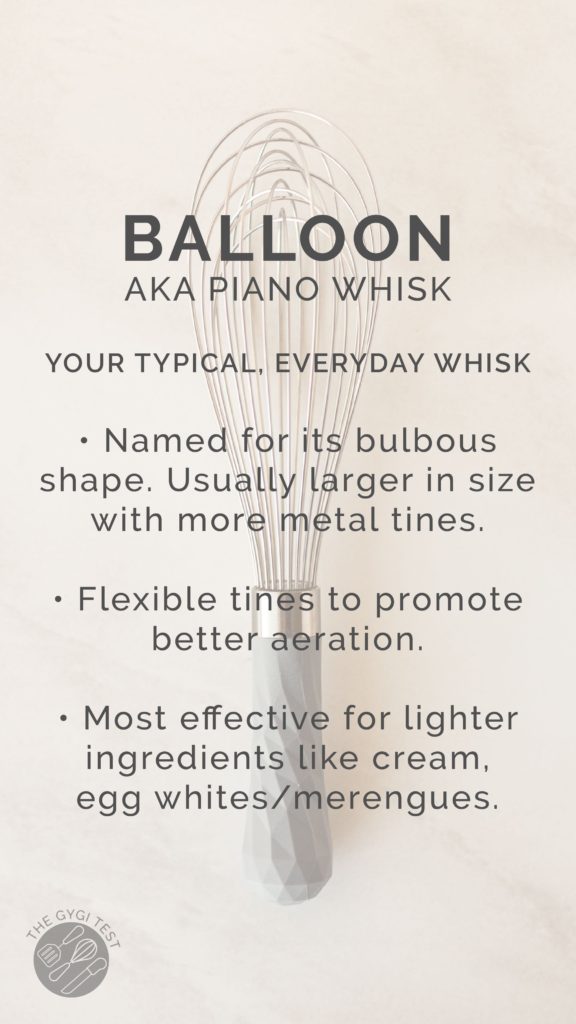
In the end, we were reminded why we go for the balloon whisk when it comes to whipping cream. The large bulbous shape, with many thin tines adds more air with less effort. Will the other whisks eventually whip your cream? YES! Will they take more effort? Also, YES! For this reason, we believe every kitchen should have a balloon whisk stashed in their drawers.
#2: Whipped Cream – Whisking Techniques
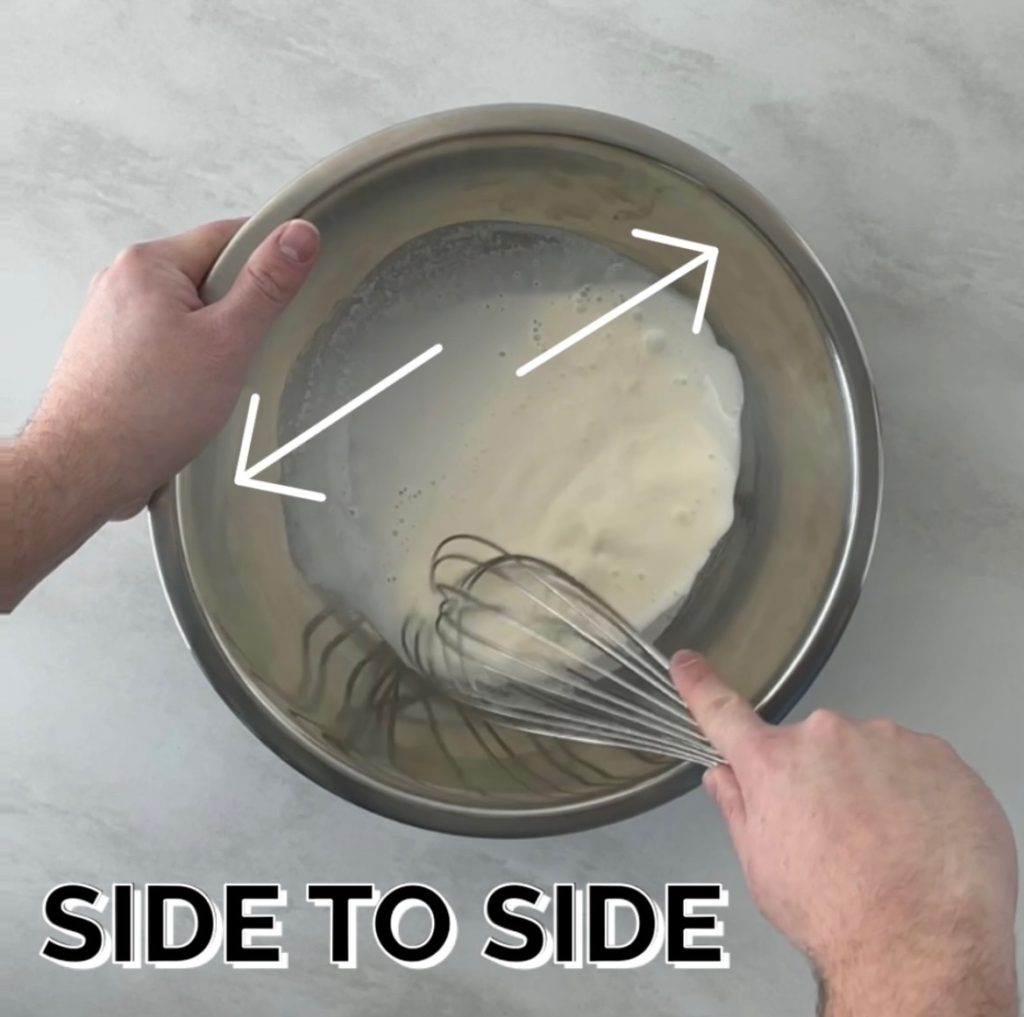
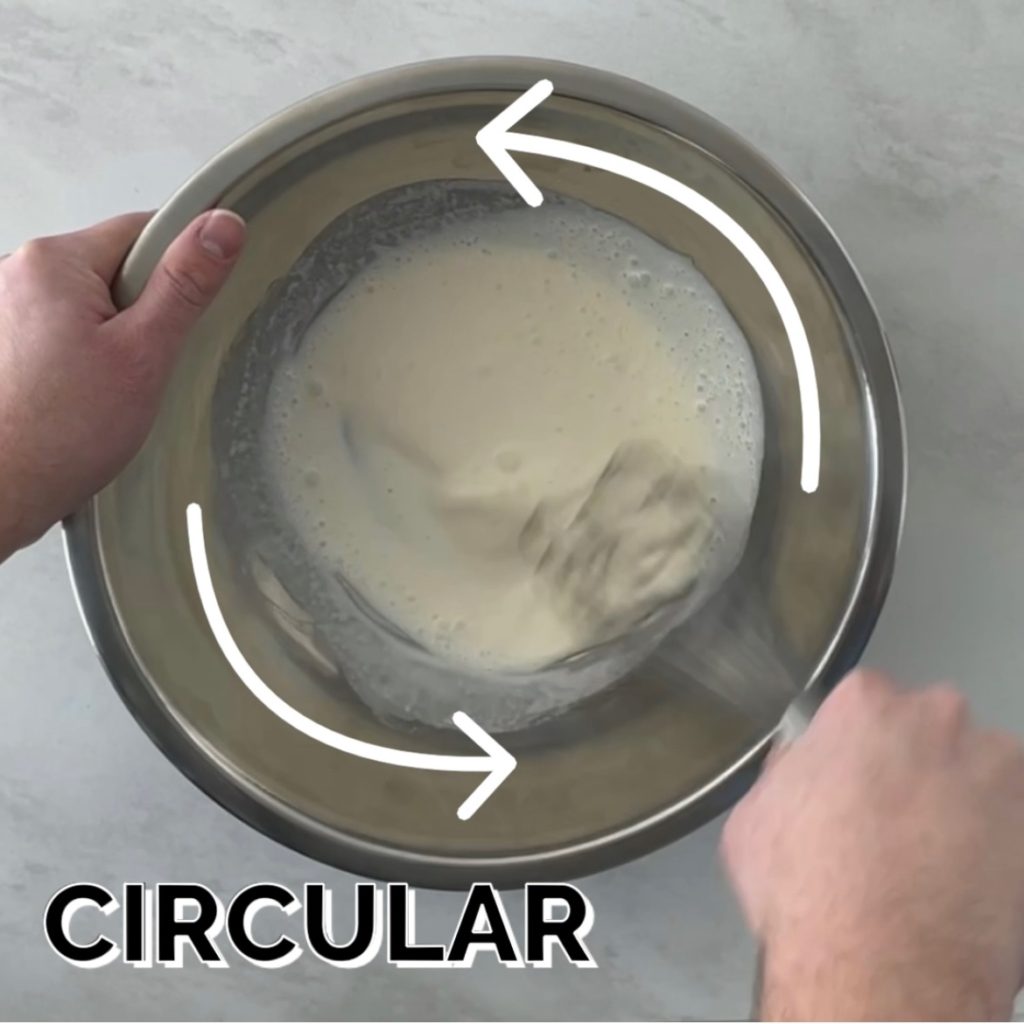
We really get excited when we find a way to simplify an everyday kitchen task. For this test, we confronted the basic skill of whisking. We have always thought of the ‘traditional’ circular motion as the quintessential whisking method, but rumor on the streets has led us to believe that there may be a better way.
So we decided to put it to the test, the side-to-side motion vs. the circular motion went head to head to see which technique can whip some cream up the quickest and with the least amount of effort.
We used the same sized bowl, the same whisk, and the same amount of cream- the only difference was whether we moved the cream back and forth across the bowl, or around the bowl in a circular motion. Which one would you guess is more efficient?
The winner: BACK AND FORTH! By a long shot! We were surprised by how much faster it was to whip the cream back and forth. At the point the back and forth method was finished whipping, the circular bowl was still runny.
Here’s why, according to America’s Test Kitchen, whisking in a circular motion is not nearly as effective as side to side. This is because of something called “Shear Force”. Basically, as you are moving your whisk to one side of a bowl, the liquid is pushed along with it. Then when you rapidly change directions, the liquid crashes into itself and the whisk and causes more aeration to happen. If you stick to the circular motion, the liquid is only being forced in one direction, so making things like softly whipped cream or fluffy egg whites takes a lot longer!
#3 : Whipped Cream- Testing the Bowl Size

The next piece of the puzzle for whipped cream is the size of your bowl. It may seem like a minor issue, but it actually makes ALL the difference. Have you ever measured out your cream, poured it into a bowl only to realize the bowl has magically shrunk? Overfilling the bowl you are using is one of the first no-nos of making the perfect whipped cream.
We wanted to know if using a different-sized bowl would make a difference, so we threw 1/2 cup of cream into a small and large glass bowl. And we set out to whisking. It was a shocker how much faster the larger bowl finished whisking, and we know why. By giving your cream more room to move, you can add in WAY more air and much faster. So when in doubt, grab the big bowl to whisk!
Here are our takeaway messages when it comes time to whip some cream:
- Start with a balloon whisk – find a bulbous end with more tines.
- Whisk that cream back and forth, side to side- you want to force the cream to work against itself.
- Whatever size your bowl is, make sure it isn’t filled more than ¼ of the way full. This gives your whisk a fighting chance at getting the proper amount of air into the cream. The cream will double in size, so give yourself some space.
- Wanna go the extra mile? Take your time to chill the bowl you are using. The ideal temperature is around 45 degrees! Stick it in the freezer for a little while before you whip!
- Bigger is usually better, even when making a small amount of cream! By using a large whisk, a big bowl that has been chilled, and some fresh cream, you can forget the fatigue and whip up some fresh homemade cream in a jiffy!
So the next time you need some whipped cream, leave the Kitchen Aid alone, grab yourself a balloon whisk and a large bowl, and get whipping that cream back and forth. Get this simple task done the old-fashioned way!
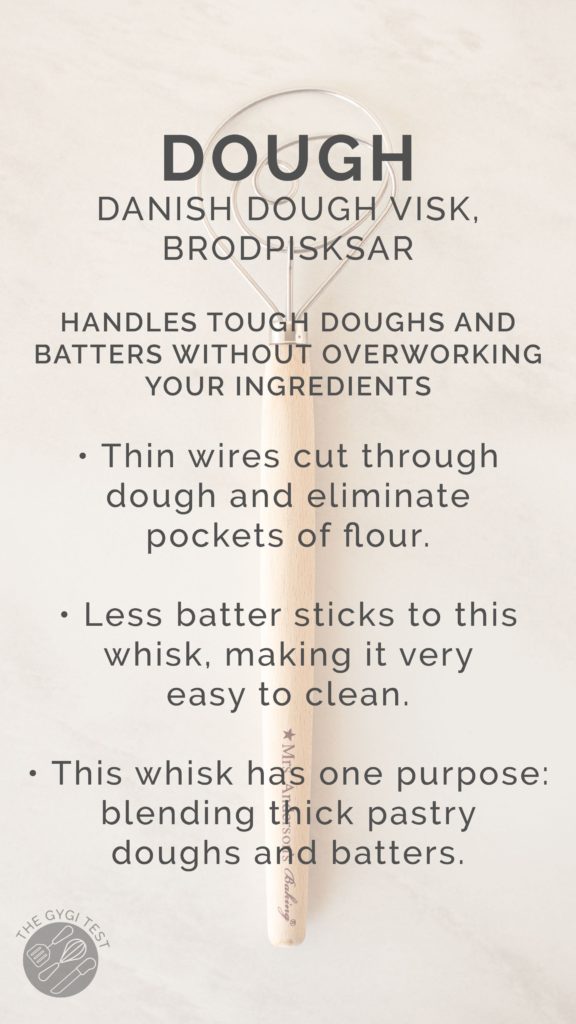
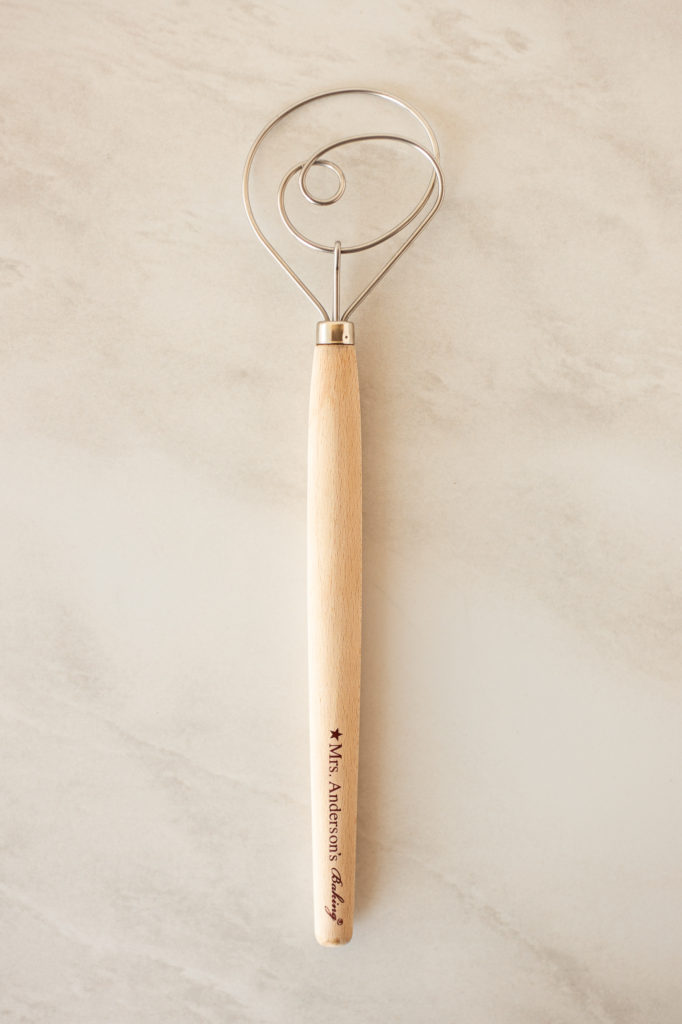
#4 : Whisks x Dough
What even is a dough whisk? Originally called the Danish Dough Whisk or Brodpisker, the dough whisk has three different sizes of circular coils, stacked one on top of the other to form a three-dimensional shape that glides through thin or thick batters and doughs with a surface area that one manufacturer claims are a mere 5% that of a wooden spoon. With fewer tines for the dough to stick to, easy cleaning is the name of the game!
We love using a dough whisk because overworking your dough is no longer a problem. You are able to work your cookie dough, bread dough, and pancake batters just enough to incorporate your ingredients but without causing too much gluten formation.
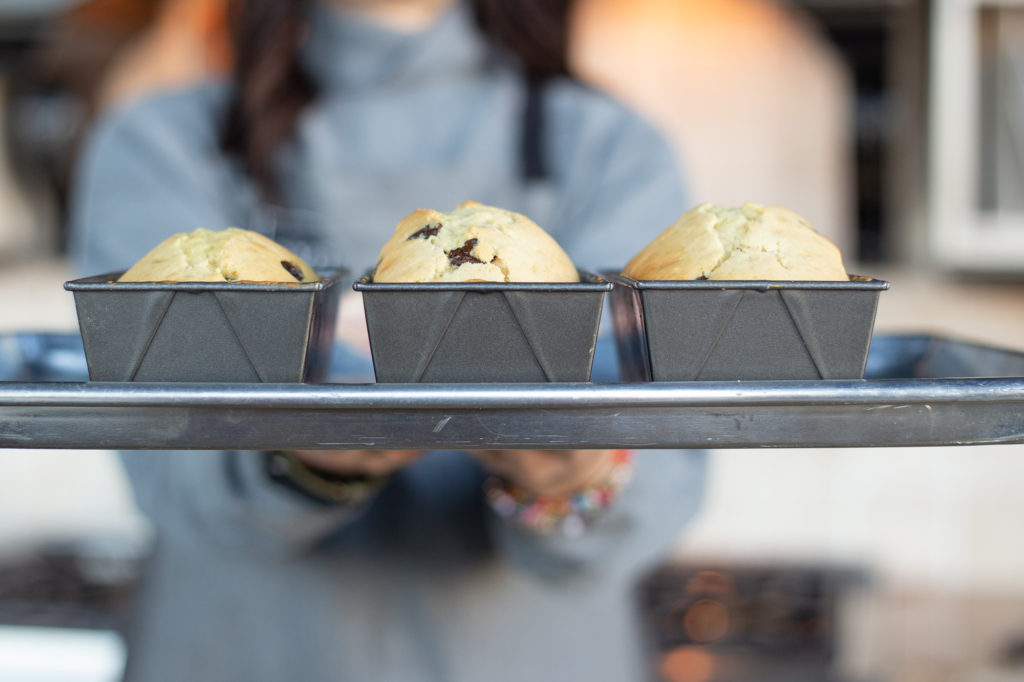
So what was there to test? We wanted to see how the dough whisks held up against a traditional wooden spoon, french whisk, and the dough whisk. We used the same batter- a quick bread. We added the ingredients in the same order and whisked them for the same amount of time, and we ended with three very different-looking batters. The wooden spoon was the runniest, the french whisk was still quite lumpy, with a lot of batters stuck in the tines, and the dough whisk was smooth and thick.
We threw the batter into some bread pans and baked them up to see how the batter would compare. This is where we noticed even more differences. The wooden spoon was denser, had fewer air bubbles, and had a thicker texture. The french whisk was more similar to the dough whisk, but the dough whisk had a higher rise. It also was much easier to clean!
So does the dough whisk deserve a spot in your kitchen? If you make a lot of bread, especially a thicker dough – we say yes! You save so much time and effort during the whisking, and you don’t have to clean out all those tines! If you have a french whisk in your drawers, it does the job, so no need to run out and grab yourself a new gadget if baking bread is a once in a blue moon kind of event.
We know many of you have purchased dough whisks and are raving over the ease and convenience of using this more custom gadget. We hope it has earned its space in your drawers.
#5: Whisks x Salad Dressing
Doing our Gygi Tests isn’t just about figuring out the best product we sell in our store. It is about helping you do things more efficiently in your kitchen! Who doesn’t love to save a little time or do things a bit better? This test is all about something of us do making a little salad dressing!
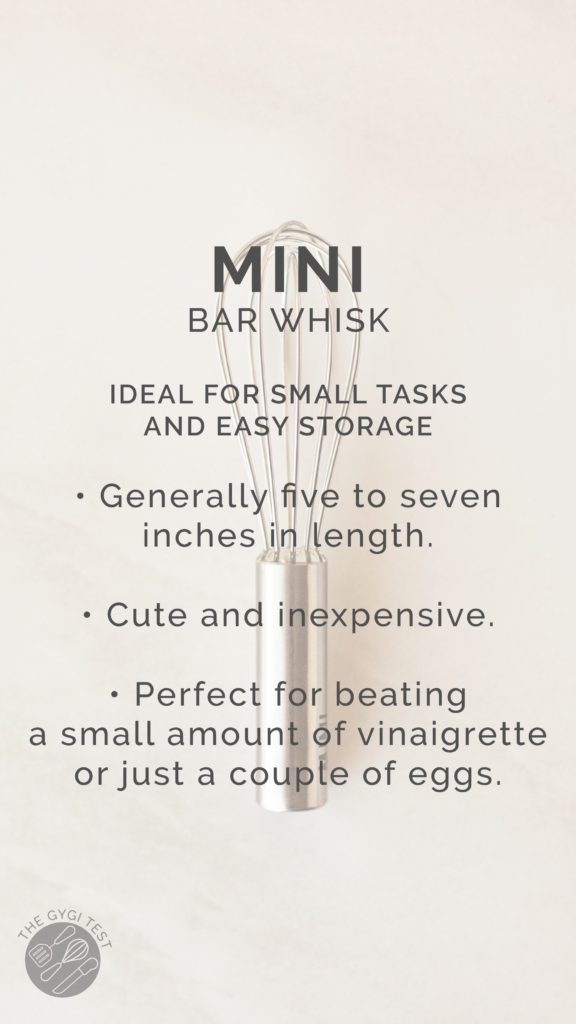
We added some simple dressing ingredients (lemon, mustard, oil, salt, and pepper) and put the whisks to the test. We used a mini whisk, a sauce whisk, and a balloon whisk! We were looking for a result that demonstrated a dressing that was fully emulsified – creamy, smooth, doesn’t separate easily.
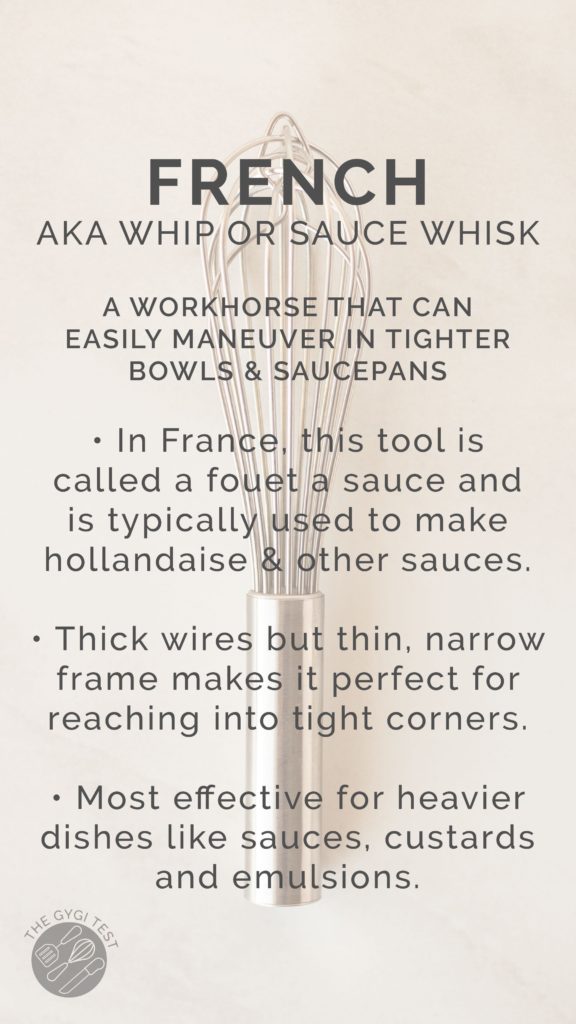
We tried a mini whisk, a flat sauce whisk, and the balloon whisk. And our personal winner was the mini whisk! Not only because it is so cute, but it really did a great job incorporating all the elements of the dressing- which are known to separate, it was easy to handle and made the least amount of mess. The traditional balloon whisk was just a little too big for the job, splashing out of the bowl. And the sauce whisk struggled to create the same smooth consistency, partially because it was challenging to get into the edges of the bowl, leaving some grainy texture.
Do you have a mini whisk yet? We totally think it deserves a spot in your kitchen!
#6: Whisks x Ganache
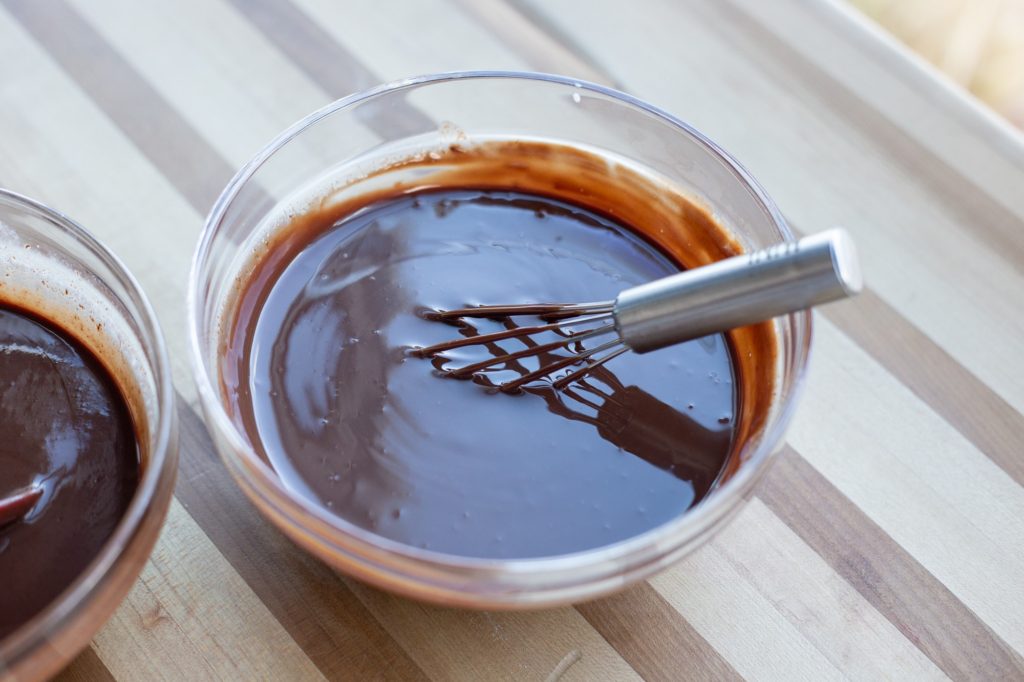
The last time you made a ganache, did you make it with a whisk or a spoon? Can’t remember? We want to help you the next time you are pondering that choice! This test breaks down the use of mini whisks when it comes to making a ganache. It’s a simple test that told us a lot!
For this test we put some chocolate into two bowls, we then heated some cream and poured it over the chocolate. We let it sit for about a minute and a half and then stirred it with a mini whisk and a spoon. Our goal was to see which method would create a smoother ganache in the least amount of time.
Typically it takes quite a bit of effort to make a ganache, you gotta put your elbow into it. But when we used the whisk, it was much faster and more effective than using the spoon. We were surprised at how quickly it had the ganache at a beautiful smooth brown color.
The spoon eventually got the job done, but for a really smooth ganache, we think you should give the whisk a try!
All this talk about whisks, really made us feel a special love for the whisks in our lives. Each one serves a special purpose, and when used for its intended purpose it can really make our time in the kitchen easier and more fun. Thanks for joining in on the whisk fun with us!

Shop WHISKS