Sourdough starter, unlike commercialized yeast (found in the grocery store in jars or packets), is a natural culture of yeast and bacteria used to leaven (make rise/grow) bread. It’s made of only two ingredients: flour and water. When we combine flour (which already contains naturally occurring yeast and bacteria) with water (the moisture needed for yeast & bacteria to thrive), something magical happens; the fermentation process begins.
When you show your starter a little love, a little patience, and a little fresh *food* every day, it will later reward you with beautiful, bold, flavorful bread. Let’s begin!
GLOSSARY OF TERMS
- STARTER: a mixture of flour and water, that with regular feedings, will ferment and develop into a sourdough culture.
- FEED: the action of giving your starter fresh flour and water (its food).
- DISCARD: the portion of your starter that is discarded/thrown away each time you feed it.
- RIPE: When your starter becomes strong and ready to use for baking, the term “ripe” starter refers to the point after feeding when your starter is no longer rising, almost to the point when it starts to fall and needs to be fed again, this is the best time to use it to bake with (don’t worry, we’ll explain)!
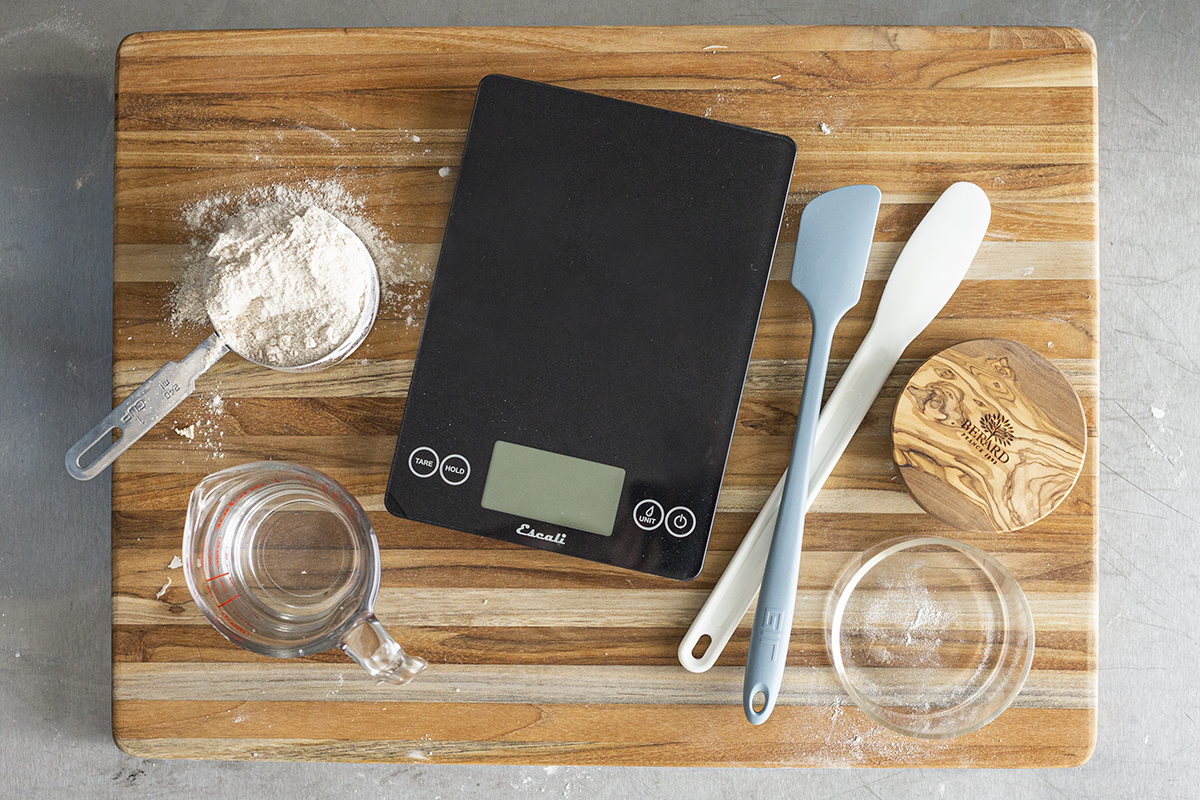
SUPPLIES YOU’LL NEED
- A FOOD SCALE: we are always going to suggest using a scale for accuracy. It will not only come in handy as you’re beginning a starter but with all of your baking from now on. We promise that if you don’t already have one, getting one and using it will change your baking game for the better!
- SOME FLOUR: the type of flour you use is completely up to you. Some chefs will swear by only using whole-wheat and others say only to use bread flour. These are both good options, but we’ve also seen great success with all-purpose. We mostly just encourage you to use a flour that’s unbleached, as bleach will hinder your starter from thriving. That said, make sure to stick with the flour you choose until your starter is well-established and can handle a change, so for at least the next two weeks, use the same flour every day and feed.
- SOME WATER: regular old tap water will work well. If your tap water is fine to drink, it is fine to use for your starter. There is some debate around this advice, too, because depending on where you live, there may be high levels of chlorine and chloramine in your tap water which could hinder the growth of your starter. If you’re worried, you canuse filtered water for your starter, but we’re going for simple here!
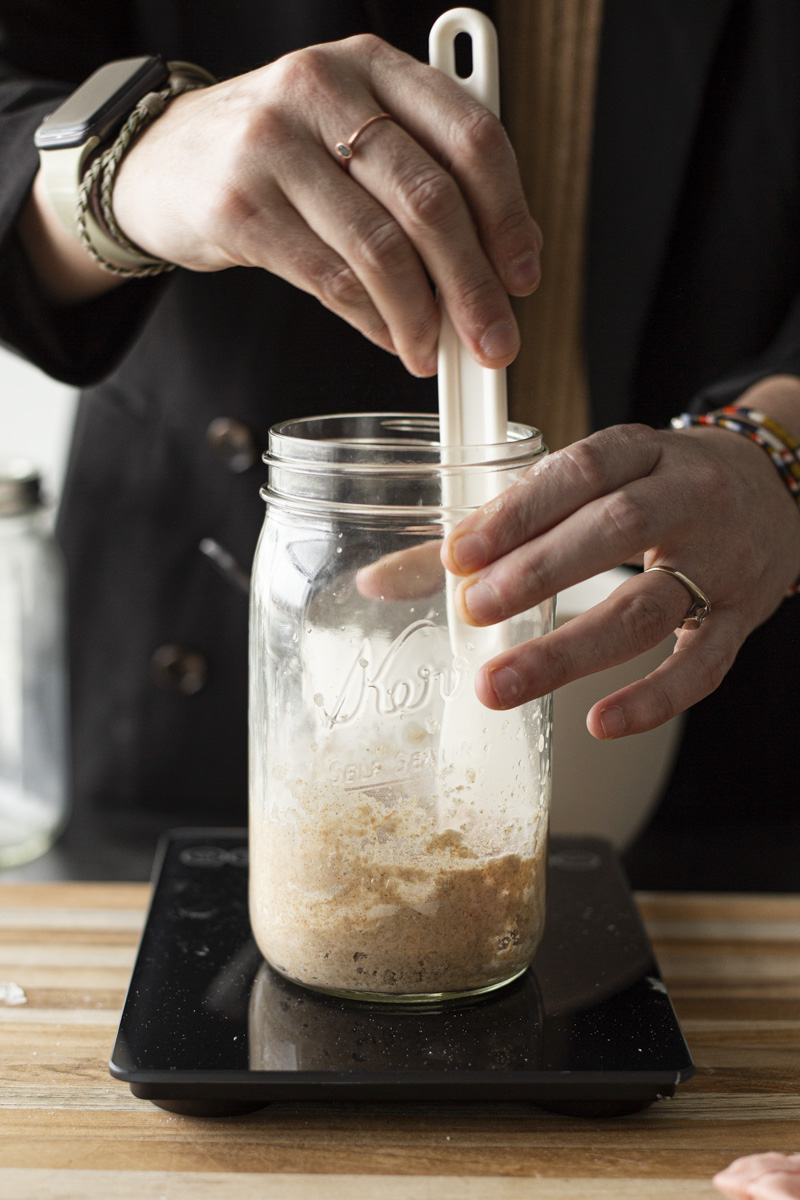
- SOMETHING TO STIR YOUR STARTER WITH: our favorite choices are a long-handled plastic spreader or the GIR skinny spatula. Either one helps scrape your container with ease after feeding your starter.
- A CLEAN CONTAINER OR TWO: when feeding your starter, we recommend transferring your starter to a clean container each day. However, that’s totally not required! You can keep using the same container every time. Just make sure to use something transparent or semitransparent so you can see the starter rise and fall. A regular mason jar or deli container will do the trick!
- CONTAINER COVER: a cover for your container can be almost anything. Set a plate on top, use a mason jar lid, cut up a floursack towel and secure with a rubber band.Whatever you choose, just make sure it is NOT airtight. Your starter needs to breathe and the gasses that form need a way to escape the container. So make sure your cover is loose or breathable.
ESTABLISHING YOUR STARTER
Before we can add our starter to our bread recipe and create a dough, the starter has to be established. This means that it has had enough time to ferment into a strong culture. There are a couple of important guidelines to remember:
- Make sure that whatever flour and water you choose to use on day one, you’re still using for every feed until your starter is established. Once established, it can handle a change in flour choice if you switch things up a bit, but only once it’s established.
- Don’t close your container airtight. Remember your starter needs to breathe and is developing carbon dioxide gasses that need a way to escape.
- Try to feed at the same time every day so bacterias have the same amount of time for growth after each feed. If you forget to feed, or feed a couple of hours early or late, it’s ok! Just keep going and try to stay as close to the 24 hour mark each time.
From the very first day, the first time you ever mix together the flour and water, it will take roughly 10-14 days for your starter to get established and strong. The simplest process we found is this schedule we’re following:
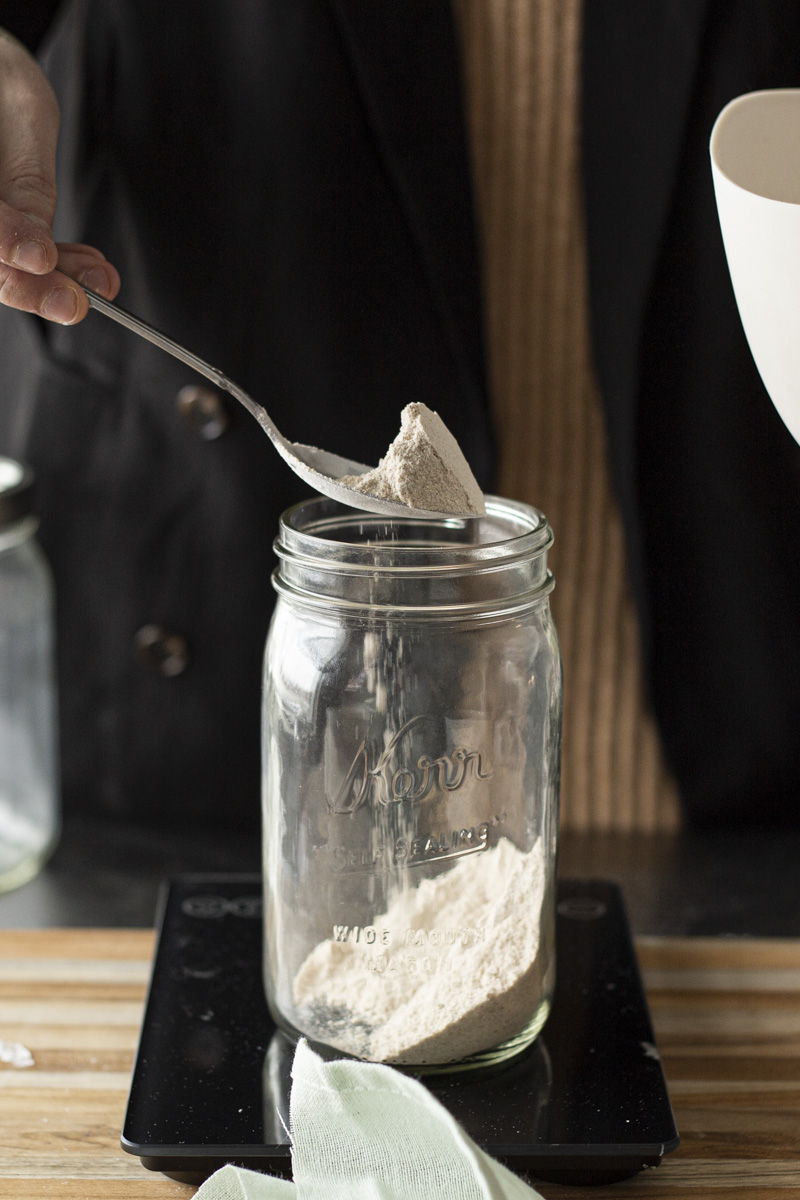
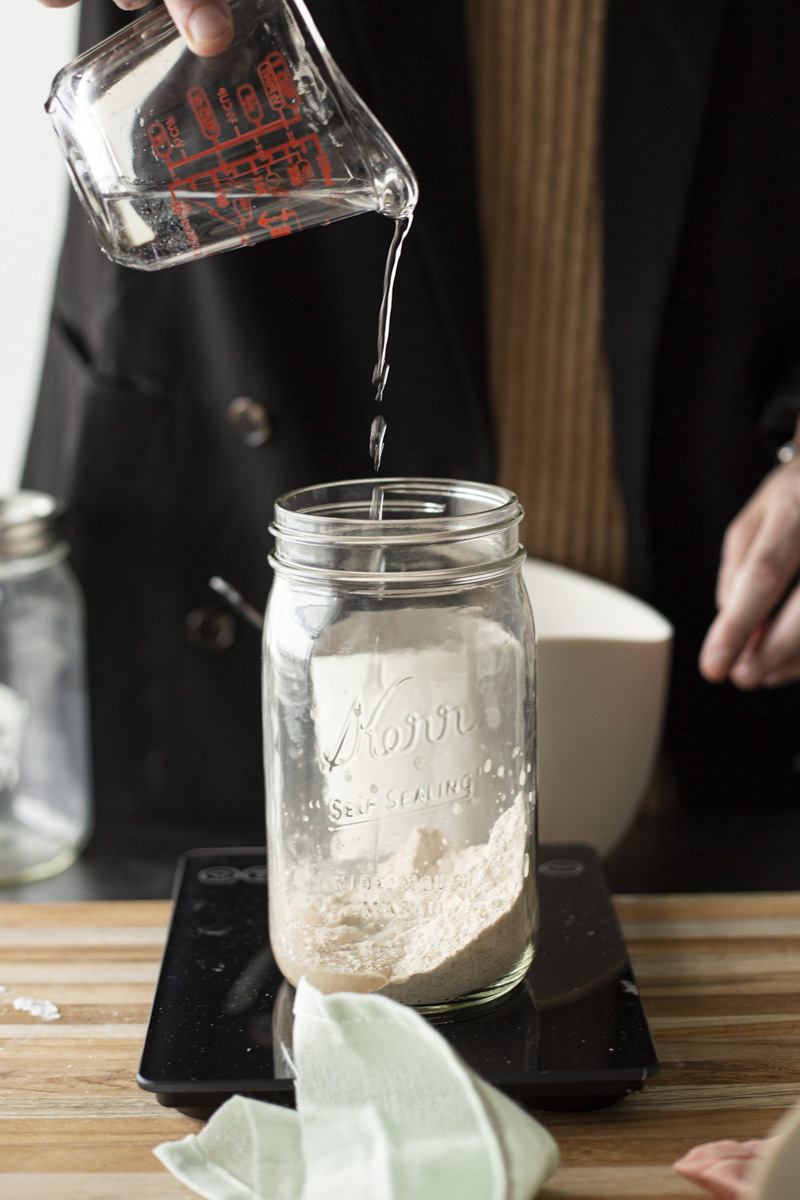
- DAY ONE: mix together equal parts flour and water in your container. You don’t need a ton. We are using 50 grams of flour with 50 grams of water. Then leave it alone for 24 hours. That’s it! You’ve begun!
- DAY TWO: we’ll begin using a ratio of 1:2:2 for each feed from now on. Meaning one part starter, two parts fresh water and two parts fresh flour. Using a clean container, add 50 grams of your mixture from day one, then discard the rest (put it in the trash can, do NOT put it down your sink drain). If you’re following along and used the same amounts we did on day one, keep 50 grams of your mixture (1 part), then feed 100 grams (2 parts) of fresh flour and 100 grams (2 parts) of water.
- DAYS THREE THROUGH TEN: this will take anywhere from seven to fourteen days to do. Keep repeating the process until the starter is ready to bake with (outlined below). Repeat the same process as day two: discard half your mixture, then feed the rest using the 1:2:2 ratio. Keep 50 grams of your mixture (1 part), then feed 100 grams (2 parts) of fresh flour and 100 grams (2 parts) of fresh water.
You’ll be getting to know your starter quite well during this time. You’ll notice it bubbling, rising, falling, repeating. Do not get discouraged if you don’t see any activity in the first few days! Just keep going. It will eventually get there, we promise.
HOW TO TELL WHEN YOUR STARTER IS READY TO USE
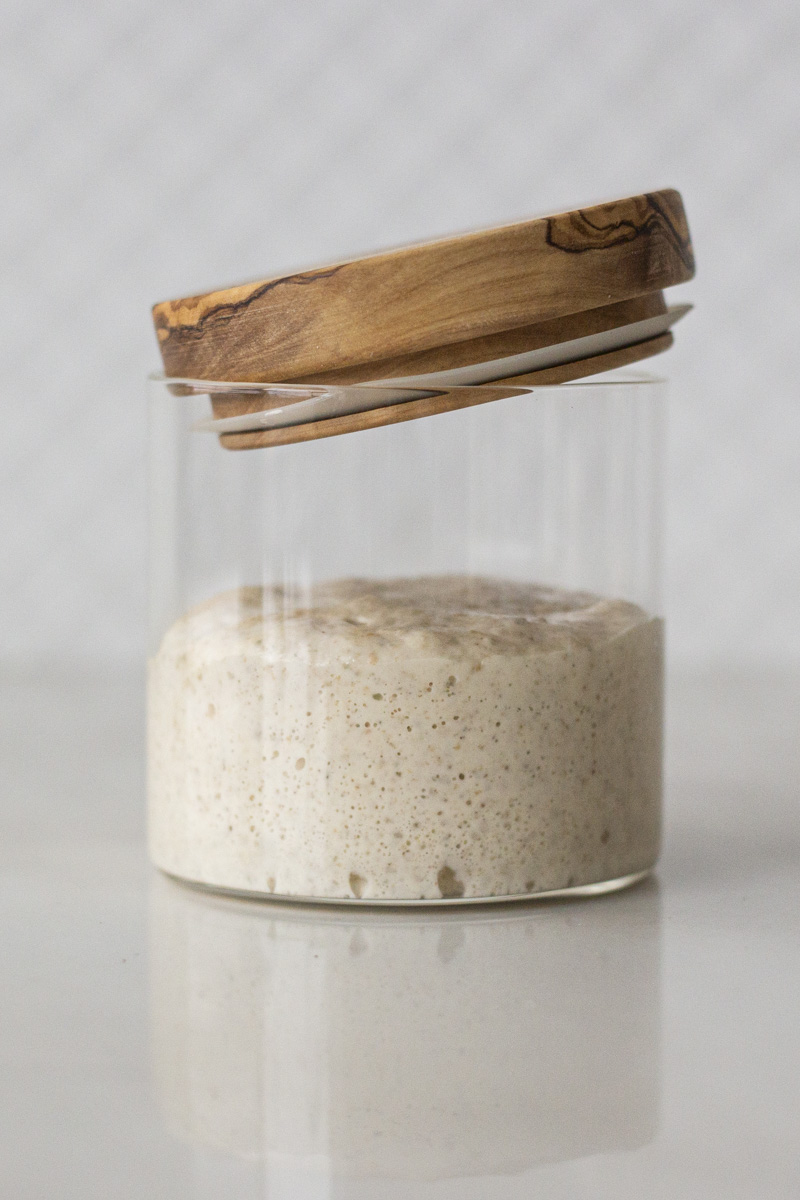
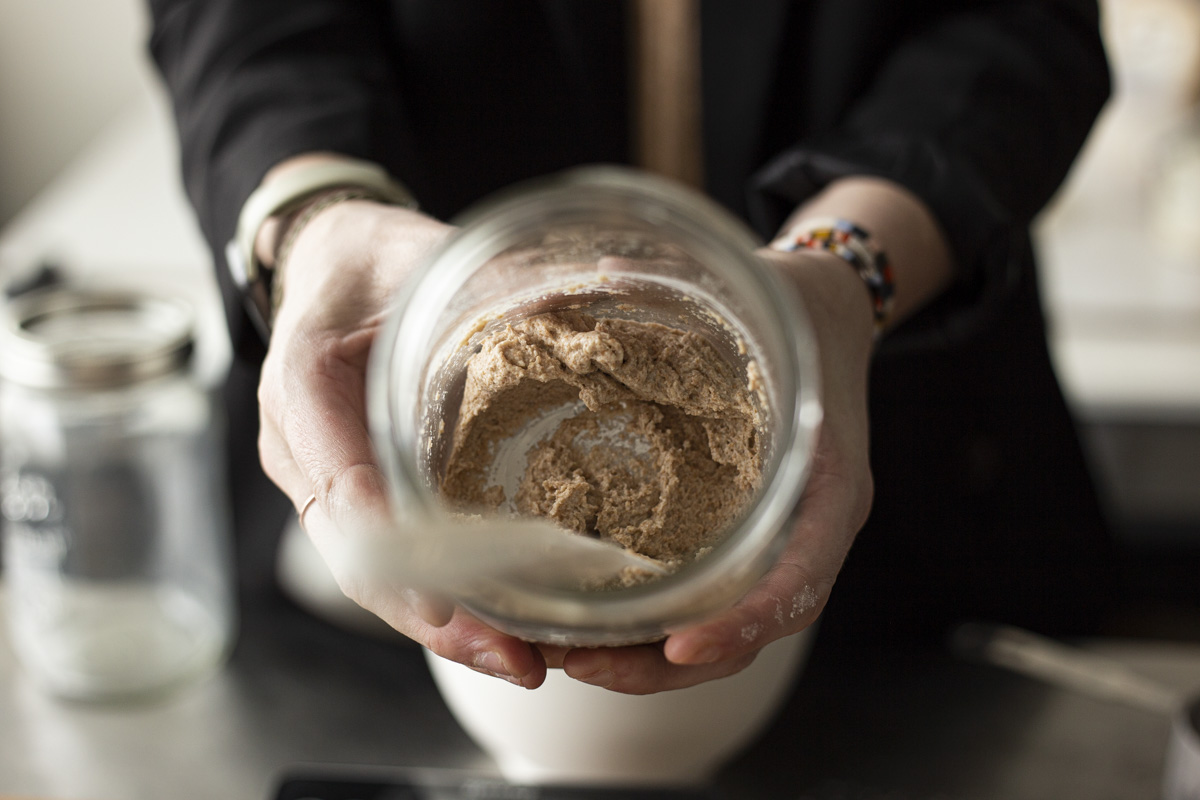
You’ll notice around days 7-10, your starter will begin to smell yeasty and slightly sweet. It will double in volume in the hours after you feed it and dome at the top, with a lot of visible bubbles. At this point, it’s time to test it! There are many ways to tell whether your starter is ready and they all have to do with these behaviors.
THE VOLUME TEST: The theory behind the volume test is that once your starter has doubled within 4 hours of feeding it, it’s ready to bake with. After feeding your starter, you can mark the jar where the starter is at its highest (with a dry erase marker or a rubber band) and watch how high it rises in the next four hours, before it domes at the top and then begins falling. This is the point when you’ll want to use it for baking– once it falls it will be too late.
Some starters will be shyer and take longer than the 4 hours, so if the starter is doubling in volume but taking longer, that’s just fine. Plan your baking around this process. For instance, if your starter is doubling in 4 hours, you can feed it early in the morning and be ready to add it to bread by late morning. If it takes 8 hours or so, you could feed it at bedtime and be ready to add it to bread by the following morning.
THE FLOAT TEST: A little less reliable than the volume test but simpler for beginners. Use a spoon to take just a small scoop-full of your starter and drop it into a bowl or glass measuring cup of water. If it floats, theoretically, your starter is established and ready to bake with! If it sinks, it might need a few more feedings before it’s ready.
Both of these tests are informative, but just like any other point of this process, it’s about getting to know YOUR starter. No two starters are alike this nuance is important to remember when testing. Sometimes the process to establish your starter can take a couple of weeks, and sometimes troubleshooting is in order. Don’t fret, just trust the process and keep going.
Once your starter is ready to bake with, you can begin playing with the ratios you use to feed it. Try a 1:3:3 or 1:5:5 ratio – your stater might perform better with one of these rather than the 1:2:2. You can continue to feed the starter once a day, move on to twice a day for a stronger starter, or even just keep it in your fridge between feedings every 7-10 days.
If you’ve been nurturing your starter for a couple of weeks and still not seeing much growth or activity, try a few of our troubleshooting steps to pinpoint what might be the problem.