A young sourdough starter only needs a few basic things to become active & thrive. So when you take the time to nourish yours for weeks without seeing any activity, it’s easy to become frustrated and want to throw it away or start over.
0ne thing that is so important to remember is that ALL sourdough starters are different. No two are exactly alike, just like no two homes are exactly alike. Don’t compare the progress of your starter with someone else’s.
That said, there are a few factors you can watch for and make adjustments to after you’ve been trying to establish a starter and it just doesn’t seem to be doing anything after several days.
Consider your ingredients. Grab your bag of flour and make sure you’re not nearing its expiration date, or consider how long the flour has been opened. Flour can and will go rancid and will not create a happy starter. Also, check on whether the flour is bleached or not. It’s not as common anymore to find bleached flour in a grocery store but it still exists and can sometimes be hard to spot. If your flour is bleached, either switch to unbleached immediately or start over with fresh, unbleached flour from the beginning.
Is your water filtered or straight from the tap? Tap water should, theoretically, be just fine for your starter if it’s fine to drink. However, if it’s too high in chlorine or chloramine, it will hinder the starter from thriving. Try using filtered or bottled water instead and see if it makes a difference. Don’t be afraid to switch things up to find a happy balance for your particular starter. If you find this change brings a surge in activity, the starter will likely be able to handle going back to tap water after a few more weeks when it’s more established.
Consider your temperature. A sourdough starter loves a warm environment, and if your kitchen stays around 65ºF, the starter may have a hard time getting going. An ideal temperature would be 75-80ºF, which can be challenging to find during the winter, but will be well worth the effort.
Stay consistent with your feedings until the starter is strong enough to bake with. Keeping a schedule isn’t as important later on as it is right now when your starter is young. Try feeding your starter around the same time (or times) each day.
Give it time and have patience. It’s completely normal to see a surge in activity within the first few days of starting a starter and then almost nothing for a few more days before it bounces back and becomes active again. The reason for this is the good bacteria that you want is competing with less desirable bacteria as it’s trying to stabilize. Keep feeding your starter on a consistent schedule and it will get going eventually.
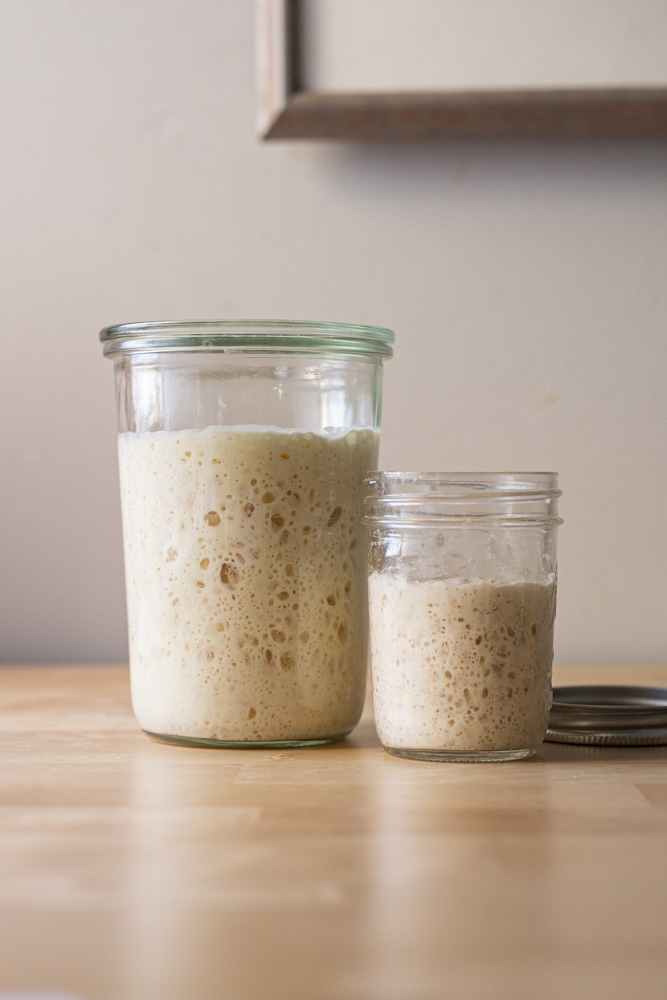
If the starter develops hooch (the liquidy substance that floats at the top or even middle of the starter), just dump it out and feed the starter underneath or stir it in and continue with feeding. The hooch won’t hurt anything, but it’s a sign the starter is hungry and if it’s happening regularly, you’ll want to increase your feeding schedule or the amount of food you’re giving it. A “crust” that forms on the top is also nothing to be concerned about, it can be scraped off and you’ll continue feeding the soft starter underneath. If this continues developing, consider another option for covering your container that’s still not airtight but more heavy-duty to prevent the surface from drying out.
While it’s much more difficult to kill a starter than keep it alive, there are a couple of surefire red flags that you should pay attention to. First, mold. Mold is a dead giveaway that your starter has been contaminated and must be thrown away. Yes, all of it. Mold is dangerous and shouldn’t be taken lightly. To prevent mold growth, monitor your temperatures so the starter isn’t getting too warm, keep the container away from fruit bowls or stored fruits & vegetables, and don’t neglect your starter for long; make sure you’re maintaining feedings. Second, pink or orange starter or streaks of color. These are signs the starter is overwhelmed with bad bacteria and, again, means it must be thrown away.
4 ways to help your starter grow
- ADD WHOLE GRAINS
Adding a whole grain flour to your starter made with AP or bread flour could give it a boost in fermentation. Whole grains will ferment more quickly than white flours. Try substituting 5-10% of your flour amount with Rye or Whole Wheat flour the next time you feed your starter. - CHANGE LOCATION
Try storing your starter in an oven with the light on, a microwave with the door closed, or in a smaller, typically warmer room in your house. Your starter LOVES being warm and added warmth could give it a jump-start in activity! - CHANGE SCHEDULE
If your starter is still being shy, try changing your feed schedule. If you typically feed in the morning, try feeding in the evening instead or increase your feedings to twice per day instead of once. - CHANGE RATIOS
One more thing that can help with growth is the ratios you feed your starter with. If you’ve been keeping a 1:2:2 ratio when feeding, tru a 1:3:3 or even a 1:5:5 ratio instead. You don’t need to start with 50 grams of starter each time, either. You could start with just 5 or 10 grams to gage some growth with new ratios.