If you make a turkey for a family feast, you want it to be the star of the show, but it can be so tricky to get it just right. And this is problematic when the bird takes over all the fridge space while brining and then all the oven space while baking for most of the day. The casseroles, rolls, sweet potatoes, and pies all have to wait in line. Nobody wants that! And by the time the meal is all cooked, you don’t have the time or energy to actually enjoy it. So we have a time-saving turkey trick for you – spatchcocking.
This approach has been used for chickens for a long time, but can also work for your turkey. If you think about it, a turkey is spherical in shape, like a giant meatball. And you can imagine that in order for the center to be fully cooked, the outer edge will be overcooked. But if you flatten the meatball, or in this case your turkey, the meat is more uniformly exposed to the heat allowing it to cook quickly and evenly. No more dry meat and overly cooked skin! And bonus! This technique can cut the average cook time by 75% while still presenting an attractive, tablescape-worthy turkey. We used poultry shears and a heavy duty cutting board. Once you are ready, just follow these three steps:
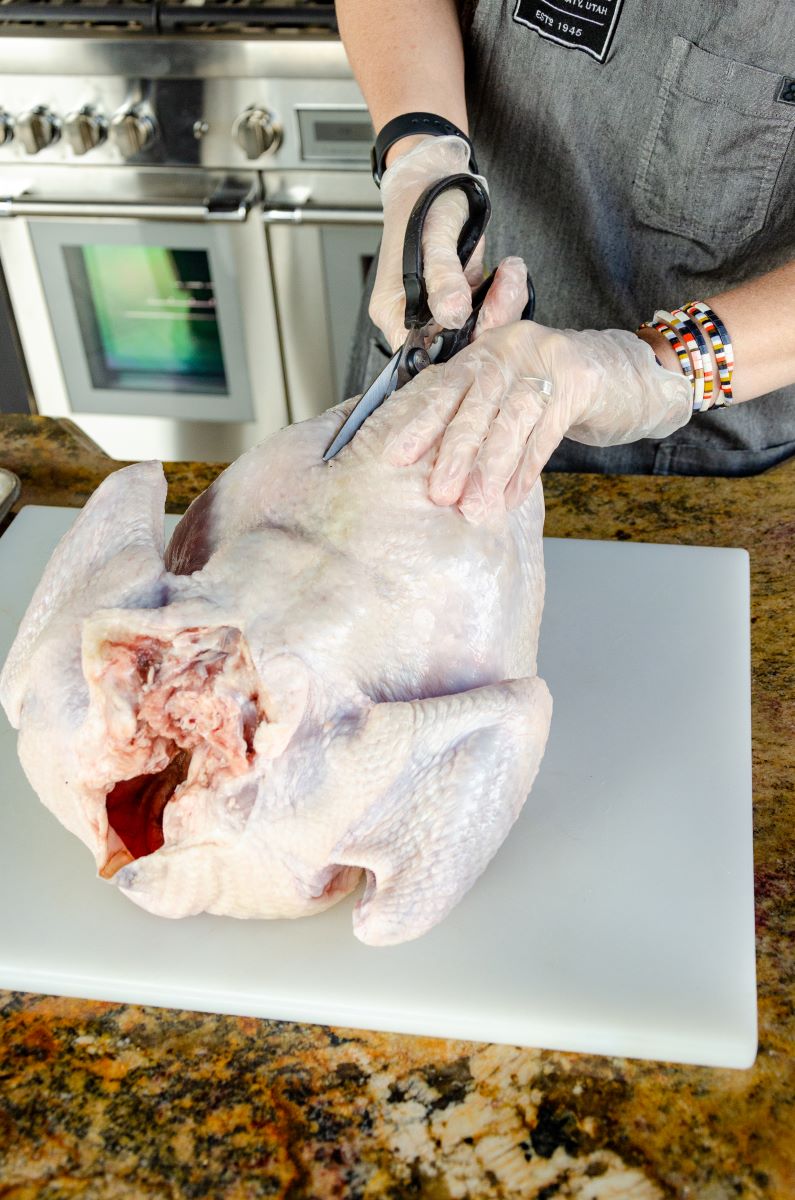
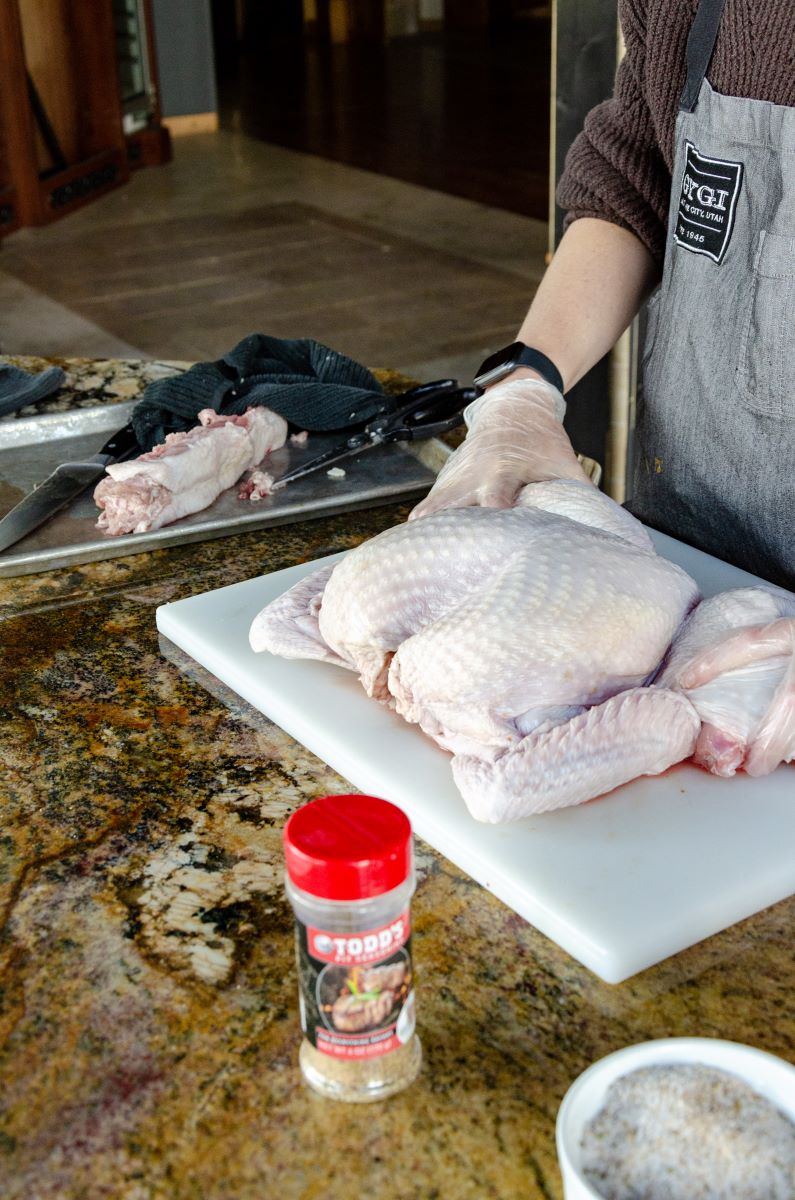
1. Remove the Spine
Pat the turkey dry with some paper towel and place it backbone side up on a stable cutting board. Using poultry shears, cut either side of the backbone to remove the spine. Start from the bottom and cut up toward the neck on both sides of the spine. If you get to a spot that isn’t working with the shears, use a knife to cut through and finish removing.
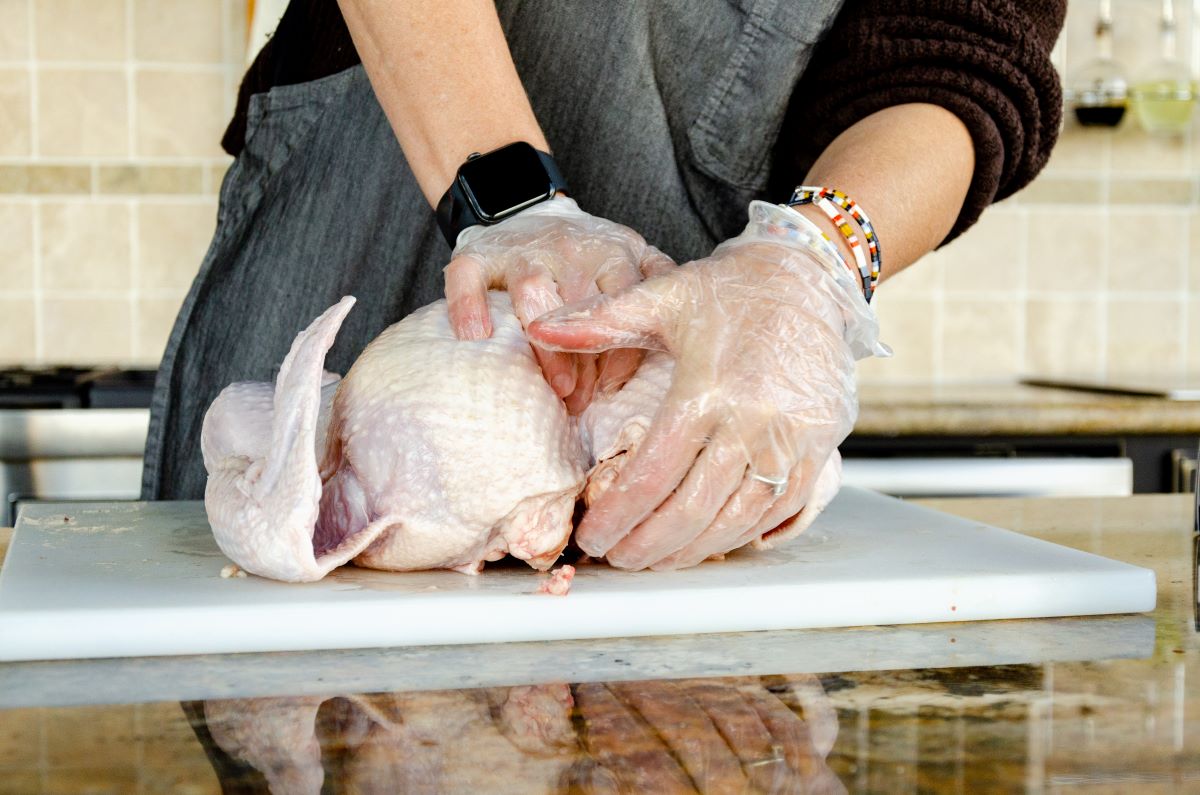
2. Flatten the Bird
Once you remove the backbone, use a knife to cut down the center of the breastbone or make one cut on either side. Flip the turkey breast side up on the cutting board and press down on the breastbone with your palms and flatten it (breaking the breastbone and the ribs too).
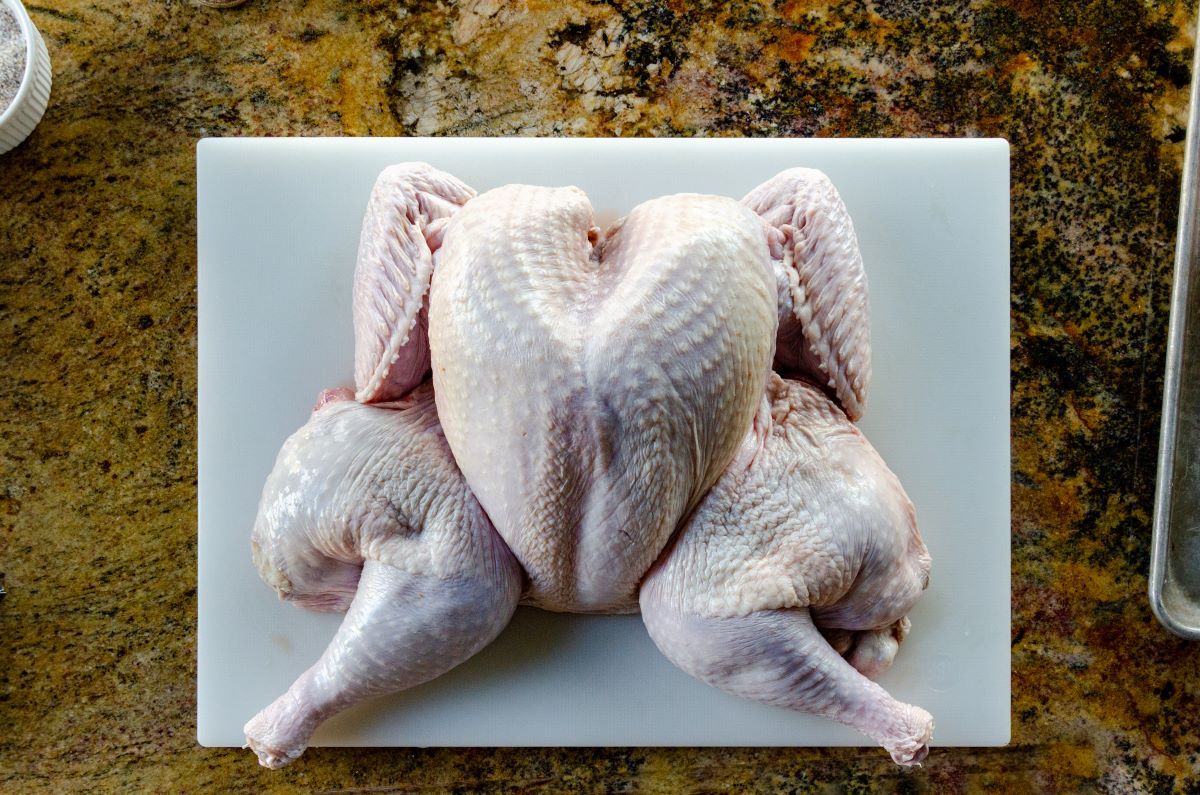
3. Arrange the Wings and Legs
Once you are done spatchcocking the turkey, place it breast side up in the roasting pan or on a sheet pan with a cooling rack. Tuck the wings under slightly. Then move the legs outward towards the side. Trim off any excess neck skin, top with a dry brine, and fill the rest of the roasting pan with carrots, onions, celery, etc. Now, the turkey is ready for the oven.
Not sure you are quite ready to cut out the backbone on a turkey and flatten the breastbone? We don’t blame you. Our first time spatchcocking a turkey was a little traumatic. Just ask your butcher to do it for you! They will know exactly what to do so you can get a more even bake on your holiday turkey this year.
Then, for traditional roasting, preheat the oven to 425℉ and roast for about 30 minutes, undisturbed. When the skin starts to brown, shield it with heavy-duty aluminum foil and finish cooking. Depending on the size of the bird, roasting a spatchcocked turkey could take as little as 45 minutes. To be sure your turkey is done you need to test the temperature to make sure the deepest parts of the turkey breast reaches 155℉ (that way you ensure a 165℉ carryover cook as you let the bird rest). You can use a leave-in thermometer or an instant-read thermometer to keep track. Once the turkey is done resting (about 15-20 minutes) then you are ready to carve and enjoy this beautiful bird along with all your favorite sides!
What do you think? Is this something you are ready to try this season? We are telling you, it is life-changing. Read this for some of the advantages of spatchcocking a turkey and see for yourself. Who knows, maybe it is time to break with some traditions and try something new.