When we’re searching for a sourdough bread recipe, whether something that can be made in one day or something that takes multiple days from start to finish, we come across many of the same *rules* for each one. Make sure to stretch & fold your dough to strengthen your gluten structure, use only ripe starter in bread baking, score your final dough to control oven spring, don’t overproof or underproof, only use an enameled Dutch oven to cook in… SO many factors that contribute to every detail in creating sourdough.
But what happens when the rules are broken? If you run out of time and need to halt the process, or forget about the dough until it’s way over-proofed, or think you don’t have the right equipment so you don’t try at all… the rules can be rigid. And while we believe there is a good reason for any rule, we wanted to find out what happens when we break those rules.
The Rules In Question
- Only use a ripe sourdough starter to bake with
During the hours after feeding a *hungry* starter, it becomes bubbly and grows in volume which indicates it is strong enough to leaven bread. Which means that a hungry starter, in theory, is not strong enough to rise bread and this is why we discard the extra. To break this rule, we mixed our dough ingredients with a starter that hadn’t been fed for two days. It was runny, flat, had no visible bubbles and smelled sour. - Don’t under-proof your dough
If a dough doesn’t have enough time to finish proving, less air bubbles will be created and a dense, underbaked texture will result. To break this rule, we shaped and baked the dough after a very short amount of time, when some rise had been achieved but not enough to be finished proving. - Don’t over-proof your dough
Once the gluten proteins have finished rising, they essentially have no more food (in the dough) to eat, so it begins to deflate and will fail to continue rising when baked. To break this rule, we proved the dough until it had well surpassed its rise and started deflating. - Perform stretch & folds at the beginning of bulk ferment/first rise
Performing stretch & folds will create a stronger gluten structure and sturdy bread. To break this rule, we skipped all kneading/stretching & folding, and just skipped right to the bulk ferment. - Score your dough before baking
Scoring your dough allows control the release of steam, resulting in an ideal oven spring and pretty bread. - Bake your bread in an enameled Dutch oven
By design, an enameled Dutch oven can be used at very high temperatures while keeping what’s inside very well insulated, resulting in an evenly baked end product.
The Test (part one)
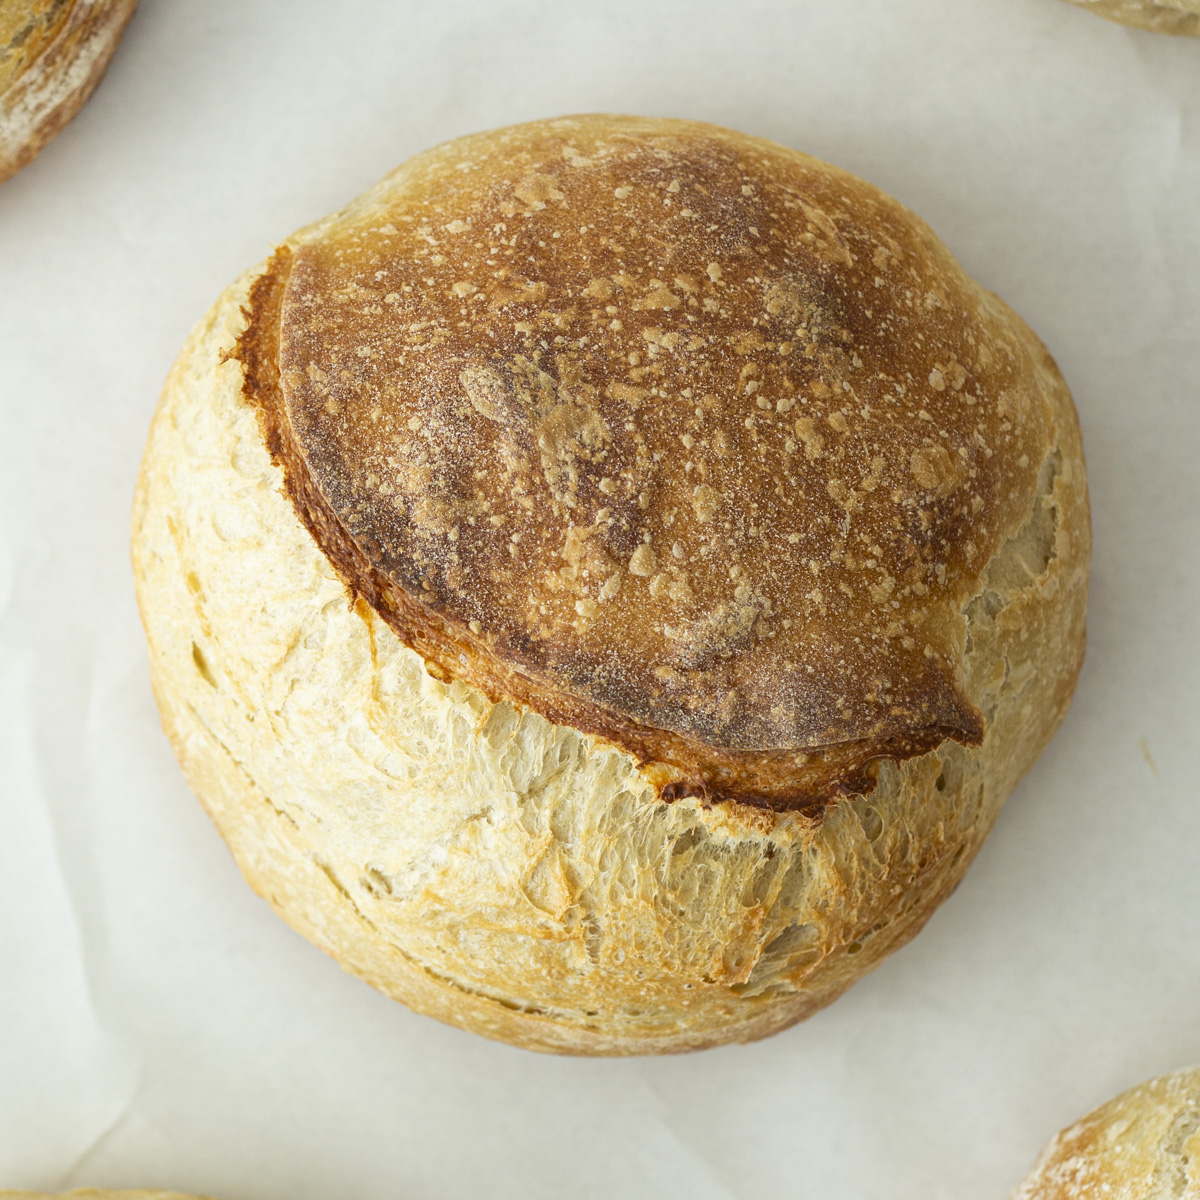


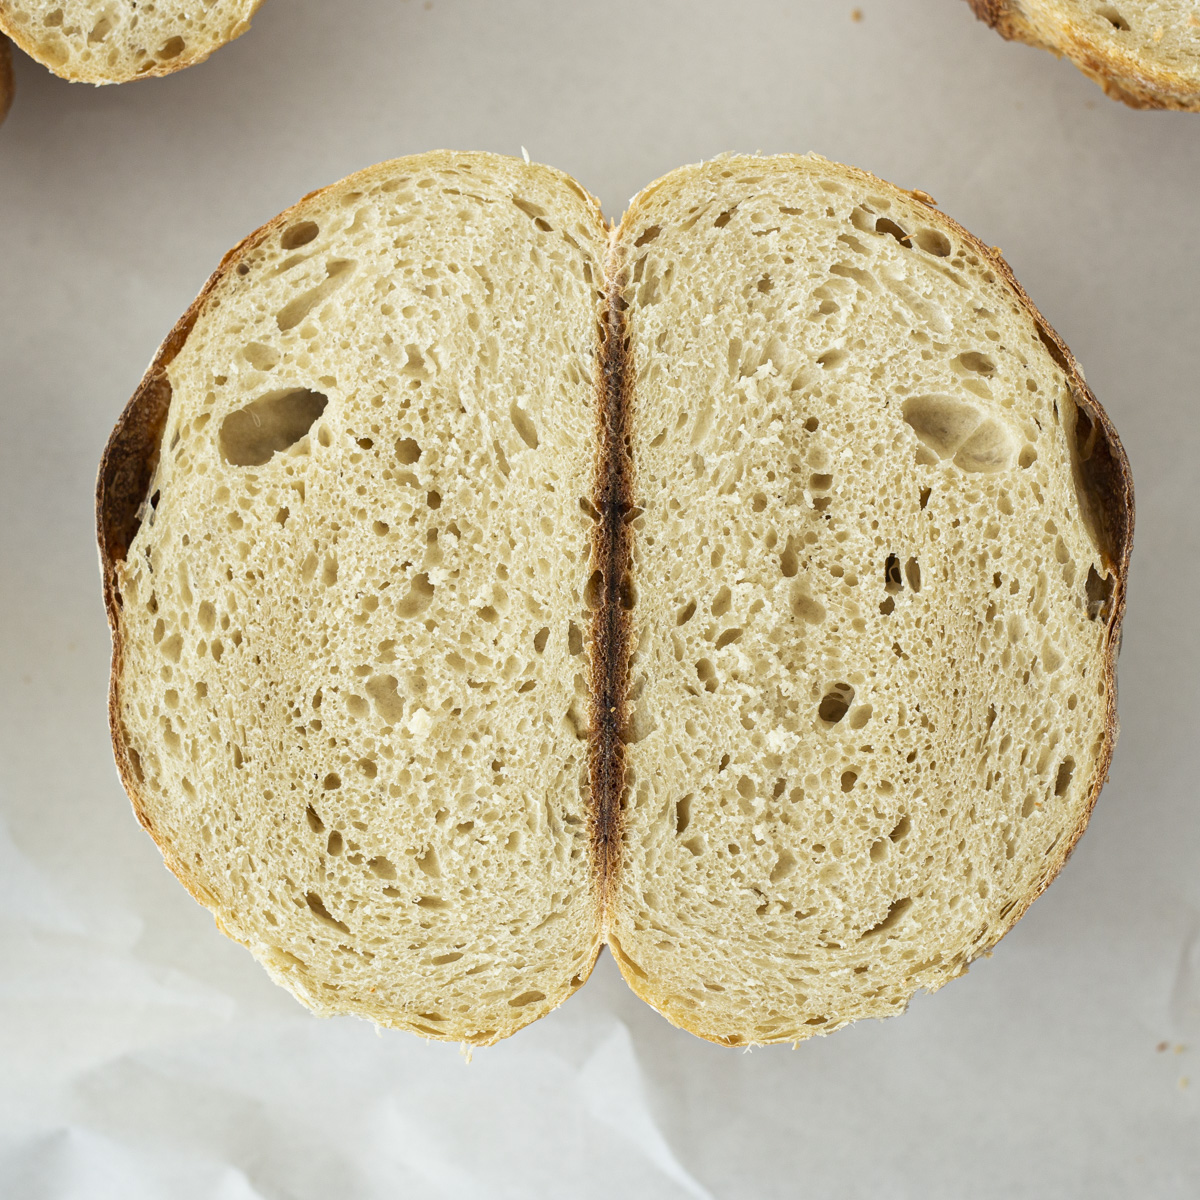
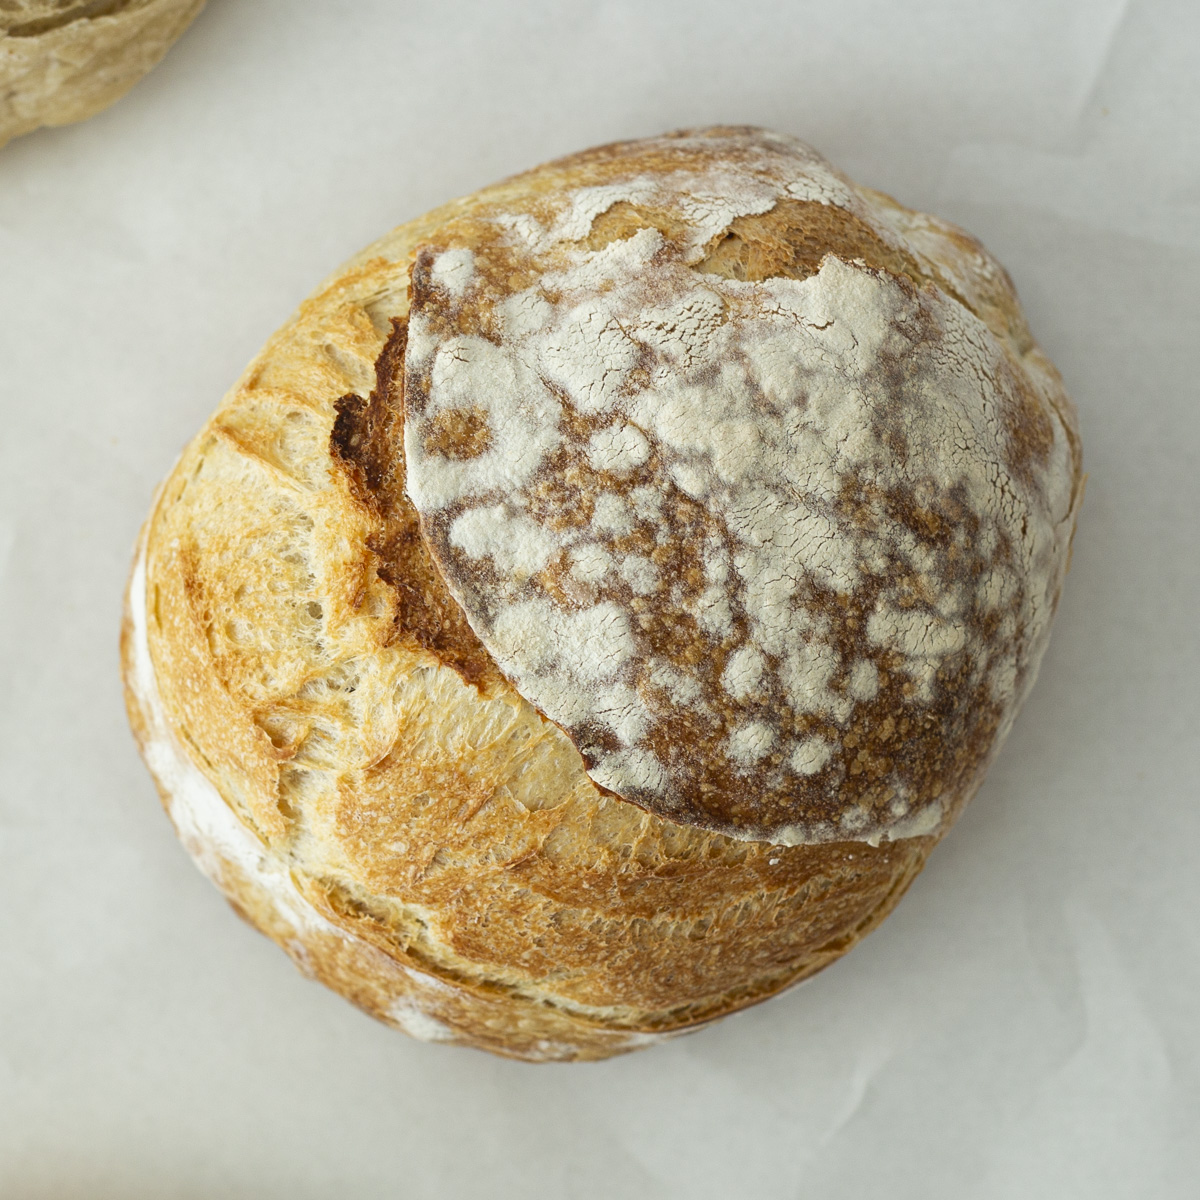
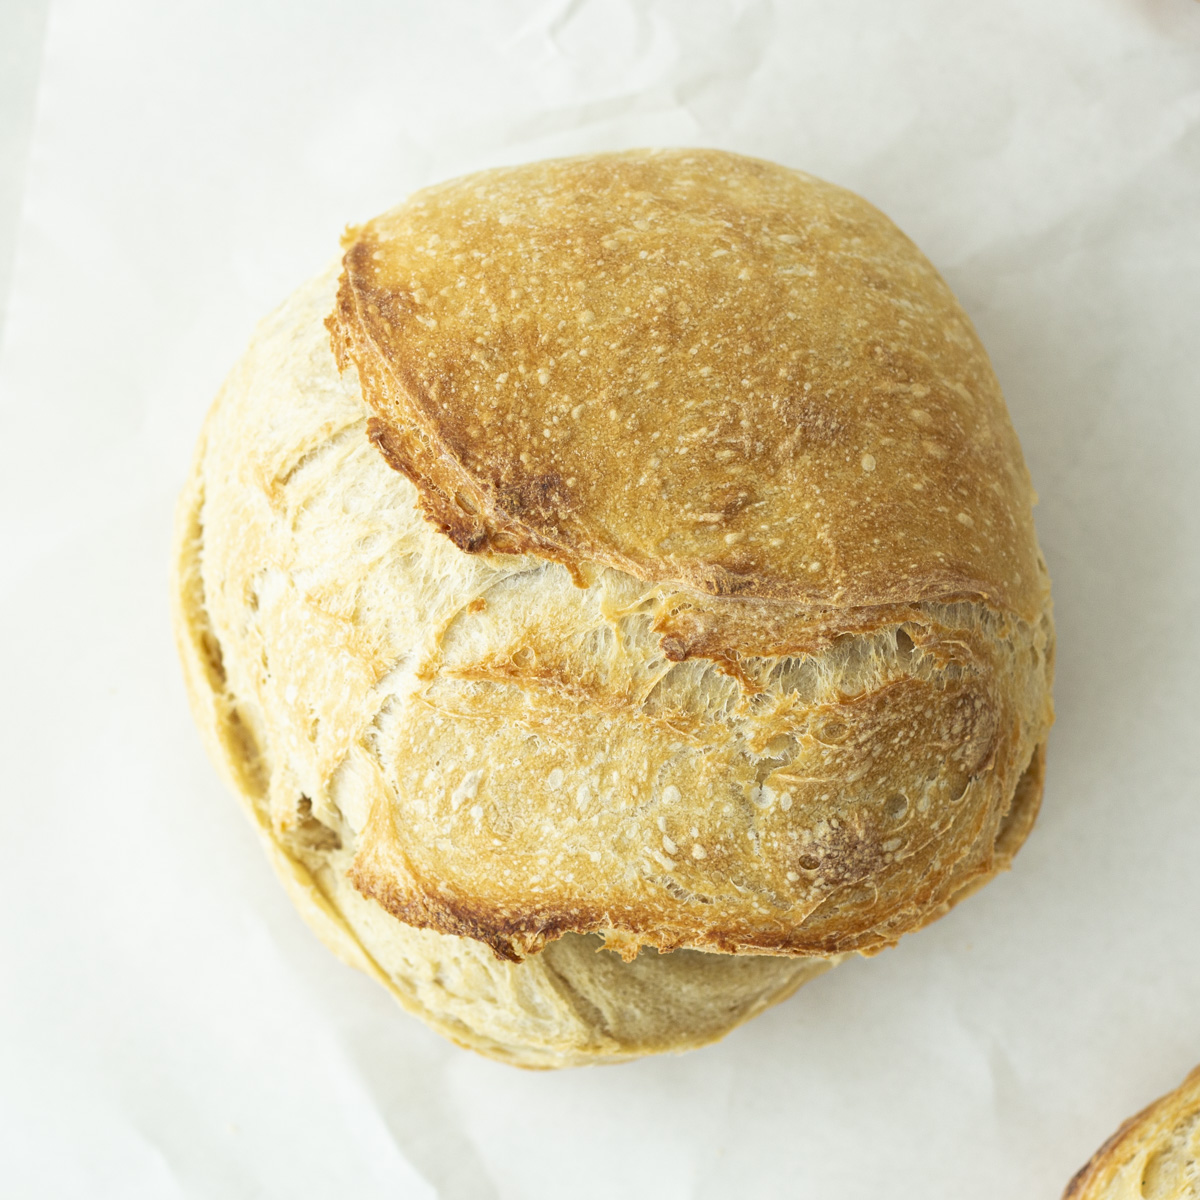
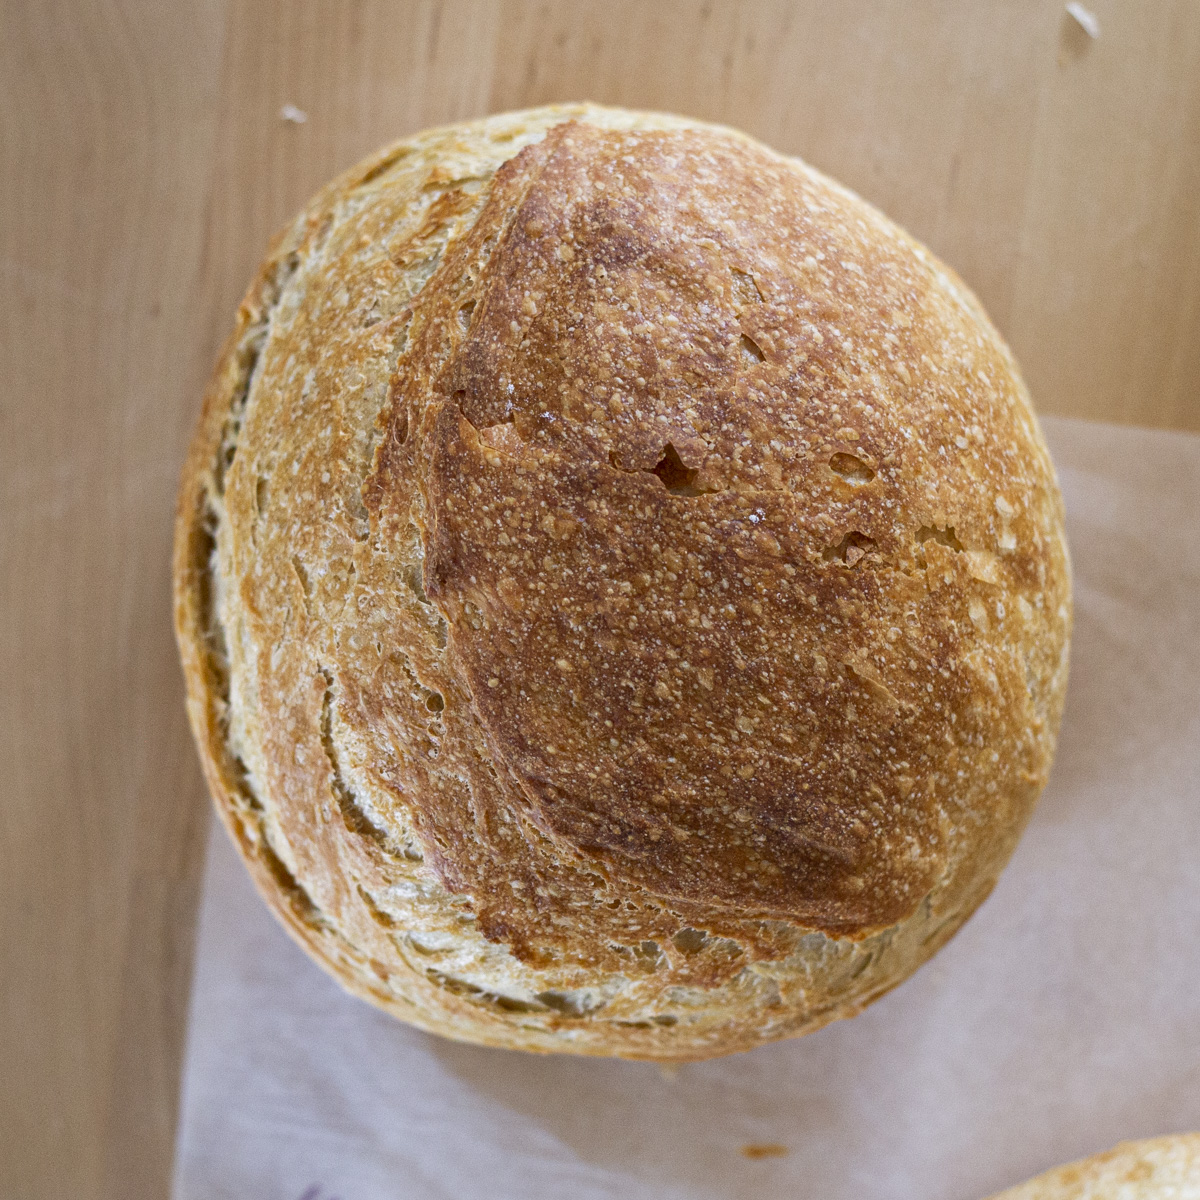
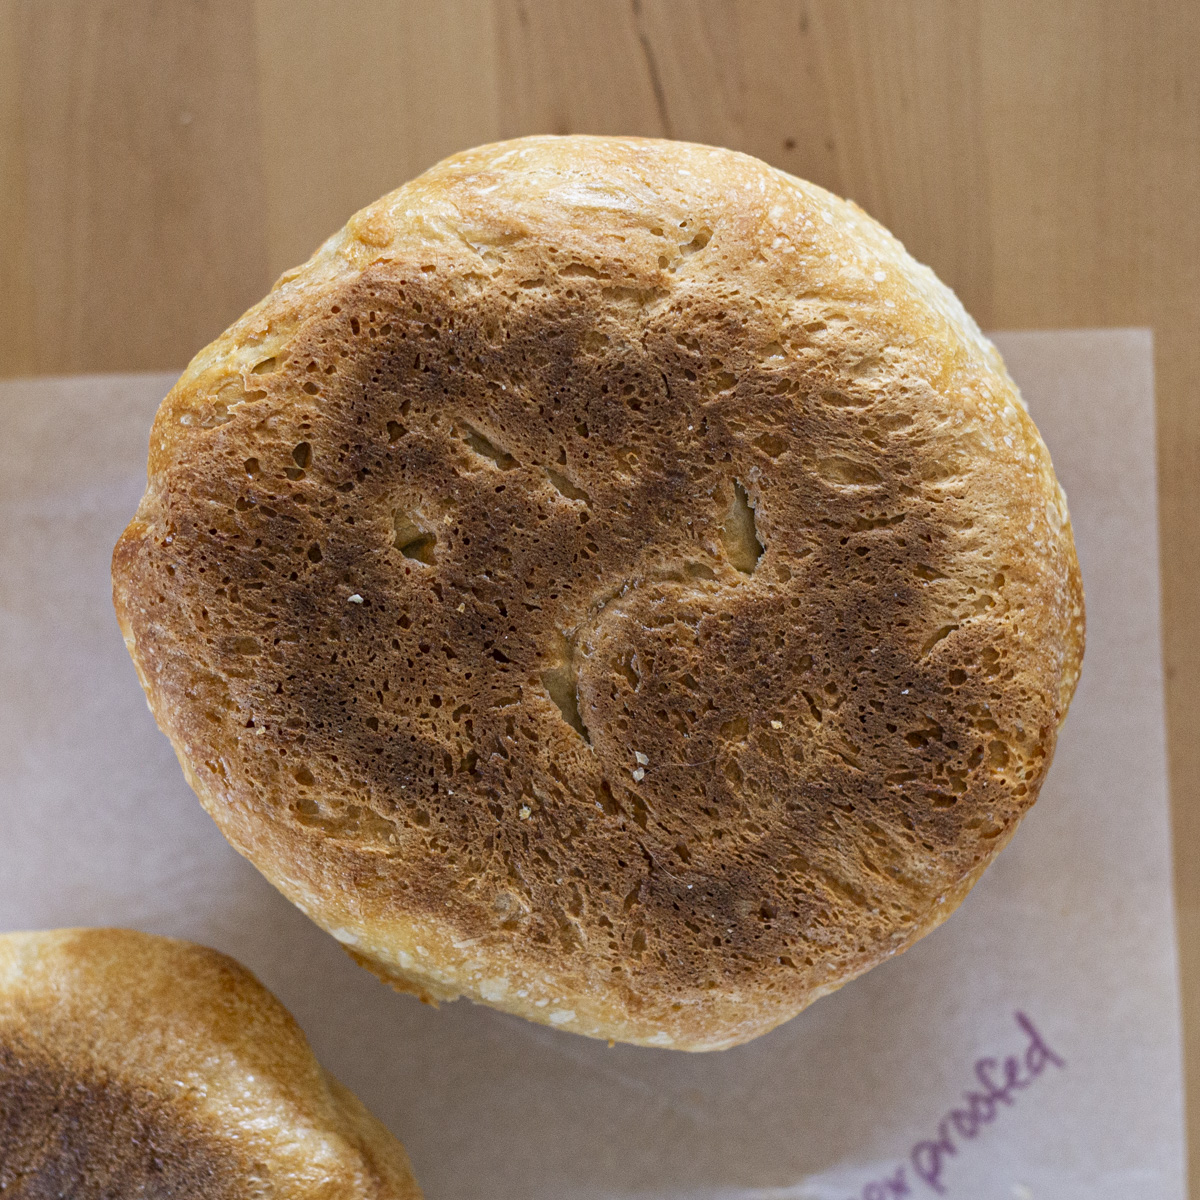
FIRST: The control loaf. The bread that followed all the rules. It was made with a ripe starter, stretch & folds were done four times, each 10 minutes apart, proofed for the perfect amount of time, scored before baked, and baked in an enameled dutch oven. This is the loaf we’d be comparing each of the others to. We were surprised by the crumb being uneven, but assume our score maybe wasn’t deep enough to allow a better spring. The texture was fluffy and chewy, and the flavor was wonderful.
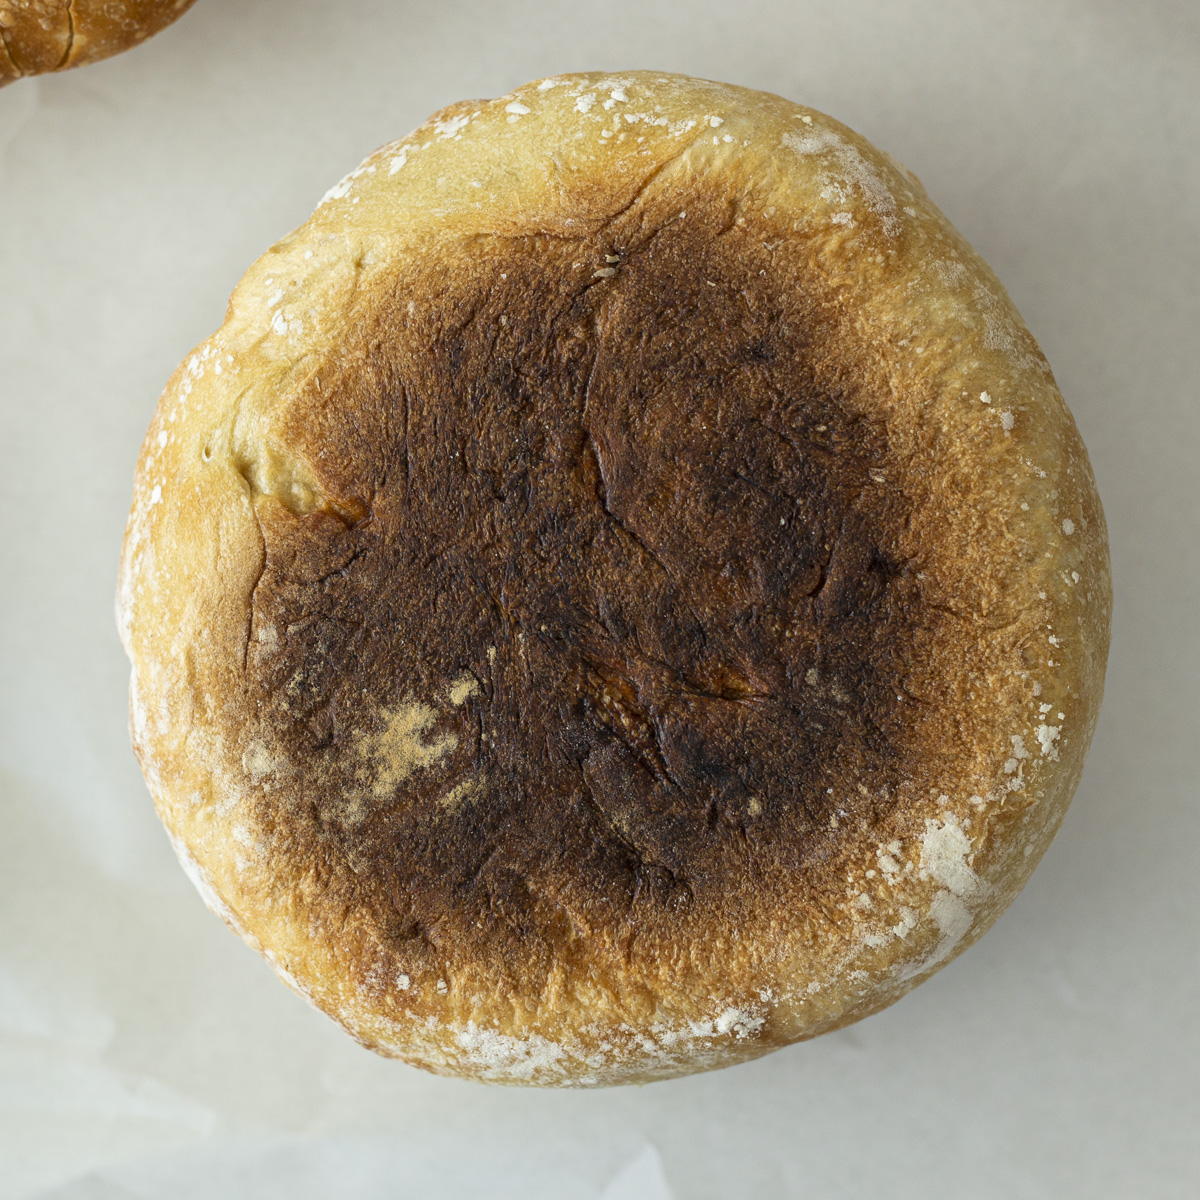
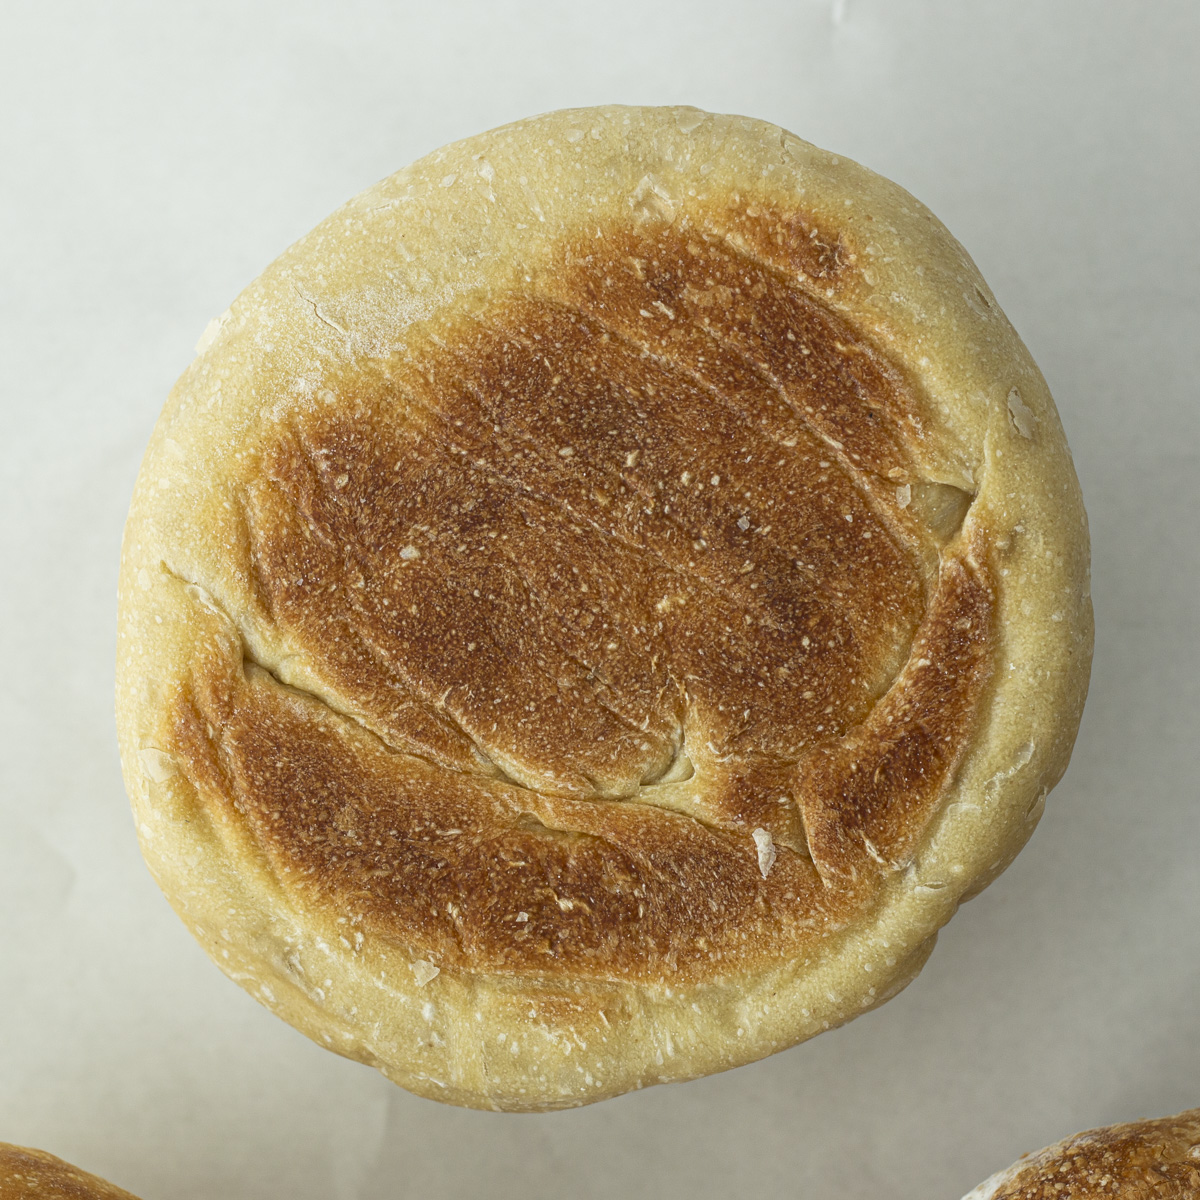
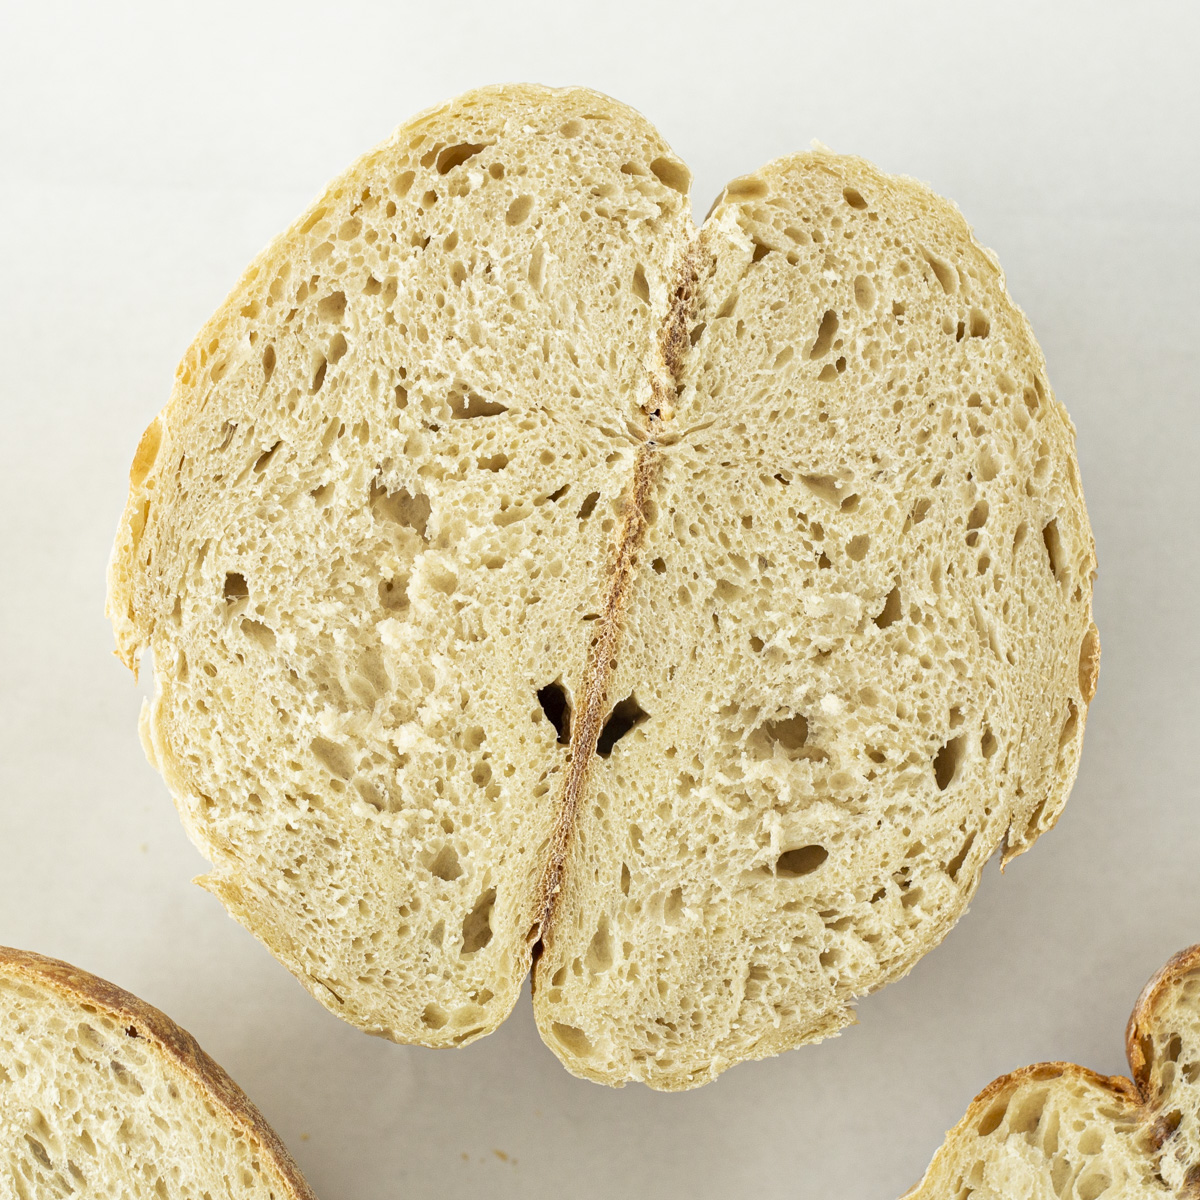
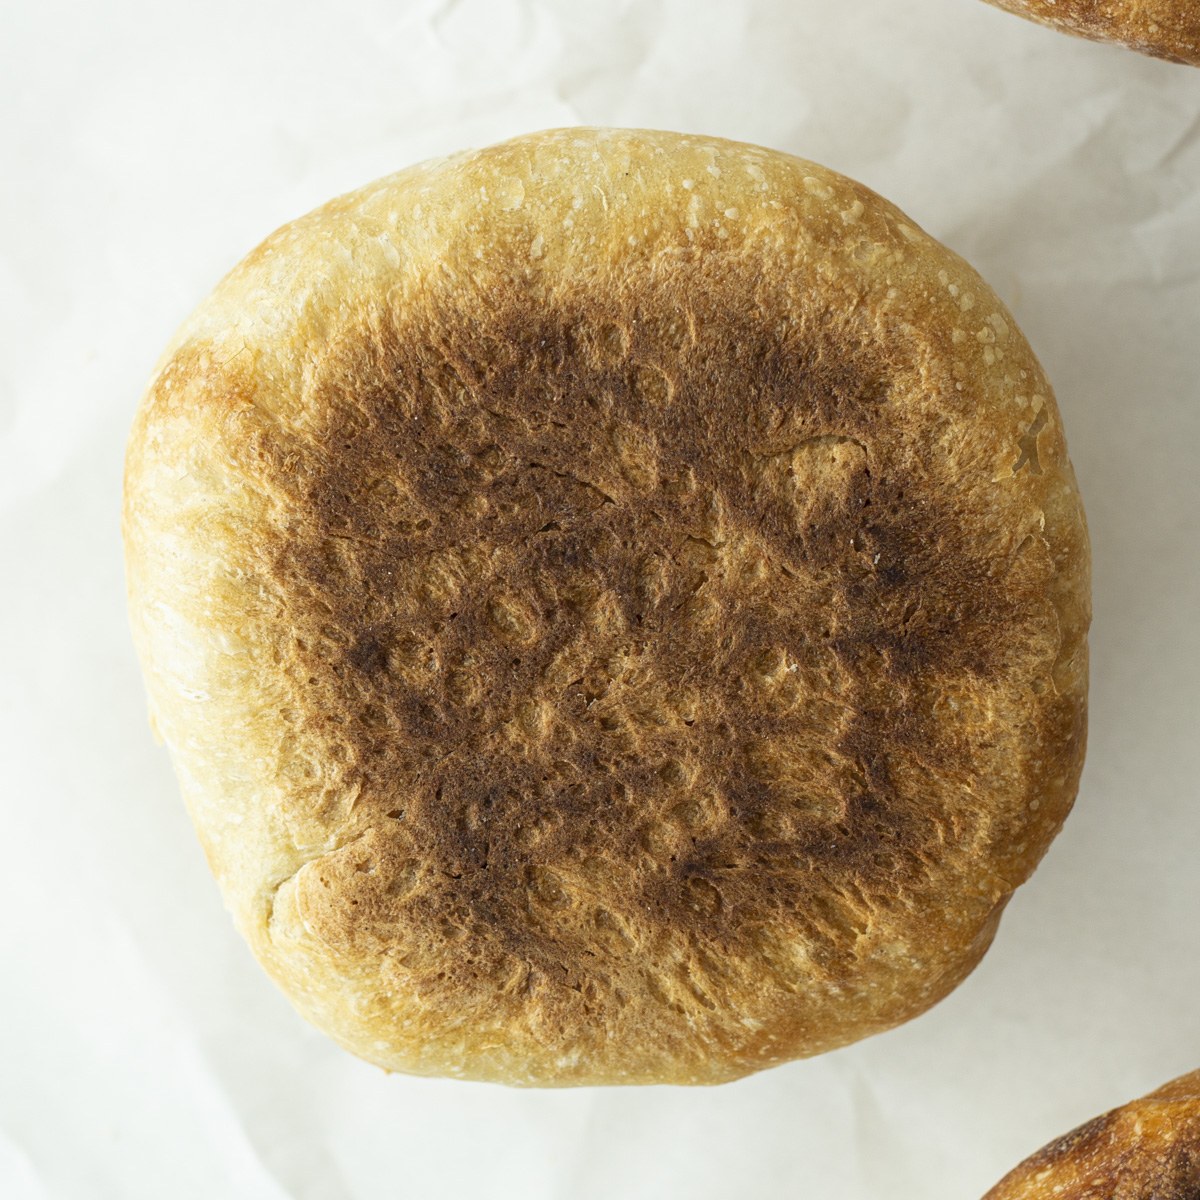
SECOND: The no-score loaf. Scoring your dough before baking allows for control over where the steam will release during oven spring. In this case, we didn’t add a score line manually, so the dough split open on its own. It was actually beautiful with the natural score, like an artisan rustic bread. The crumb structure was tight but fluffy, and we can see areas of the crumb that would have been more open had it had the chance with a manual score before baking. Because the oven is so hot and the crust bakes so quickly, the oven spring is the one big chance that sourdough has to rise during baking. Because we didn’t score the dough, the exterior stopped the interior from opening up more during the spring.
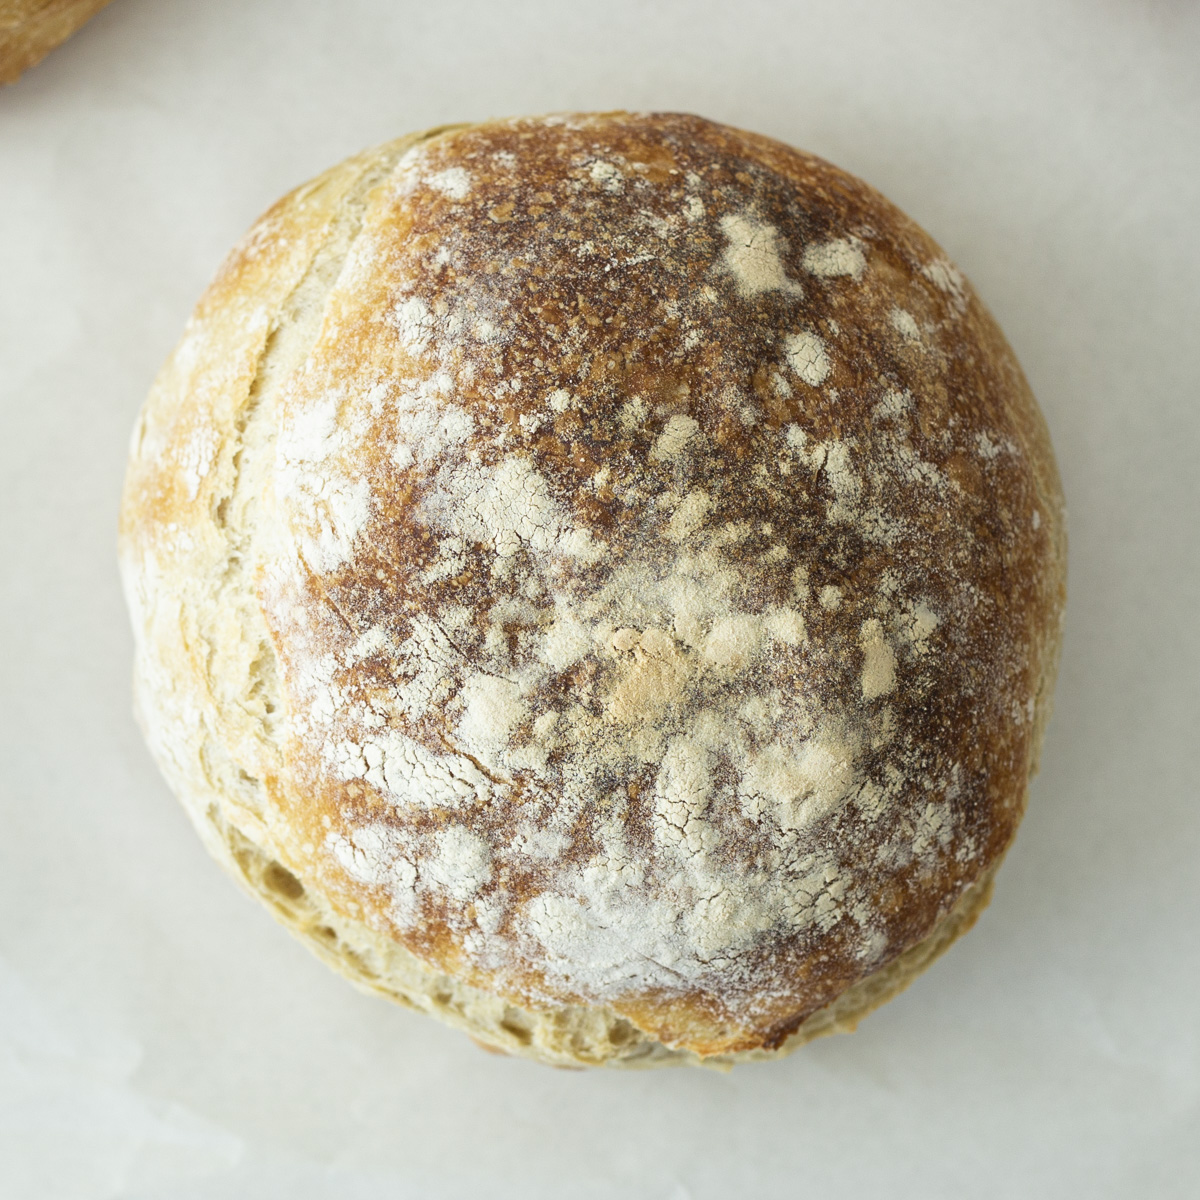
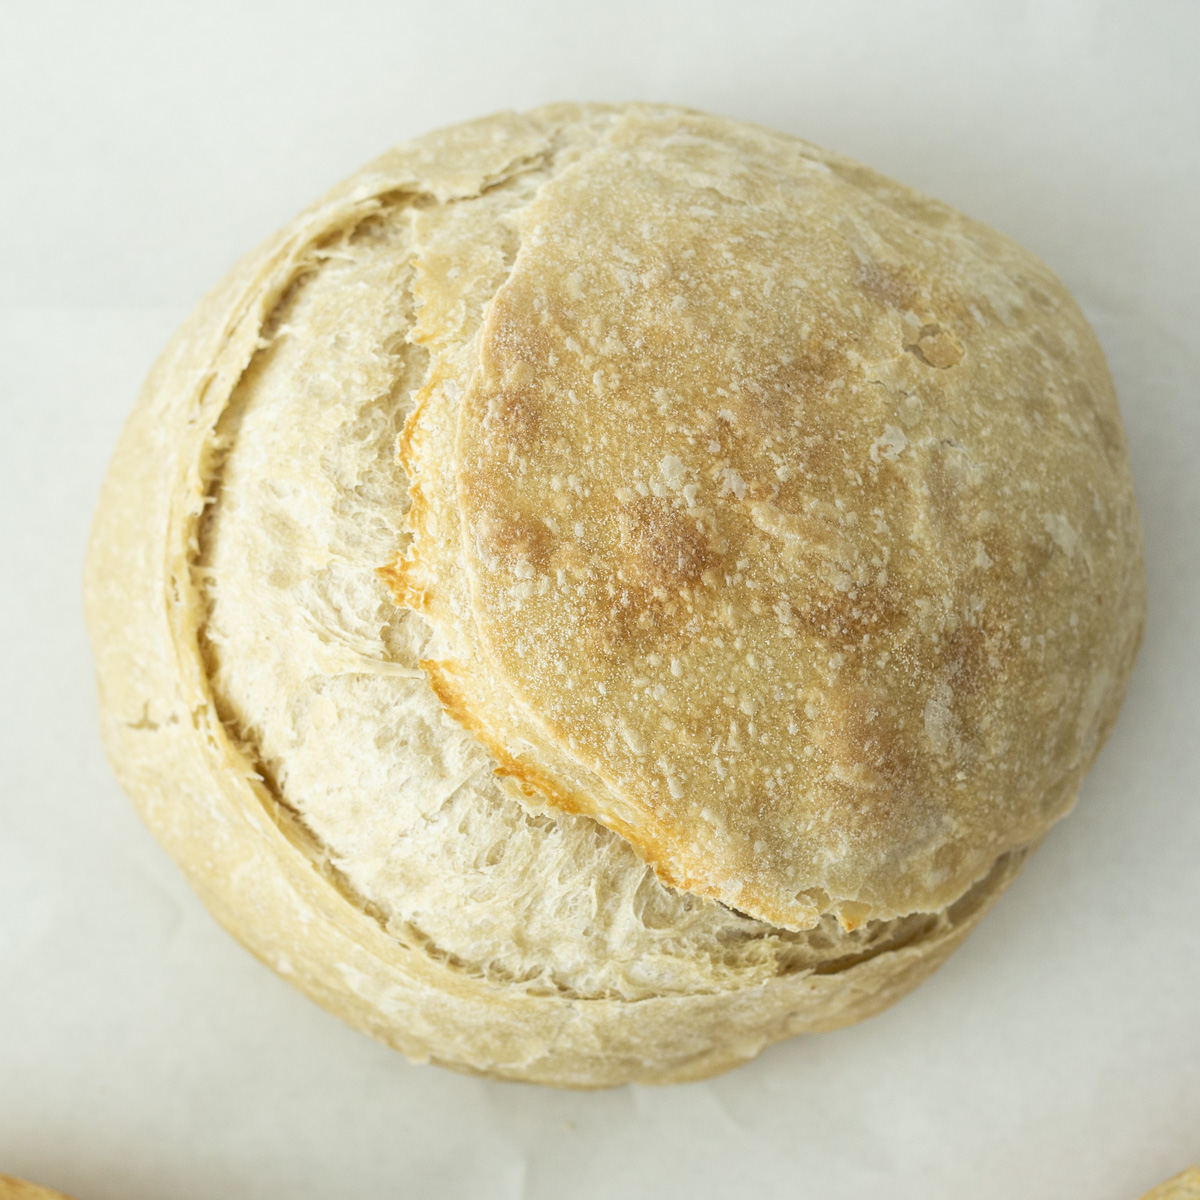
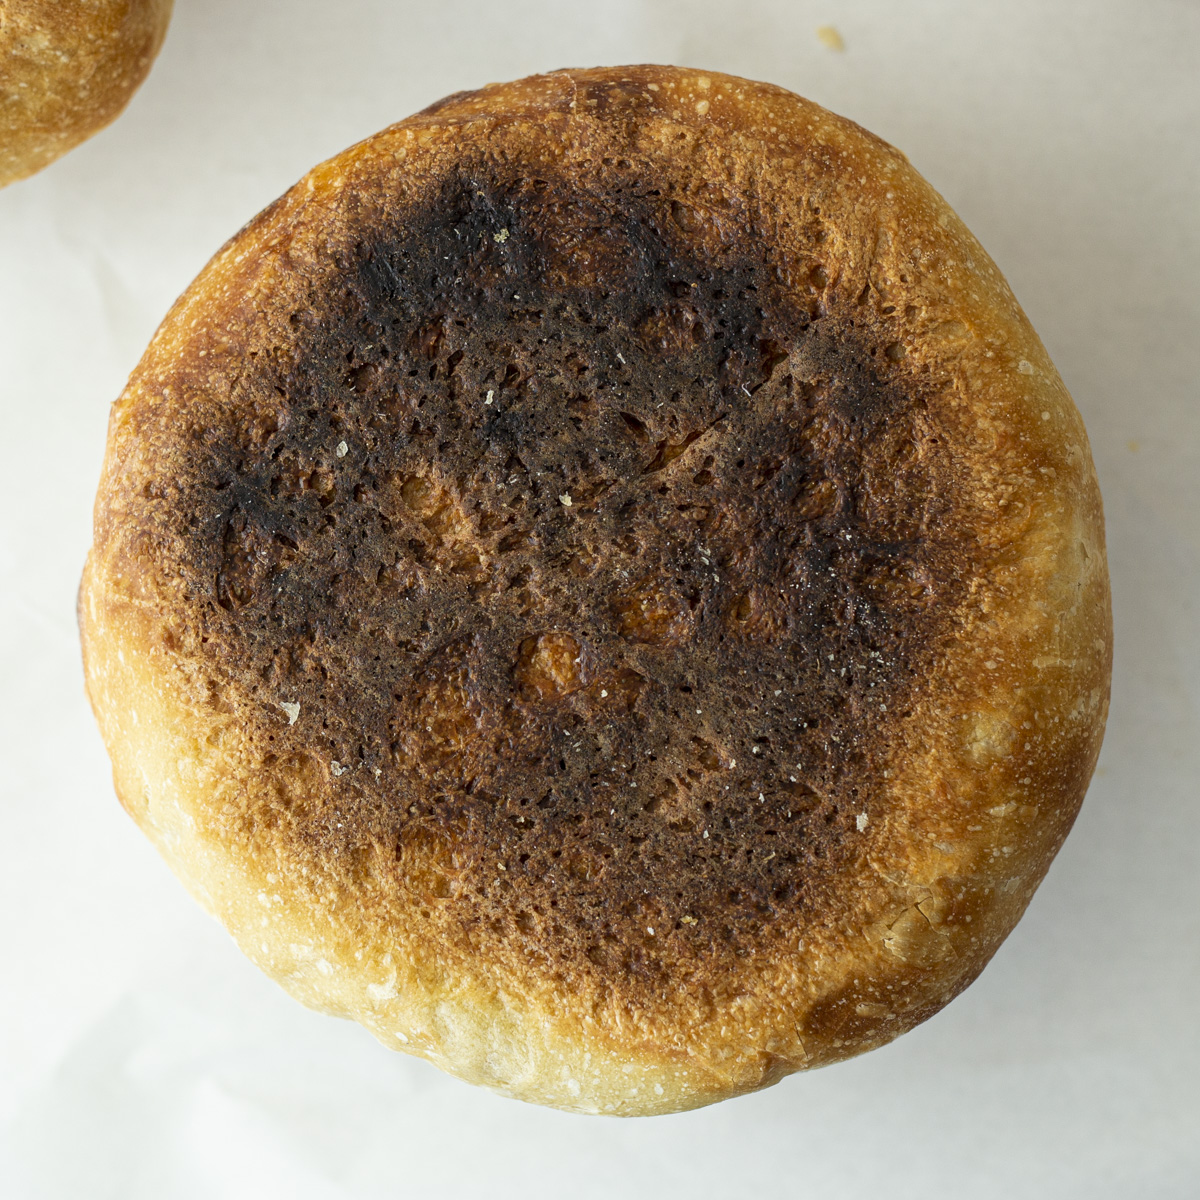
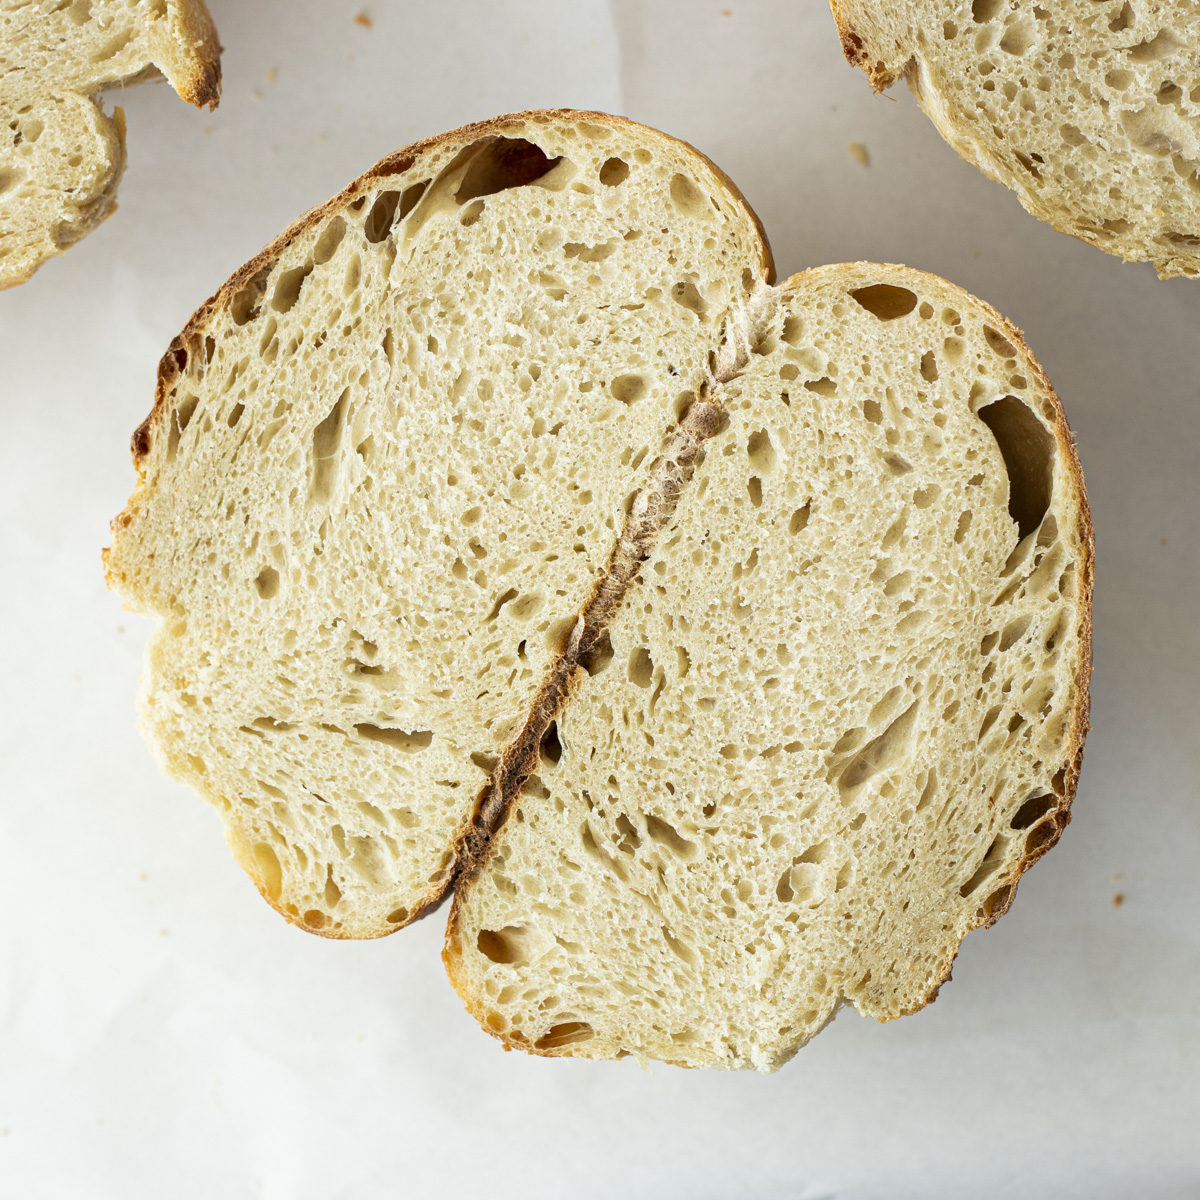
THIRD: The hungry loaf. To break the rule of only using a ripe starter to bake with, we mixed our dough ingredients with a starter that hadn’t been fed for two days. It was runny, flat, had no visible bubbles, and smelled sour – so we thought for sure it would fail to rise, but boy were we wrong! This was probably the most surprising result of them all – with attractive oven spring, fluffy crumb, and great flavor. We conclude the reason for this one succeeding must be because we used an older, mature starter that still had the strength to rise the bread even when it was hungry.
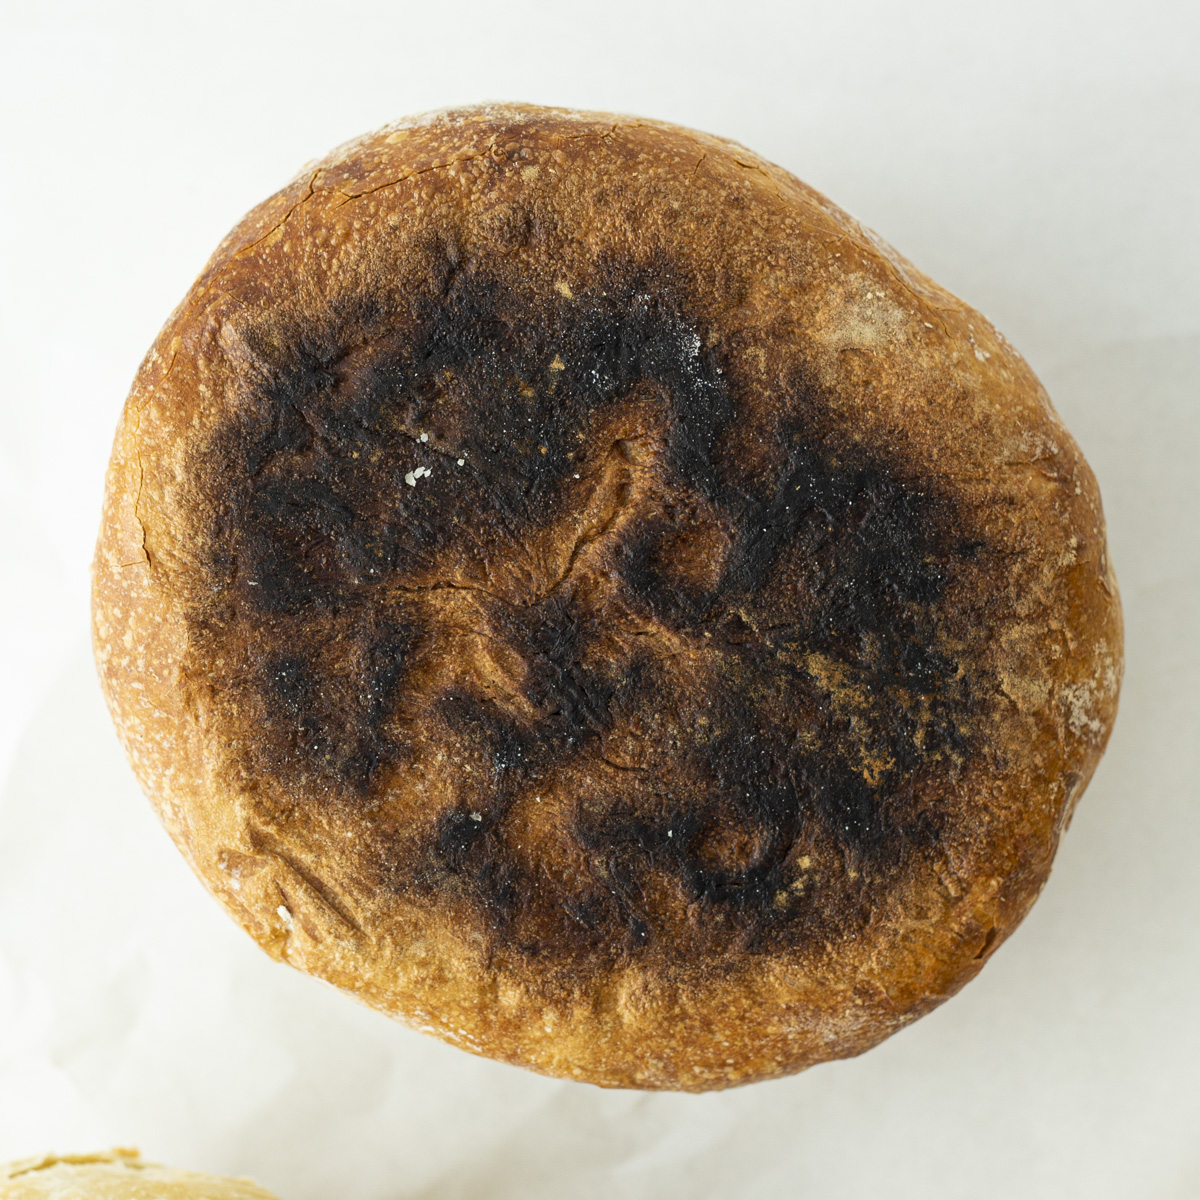
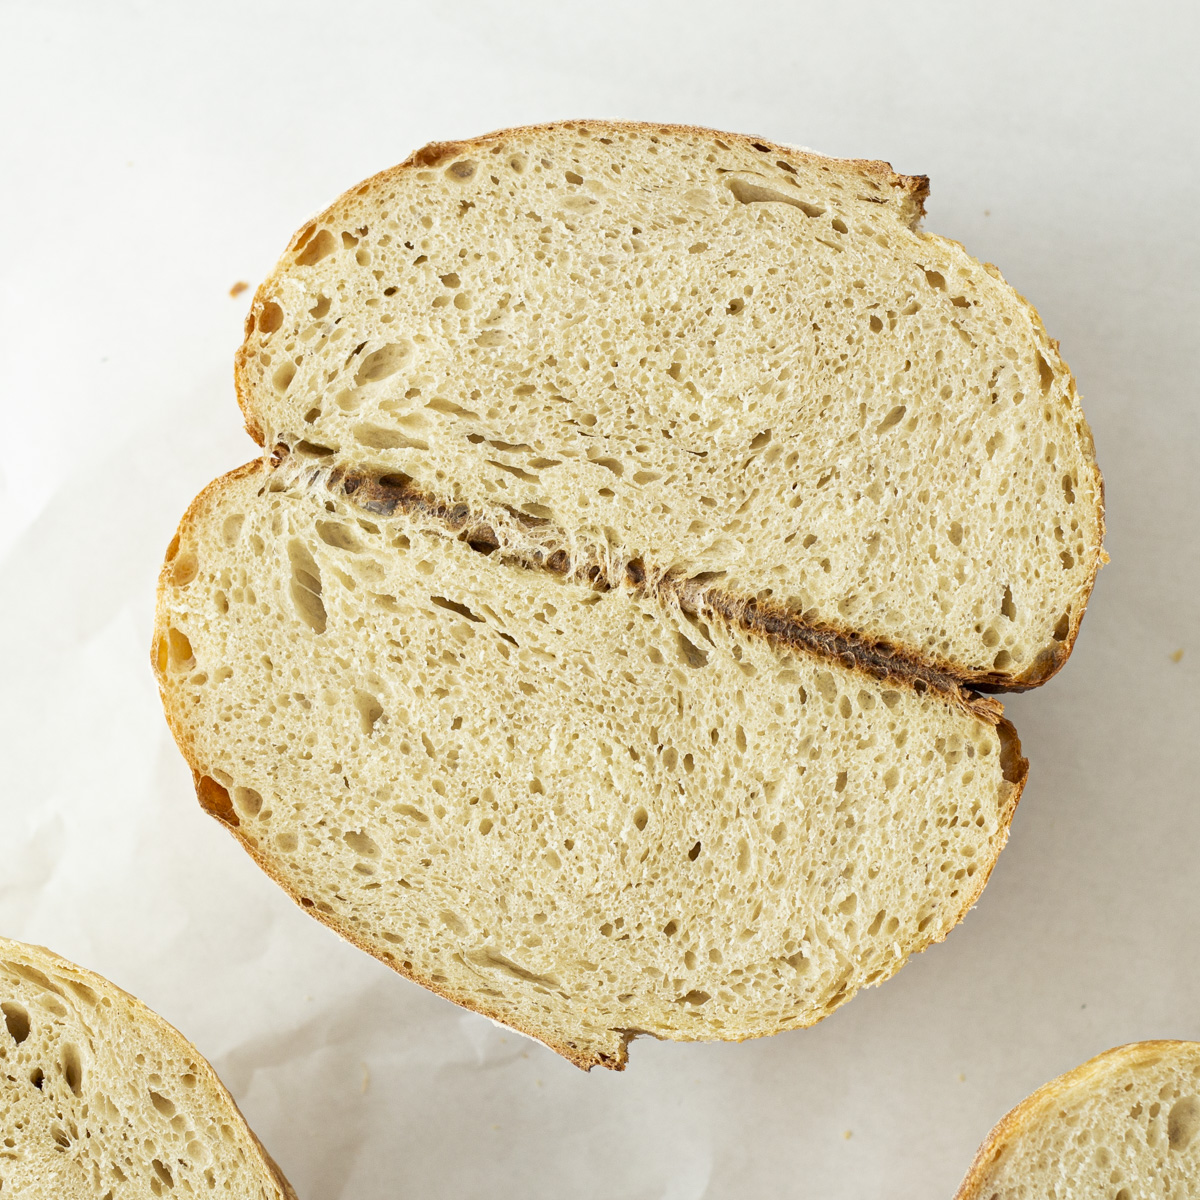
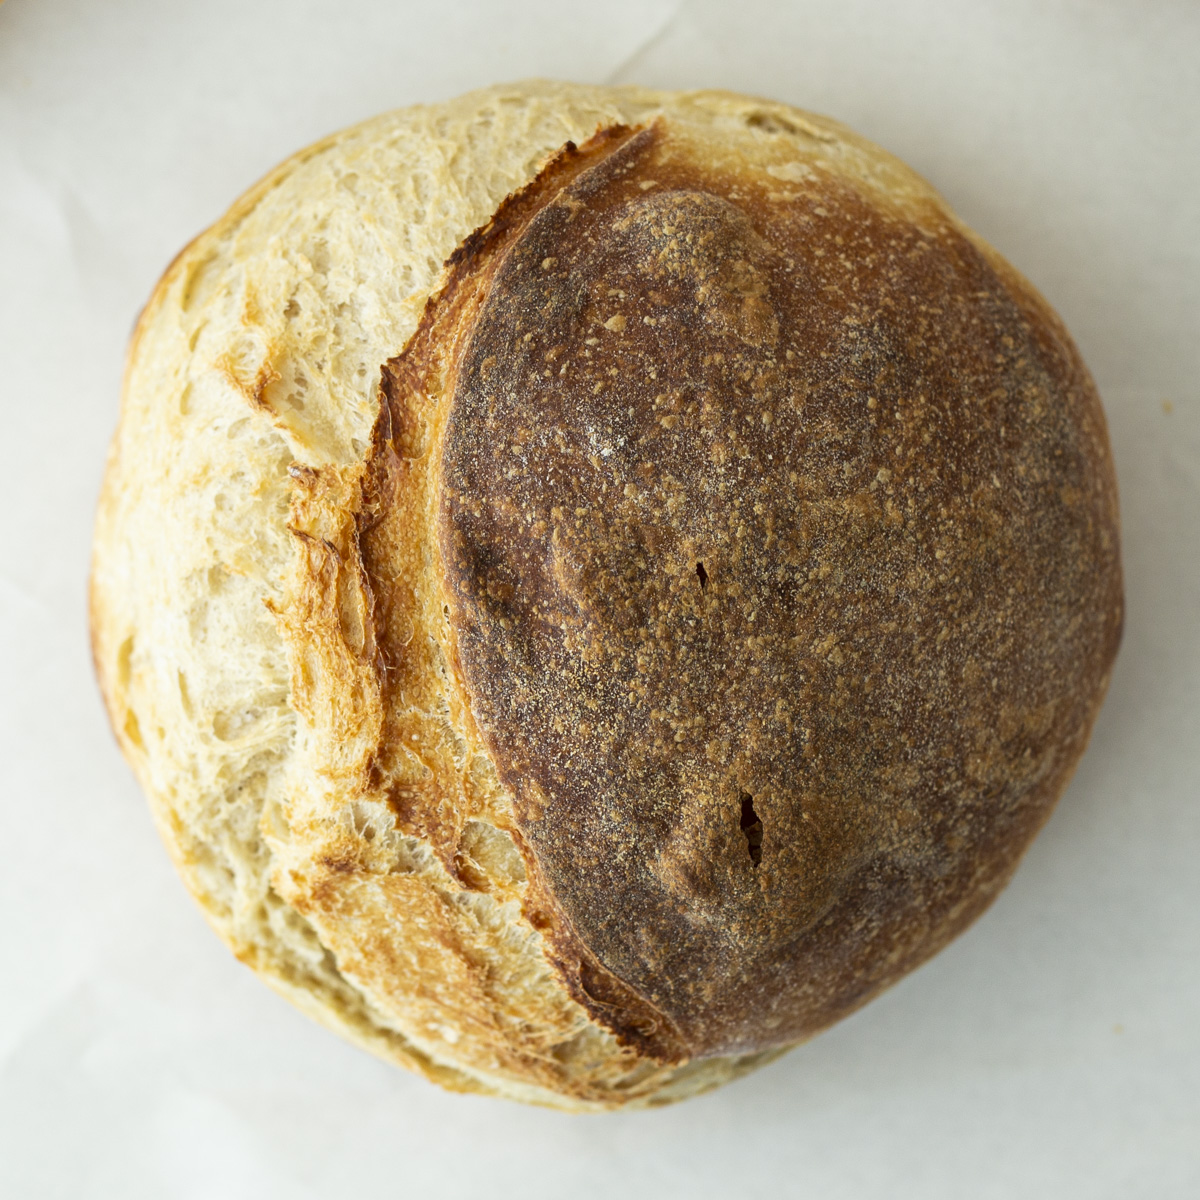
FOURTH: The stainless steel bake. Instead of using our trusty enameled dutch oven, we tried baking this loaf in a heavy-bottomed stainless steel pot with its lid. We were shocked by the results! We thought for sure this loaf would burn but it actually appeard underbaked and began collapsing when we removed it from the oven.
It was baked at the same temperature for the same amount of time as ever other loaf, and we do assume that if we left it in the oven for a longer amount of time, it would’ve been comparable and golden. The crumb was a little shaggy and tore when we cut into it, which we assume was due to a possible underbake situation. But this took away all the fear of baking in a standard stainless steel pot. The bottom did brown much more than the rest, so if we were to use this pan again, we would put a sheet pan underneat to help deflect some of the heat from the bottom.

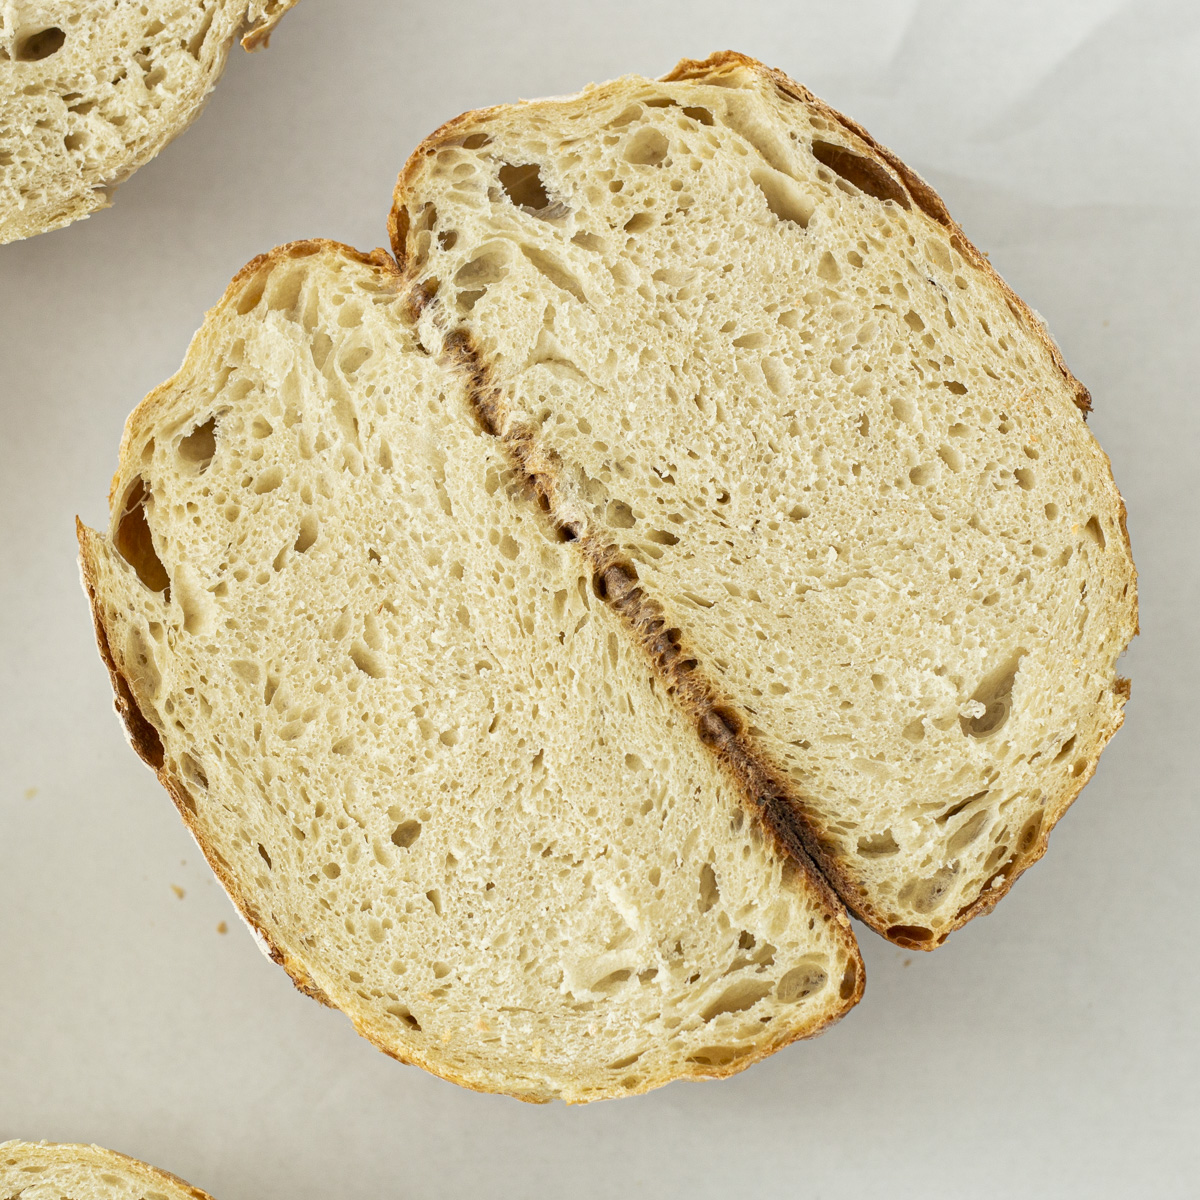
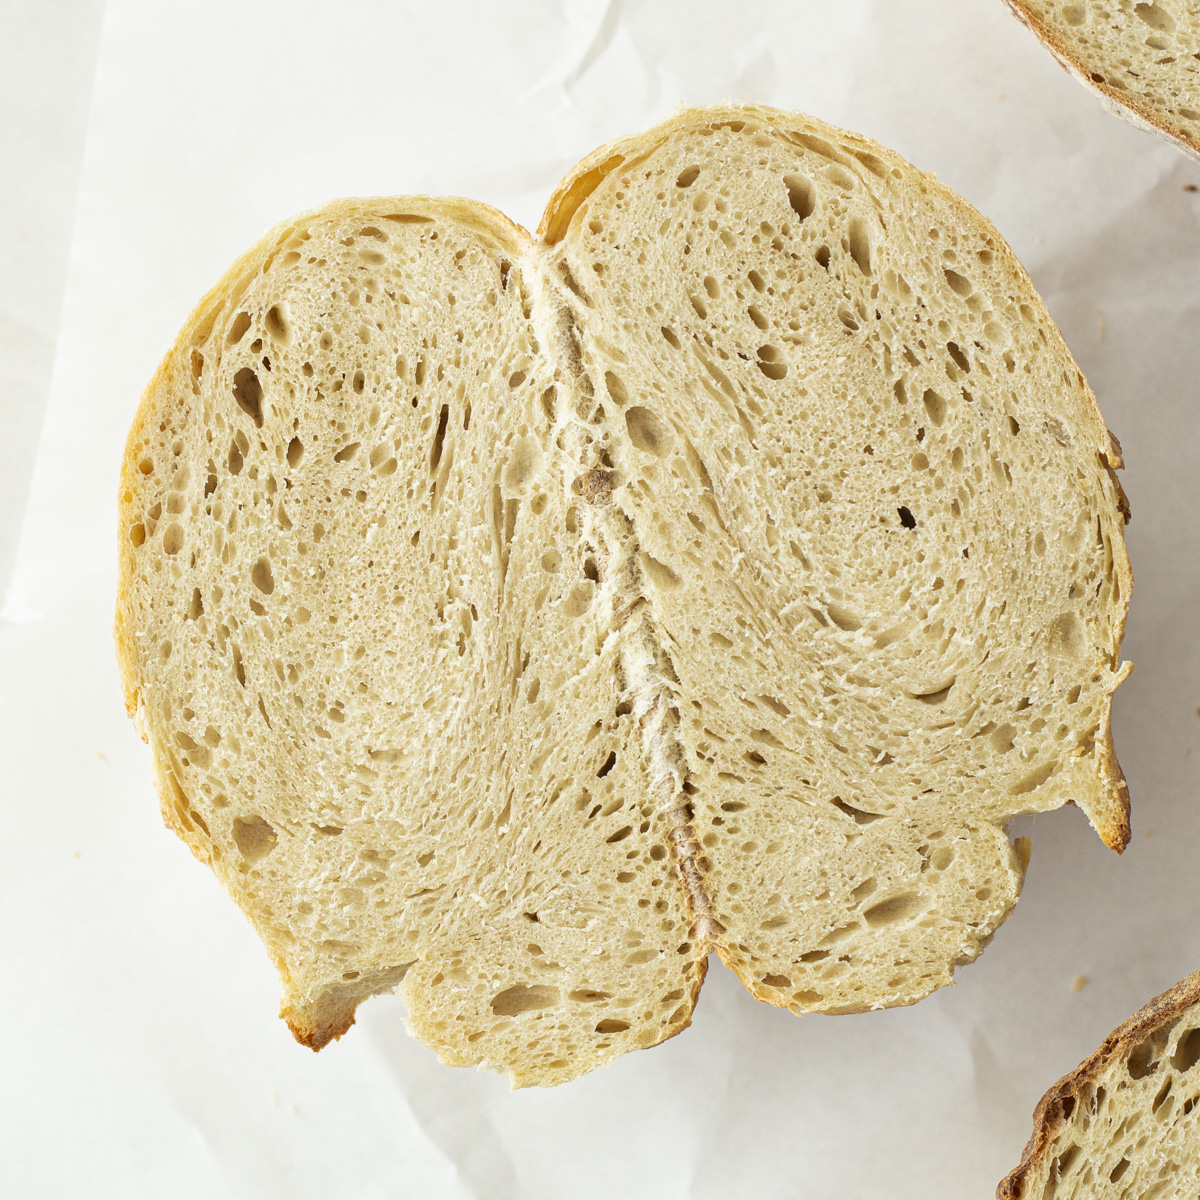
FIFTH: The no-knead loaf. Instead of performing any stretch & folds, we simply mixed our dough and left it in its bowl until proving was completed. The dough was very floppy and difficult to shape because it had essentially no strength, but once shaped into a round, it smoothed out and was easy to handle. When we put it into the hot Dutch oven, the dough did appear to flatten but once baking was finished, we were pleasantly surprised to find a great oven spring, and the final crumb structure was chewy and had a medium-firmness but also soft and delicious.
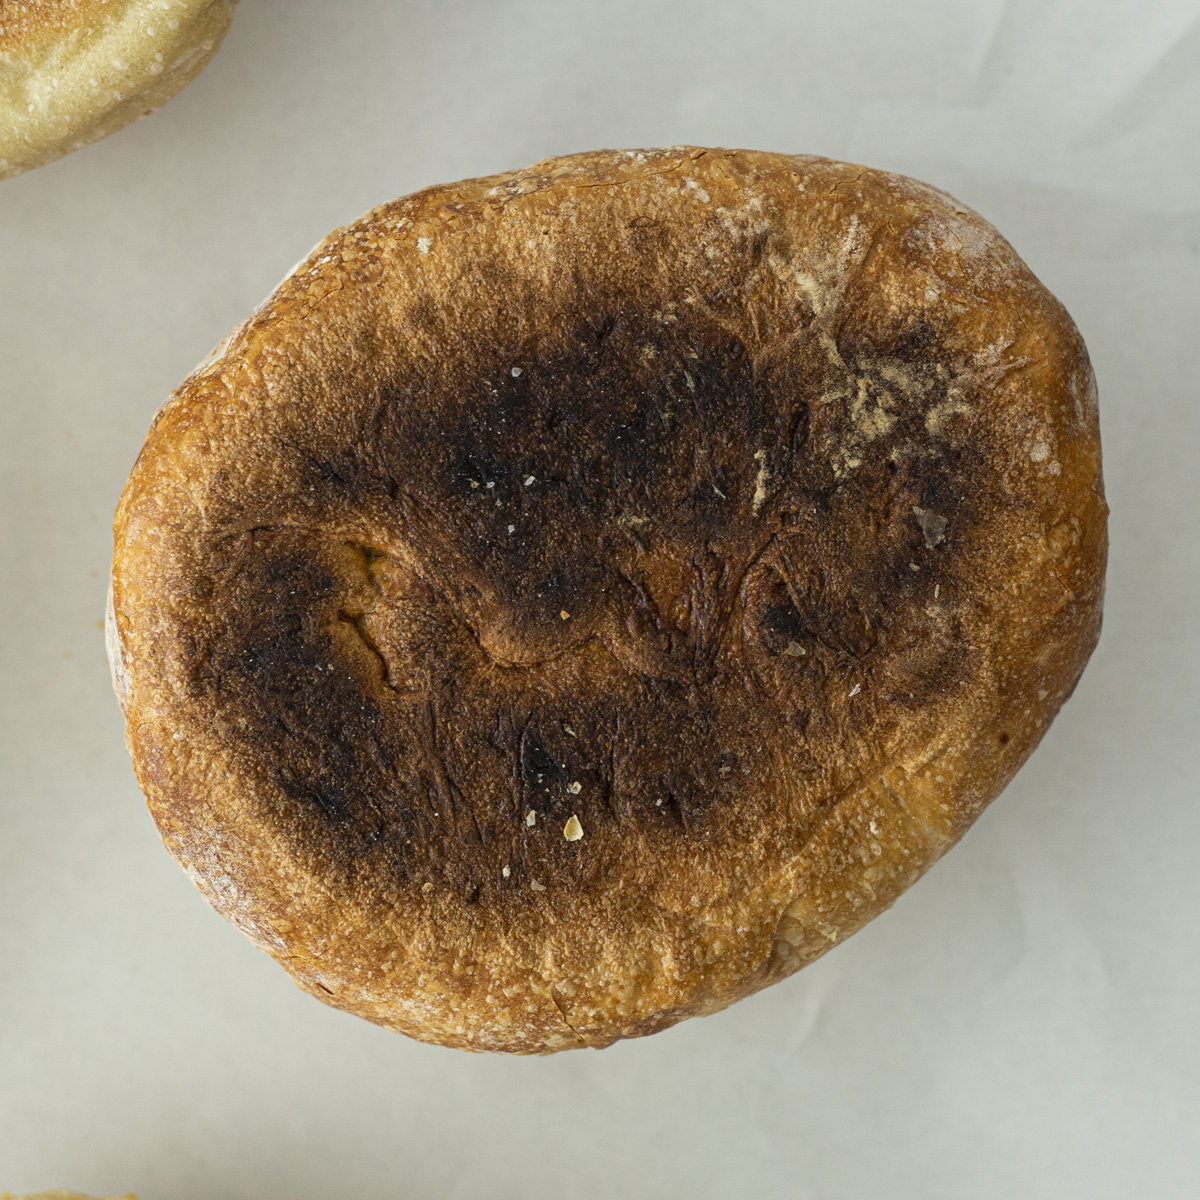
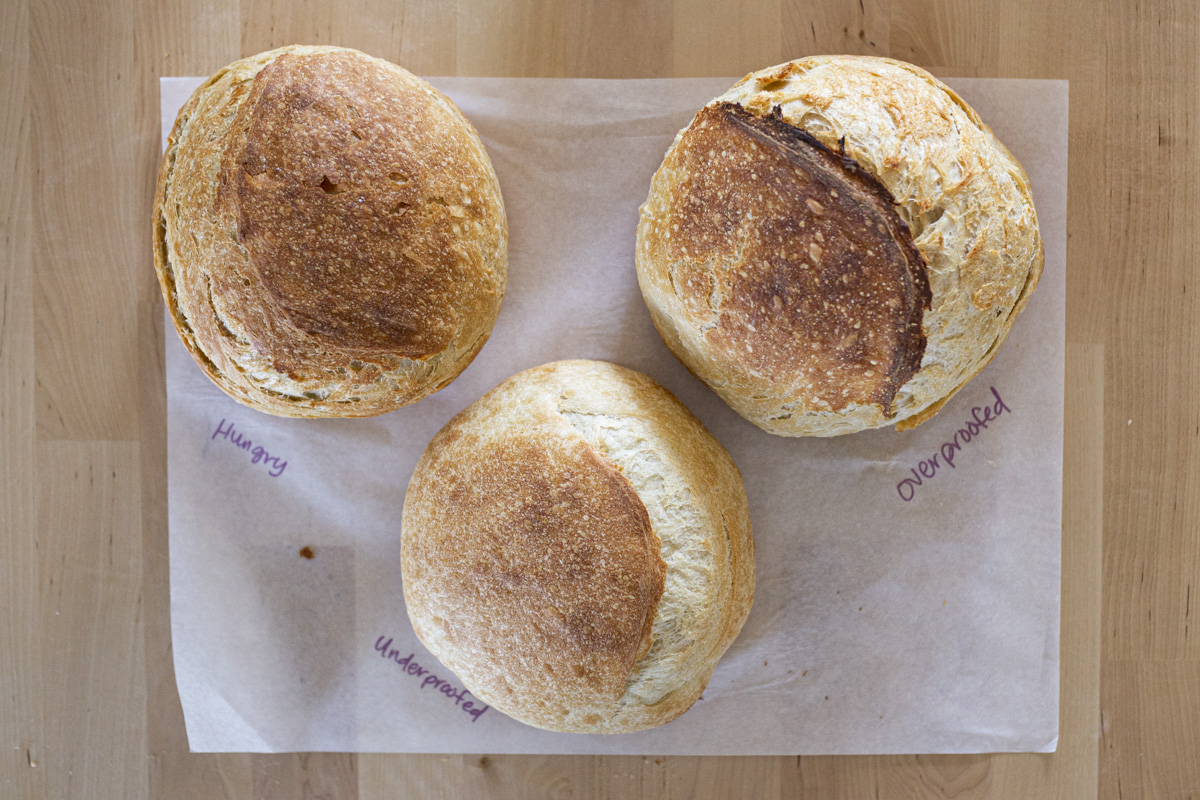
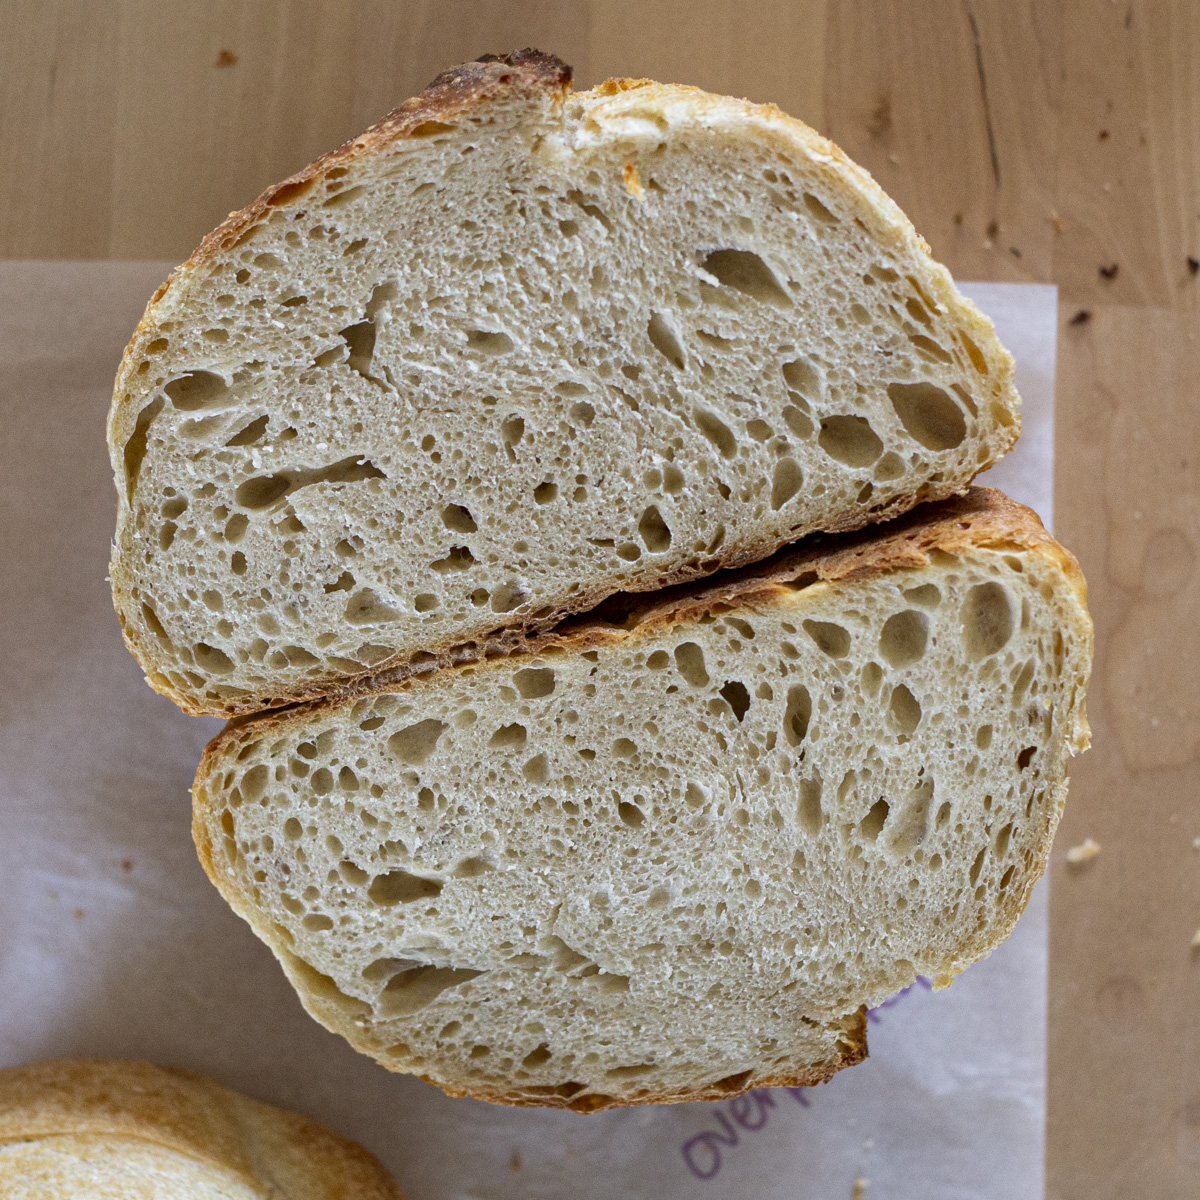
SIXTH: The over-proofed loaf. This loaf ended up proving about four hours longer than all of the others. We waited until after it finished rising and began to fall again, also the bubbles at the surface of the dough kept deflating. The dough was still easy to handle when shaping, and began to spring before we even put it in the oven! The oven spring ended up being surprisingly impressive, we didn’t expect so much rise. The interior though was another story, it yielded an uneven crumb that was dense and hindered from a better rise. Overall the texture was a pleasant chew and tasty flavor.
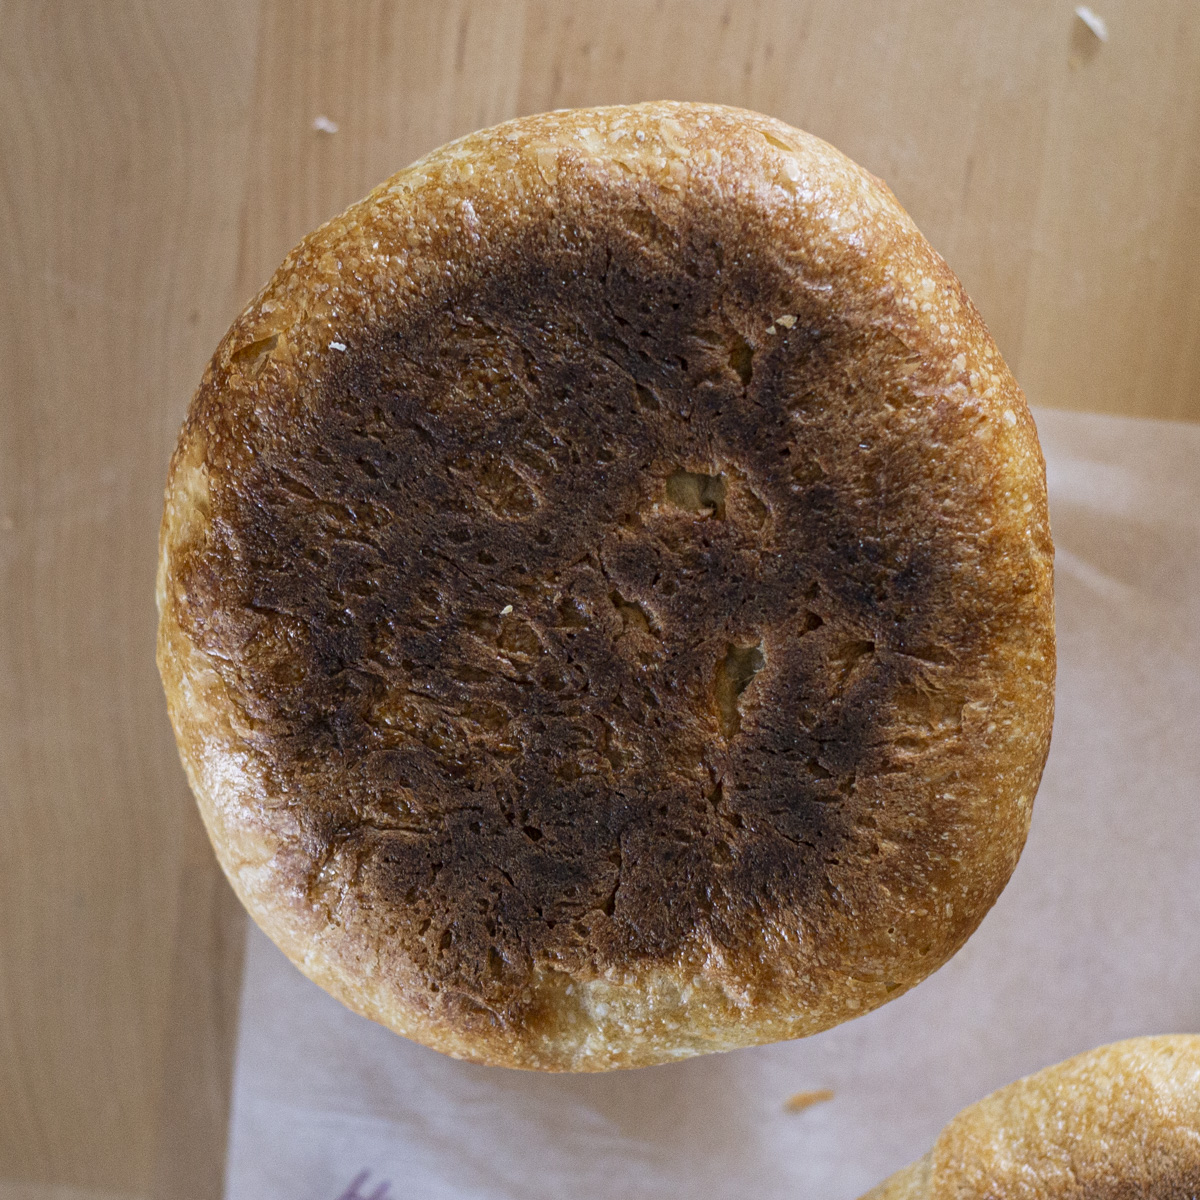
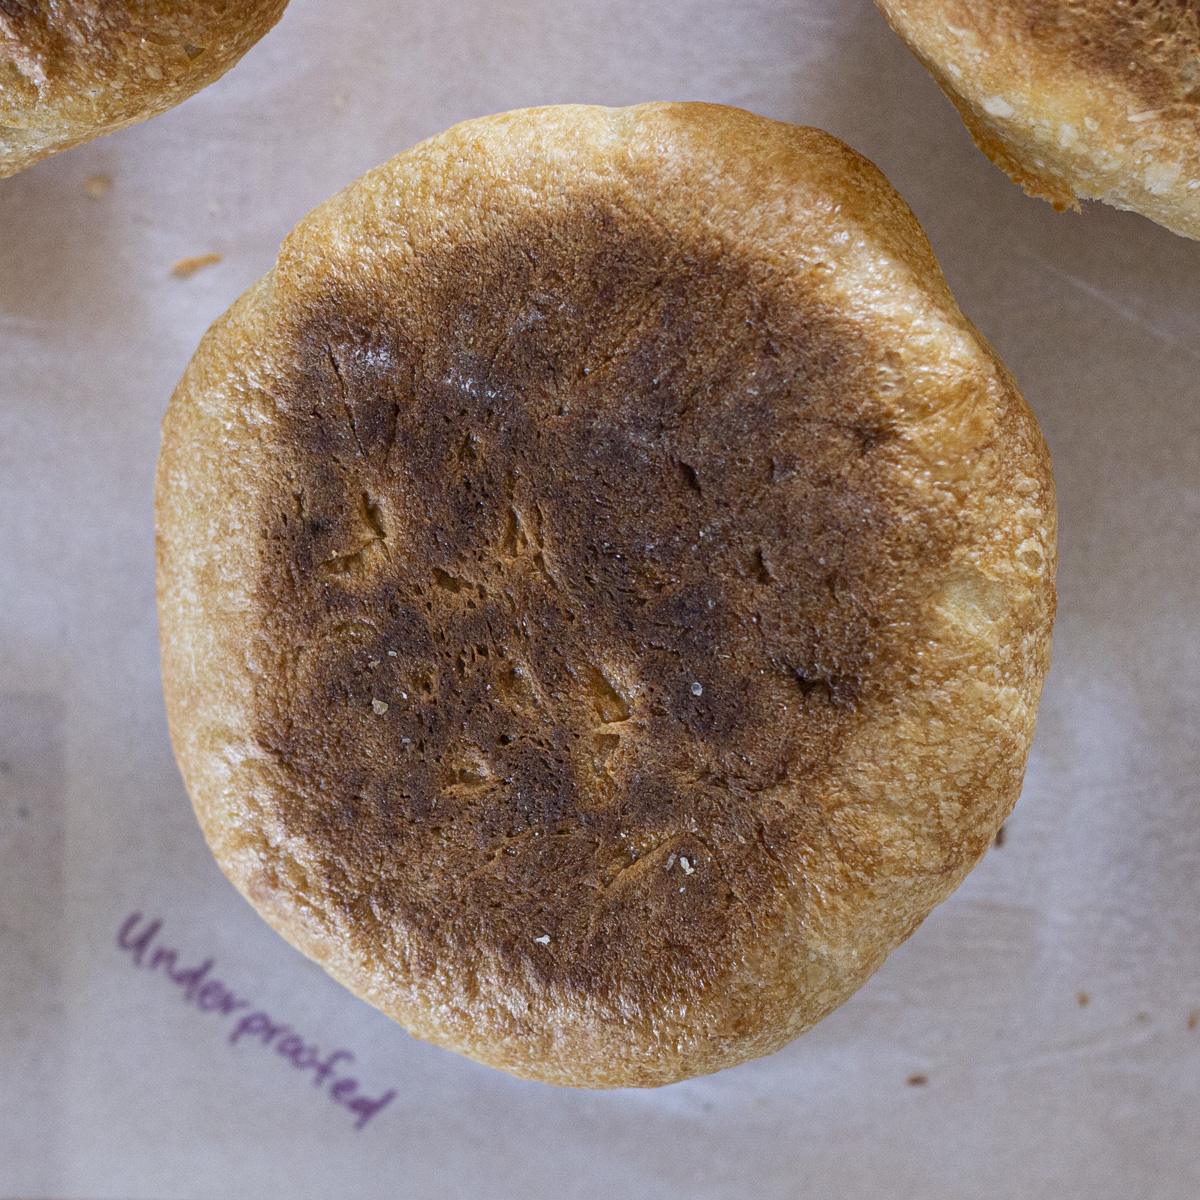
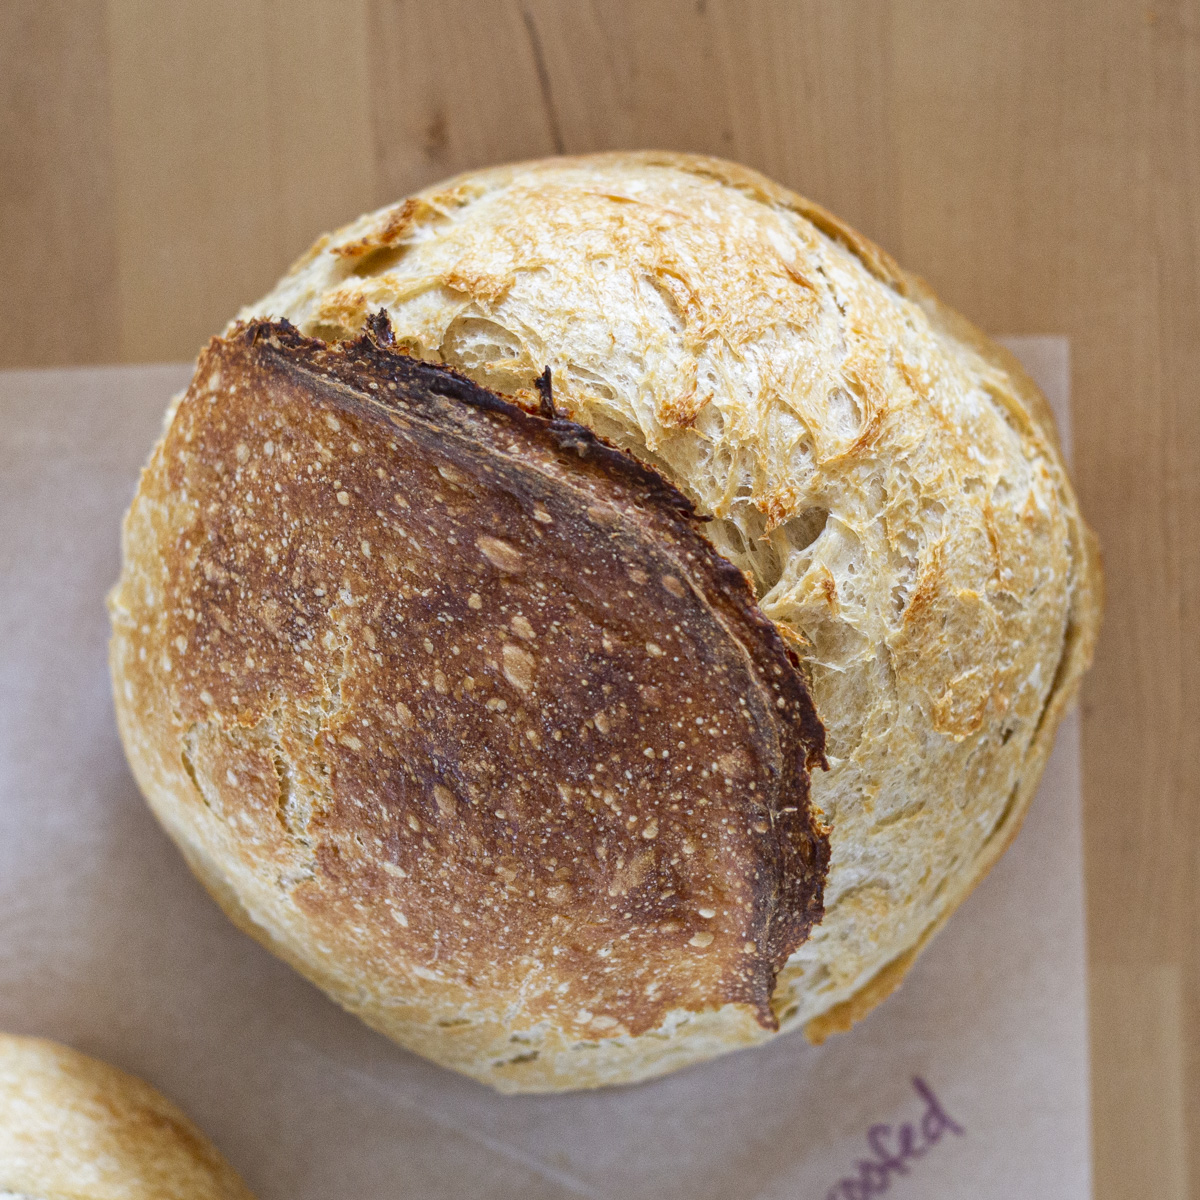
SEVENTH: The under-proofed loaf. Last but not least, this under-proofed dough was baked very first after we disallowed the proving to finish. It had a beautiful oven spring albeit shorter loaf altogether, but the crumb was tight and very dense and firm. It felt like it would be too heavy for a good chew.
The Test (part two)
After part one, we concluded that the loaves baking successfully was due to our starter being about a year and a half old. It was quite healthy & strong and produced beautiful bread despite the rules not being fully followed. Because we realized an older, stronger starter could be more resilient against skipping certain steps in the sourdough process, we decided to test a couple more loaves made with a much younger, recently established starter that was started just three weeks prior to testing. Here were our results:

Young, hungry starter: it took longer to proof this dough than the others, we assume due to the starter not having been fed for a couple of days. When we shaped it before baking, it was easy to shape and had a few fluffy bubbles, and actually felt almost just like a loaf that had a ripe starter. Upon baking, it didn’t have much of a spring, no ear, and as we cut into it, we realized how dense it really was. The dough smashed together when pushed by a fingerprint and didn’t spring back, like wet dough.
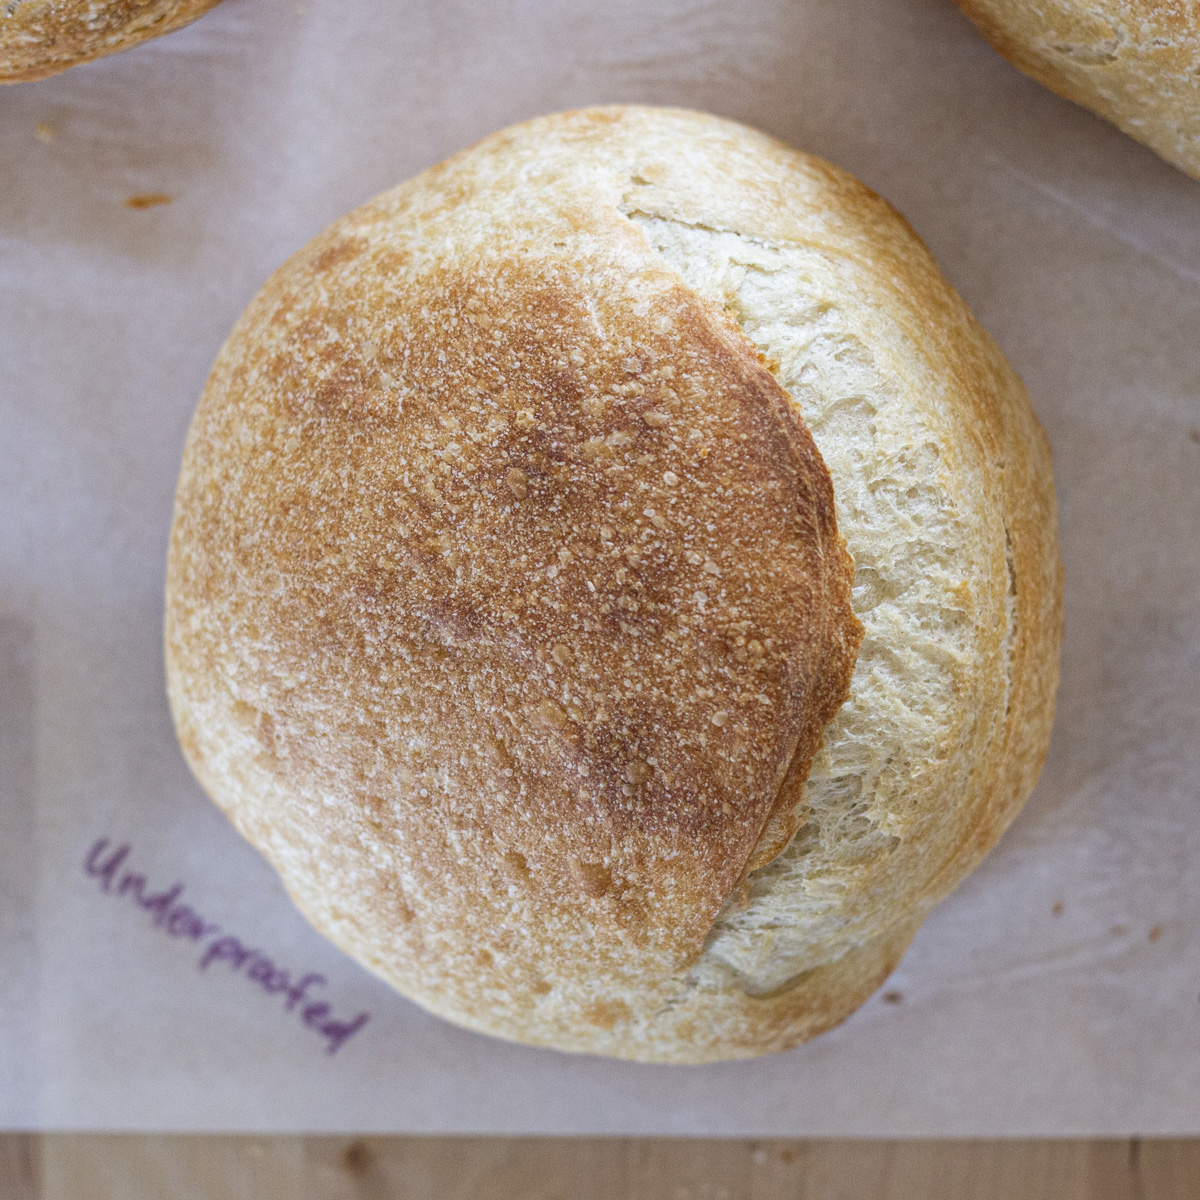

Young starter, under-proofed dough: we only proved this dough for an hour, it didn’t have much of a rise before shaping. During shaping, it was heavy and had no visible bubbles or soft surface. After baking, We were surprised by how heavy it was, like a brick, we knew it would be dense before cutting into it. After opening it up, the crumb was closed and super condensed like play-doh, super dense and difficult to push on.
Young starter, over-proofed dough: we proved the dough for about 10-11 hours, it had well surpassed its growing stage and had begun to fall. We thought for sure it would flatten in the oven! Much to our surprise, it actually had an impressive oven spring. The inside wasn’t great, but also wasn’t terrible. The crumb was uneven and dense, and felt like it would be awfully chewy.