Making caramel apples is a fun way to dive into the fall season. But in all honesty, we like to make them year round. Dip these delicious treats for yourself or as gourmet gifts for your friends and family. With a few tricks you can make them successfully whenever your heart desires, after all…
“An apple a day keeps the doctor away.”
Eh, that phrase probably doesn’t mean caramel apples, but here’s to hoping! We’ve got everything you need to make classic or gourmet caramel apples (minus the crisp Granny Smiths).
We wanted to give you everything you need to make beautiful, gourmet apples every time!
We’ve listed the instructions here, but if you’re more of a visual learner, scroll down to the bottom to watch us make them with you. Or click here to jump straight to the video.
Here is a list of the supplies that you will need:
- Peters Caramel 5lb Loaf
- Apple Skewers
- Parchment Paper
- White Chocolate
- Milk Chocolate
- Dark Chocolate
- Sprinkles
- Nuts
- Colored Chocolate
- French Oven or microwave safe bowl
Prep the Apples
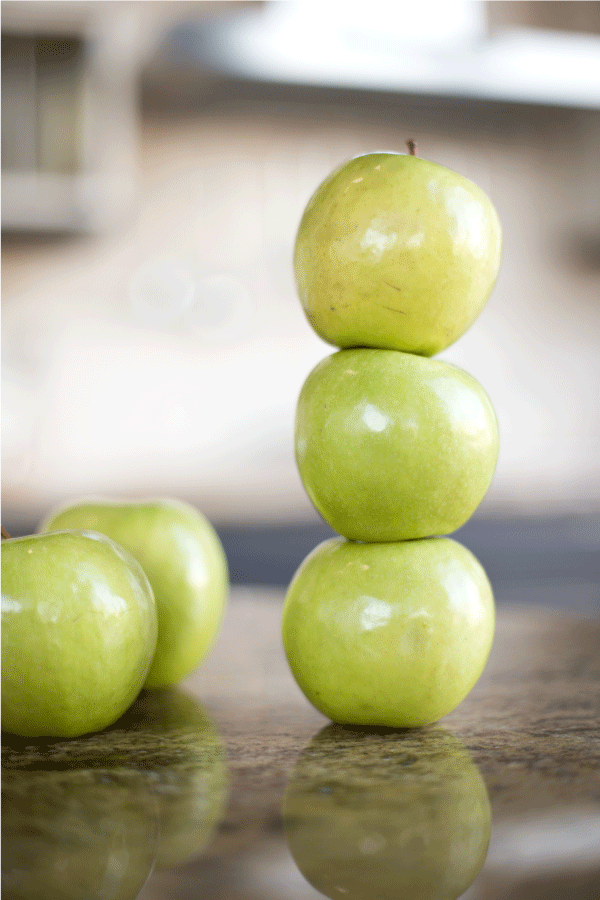
Start with tart, green Granny Smith apples. The sour flavor of green apples works very well together with the sweet buttery flavor of caramel. (One 5lb loaf of caramel will cover approximately 20-25 medium apples.)
Clean the apples. Most growers coat their apples before they arrive in the store. The wax coating is for aesthetics and to help keep the apples fresh. To remove the coating use warm water- you can use a little dish soap or vinegar in the water. Then with a dry dish towel dry and remove any excess wax. Any moisture in there will create a barrier between your apple and caramel.
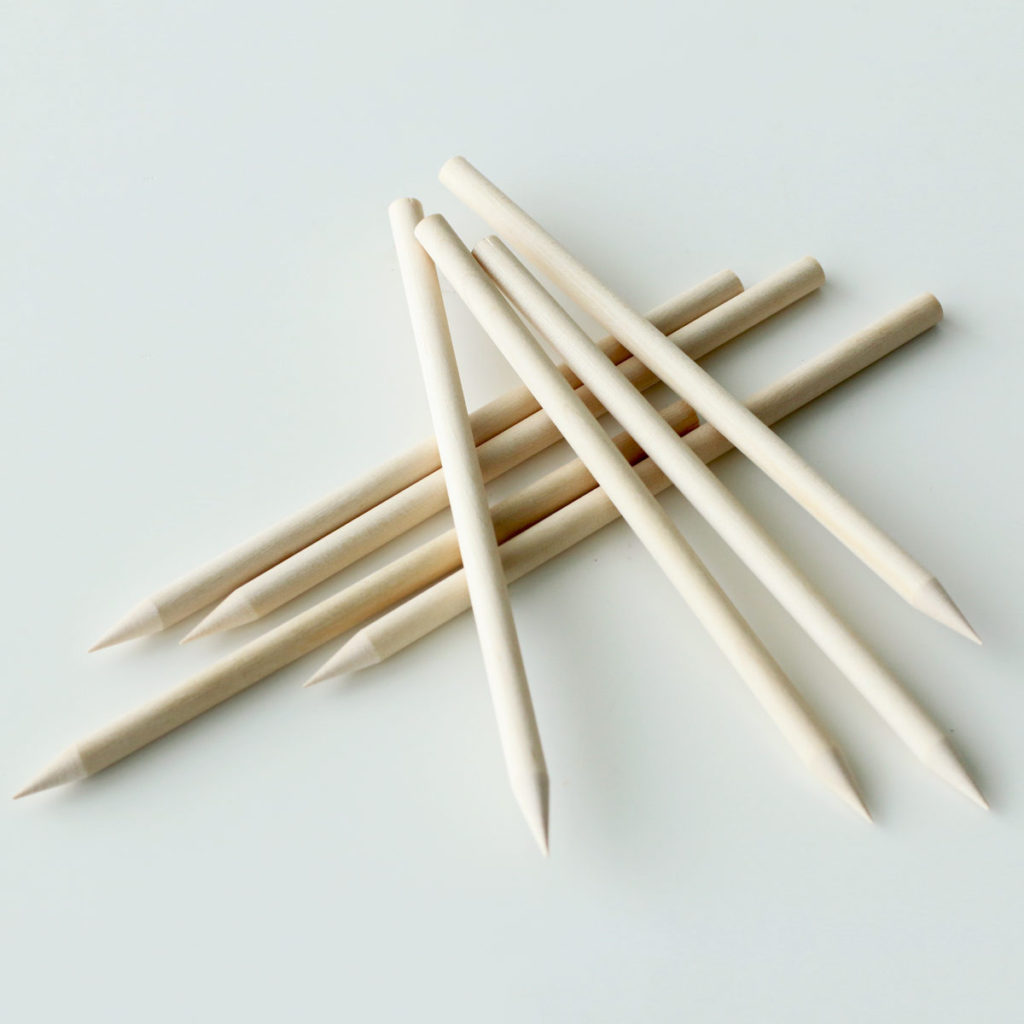
Insert the Wooden Skewers
Insert the Wooden Skewers into the apples after you have removed the stem. Make sure that the stick is in tight so that when applying the caramel it will not fall off.
Whichever end you want to use on the apple is great. If you use the stem end, you’ll get a more traditional apple shape. If you use the blossom end, you’ll have a more rounded apple shape, and it can give you a more solid surface to stand up.
Keep in mind that the apple will release moisture from the puncture point, so don’t insert the skewers until you are ready to dip. You can store the apples in the fridge until they’re ready (colder apples make the caramel set faster, but it does cool your caramel down quicker, so it’s up to you!)
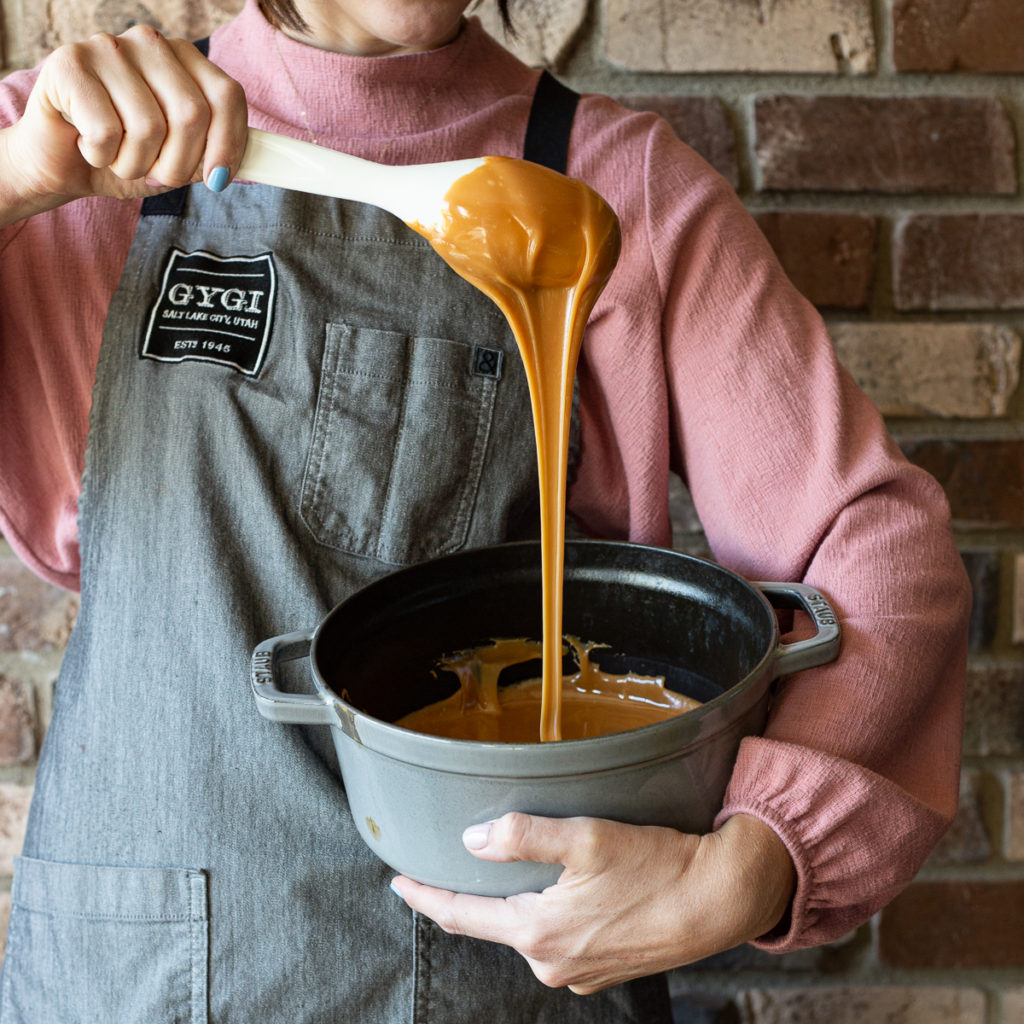
Melt the Caramel
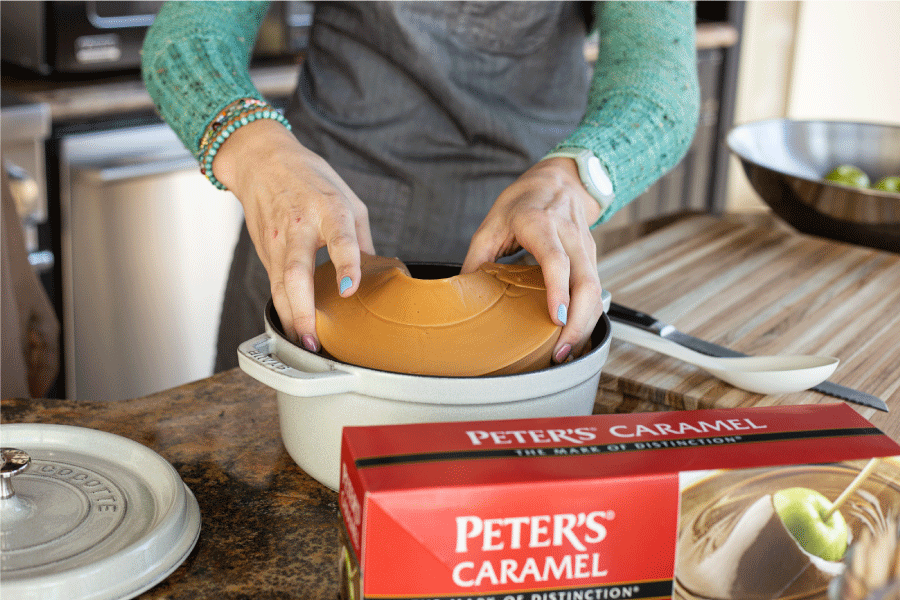
Oven:
Place the Peters Caramel Loaf in a cast iron french oven. Place the lid on the pot and put in the oven at 200 degrees for two hours. No need to check on the caramel or stir it. Just let it melt!
Once it is melted, give it one stir to incorporate any film that may have formed on the top- but limit your stirring. The more you stir, the more bubbles you’ll potentially create.
Microwave:
Place caramel in microwave-safe plastic or silicone bowl. Warm in microwave for 1-minute increments. Stir caramel in between each round of melting, and keep warming until caramel is melted.
A temperature of 175 degrees is perfect for dipping. If the caramel is too hot it will immediately slide off your apple, and is likely burning the sugar in the caramel.
If the caramel is too thick, you can continue to rewarm it- either in the microwave, or you can put your pan on the stove and warm it over low heat, while constantly stirring to avoid overheating or burning it.
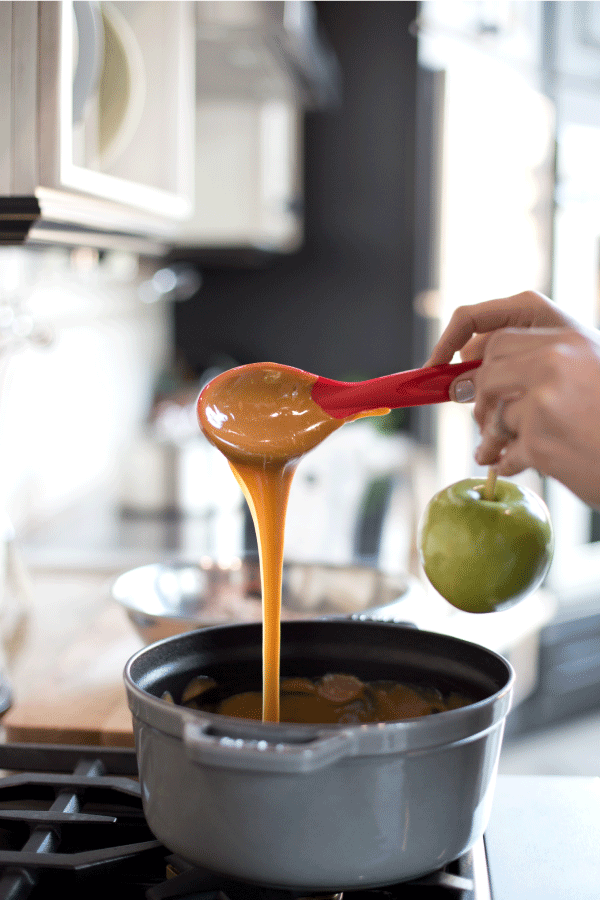
Remove the pot of caramel from the oven and stir sparingly. We’ve noticed that the more you move and stir the caramel the more bubbles and air you will get on your apples.
Dip the Apples
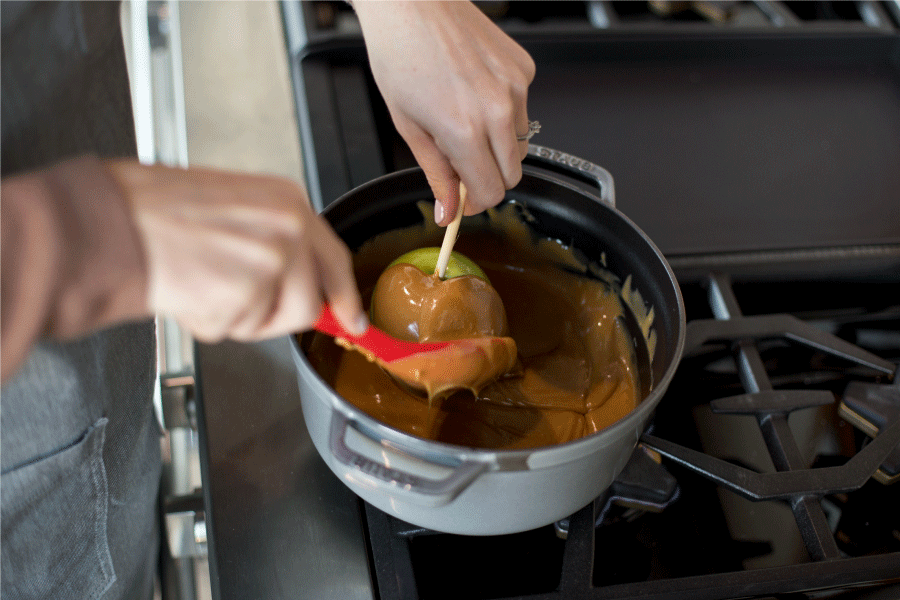
With a spoon in one hand and the apple on a skewer in the other dip the apple into the pot/bowl and start to lift the caramel onto the apple while also turning the apple. Continue coating the apple with the caramel and allow the excess to drip back into the pot. You can decide if you want caramel all the way to the stick, or if you want to leave a little peek of green at the top. Your preference!

Once you have coated the apple, lift the apple straight up out of the caramel. Use a rubber spatula and scrape excess off the bottom while rotating the apple around to clean off the extra caramel.
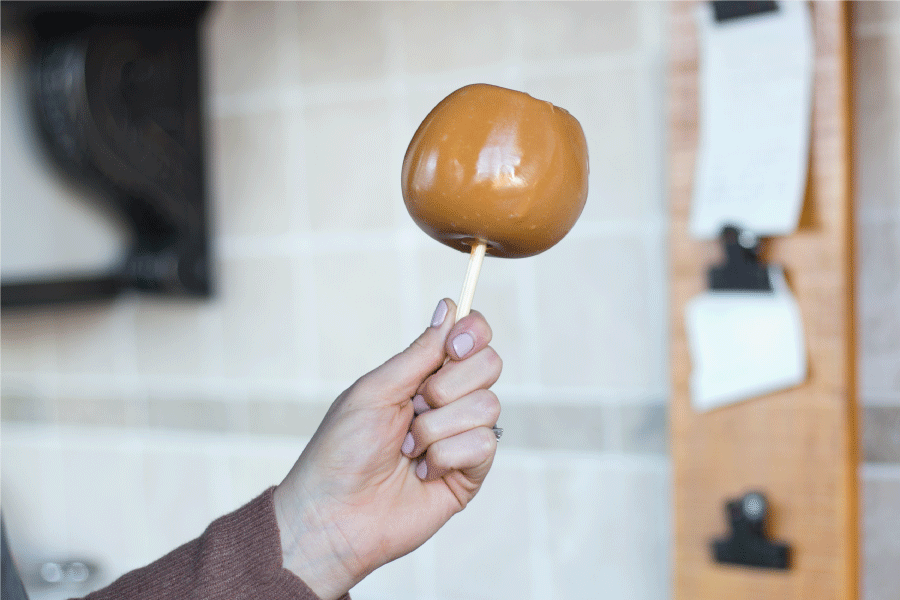
Flip it upside down for a moment (30-45 seconds) as it cools, before setting down. You’ll watch the caramel become more glossy as it sets up. Place the apple on a cookie sheet lined with parchment paper. Make sure to place the covered apple with the stick up.
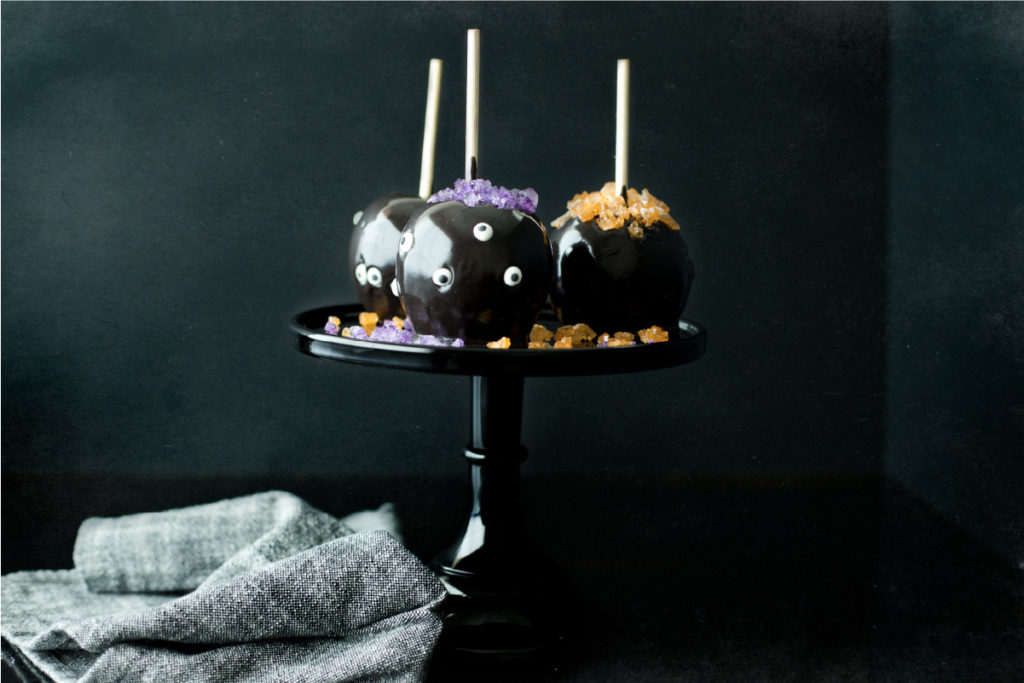
Add some Yummy Toppings
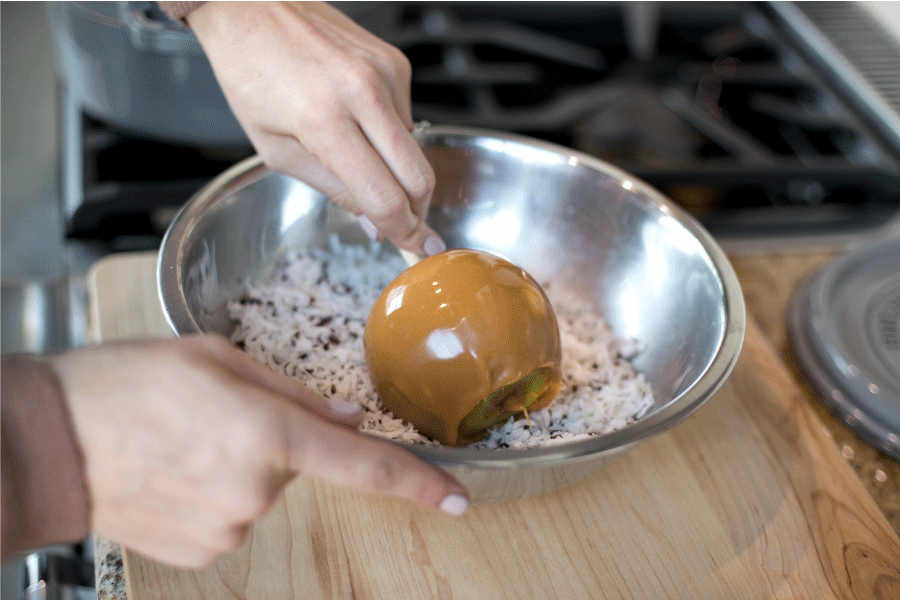
If adding topping directly to the caramel, apply right after dipping, while still warm but not hot. The larger toppings need the warmer caramel in order to make them stick. Placing in the fridge immediately after applying will help keep sliding to a minimum.
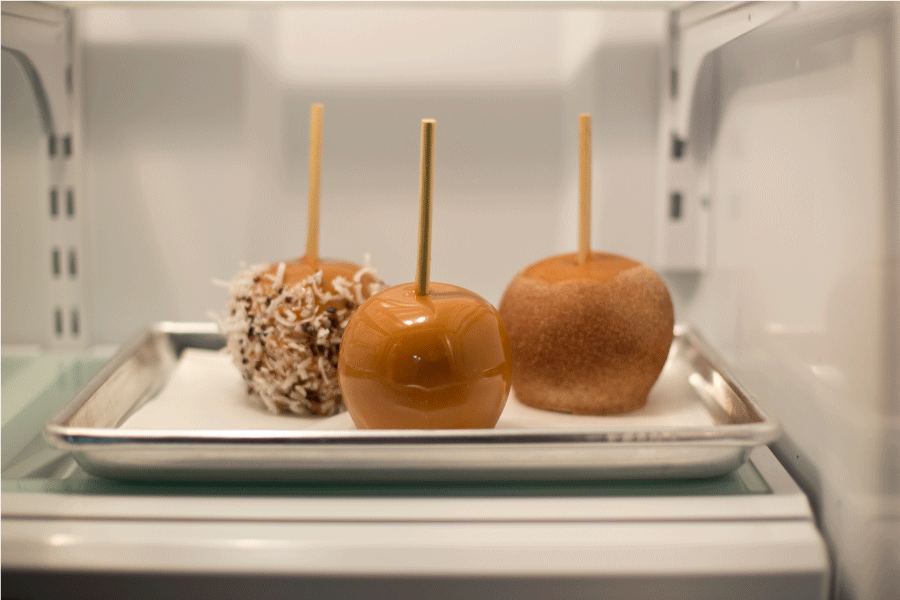
Then place your apple on a piece of parchment paper, and give it some time to cool down. To speed up the process, you can refrigerate your apples. Or you can stick them outside if the temperature is colder than 65 degrees. You can leave it out at room temperature, just make sure the caramel has cooled before adding any chocolate.
Once the caramel has cooled you can then apply chocolate and other toppings.
To learn more about melting chocolate, read here.
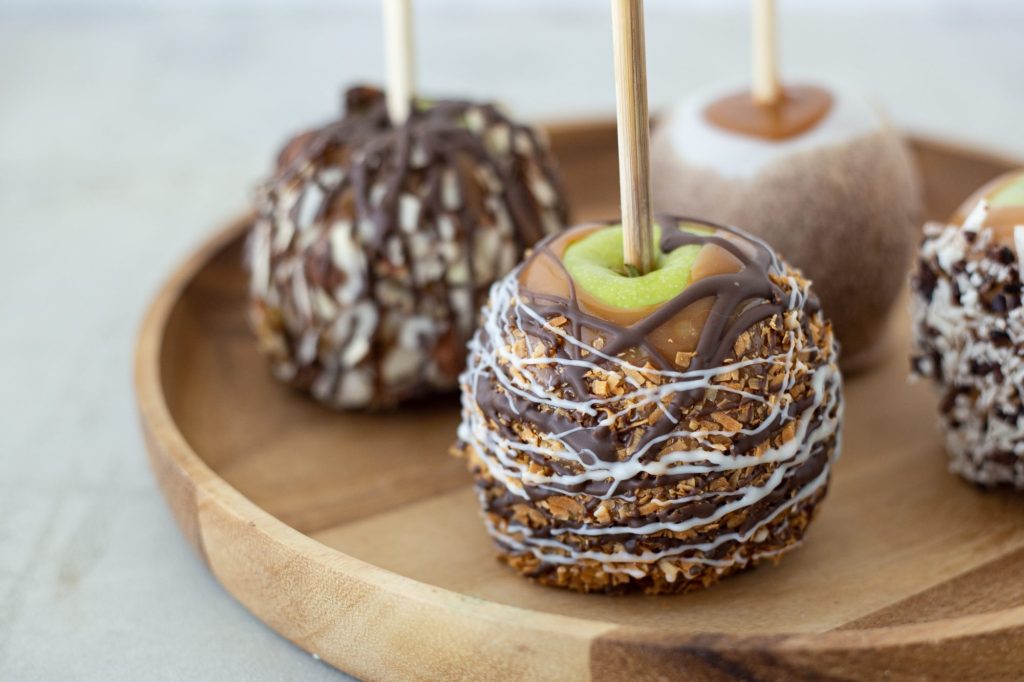
Dip your apple in chocolate, and allow the extra chocolate drizzle off the bottom of the apple. If you’re adding toppings to the chocolate, sprinkle onto the chocolate, or you can roll it directly in the bowl.
Drizzle chocolate on the outside with the tip of a spoon, and add more texture and layers to your apple. Makes your apple look fancy! You can immediately place your apple back in the fridge to help set the toppings.
Here are a few of our favorite topping combinations:
- Apple Pie- White chocolate covered sprinkled with cinnamon and sugar
- Candy Bar- Dark Chocolate covered in crushed Candy Bar (Snickers, Butterfinger, Reese’s Peanut Butter Cups, Heath bar)
- Trail Mix- Milk Chocolate drizzled over chopped nuts and dried fruit
- Oreo- White chocolate with crushed Oreo
- Salted Pretzel- Dark Chocolate with crushed pretzel crumbs
- Rocky Road- mini marshmallows, mini chocolate chips, chopped nuts and dark chocolate
- Samoa- dark chocolate with toasted coconut
- Cacao Nibs- Dark chocolate with coconut flakes and cacao nibs
When it’s time to cut your apple, take it out of the fridge for at least 20 minutes to let the caramel soften a little bit before cutting into it.
NOTES:
The more layers you add, the fancier it becomes. If you want a “Gourmet” apple, just keep on adding toppings. That’s why you’re using a sturdy skewer.
Did you toppings slip off the apple a little bit? Drizzle more chocolate over it, roll it in more toppings or just eat it! I’ve never met a caramel apple people weren’t dying to eat.
Your apples will keep in the fridge for about a week. If you keep them at room temperature, you’ll want to eat them up in 3-5 days.
When it’s time to eat your apple, we prefer to cut the apples off the stick. Just hold it by the stick, and cut around it making a square, and then cut the chunks into slices. Cut through the toppings first and then the apples. That will help keep the toppings from popping off the apple. If they’ve been kept in the fridge, you’ll want to let them get to room temperature before slicing.
It’s normal to see some moisture released at the puncture point, if there’s caramel all the way to the stick, you may see some bubbles, that’s just the apple juice trying to get out!
More of a visual learner? Follow along with this video to see how we get a gourmet caramel apple using Peter’s Caramel…
We’ve had a lot of fun making POISON CARAMEL APPLES. Learn how to make them here.
To Learn All about Peter’s Caramel, we share all our love in this post.
Want a printable shopping list? We’ve got one ready for you to bring to the store with you.