Ohhh the chocolate cocoa bomb. A favorite from 2020 and we completely understand why! It’s a gift, it’s a treat, it’s loved by all but yet they can be a bit tricky and frustrating.
The mastermind behind The Sugar House Bakery, Meaghan House, is sharing her secrets in melting, molding and creating these fan favorites. She’s also sharing other ways she loves to use compound coatings to create her amazing edible gifts.
There are a few things you’ll need to prep to help make your cocoa bombs successful:
The MOLDS
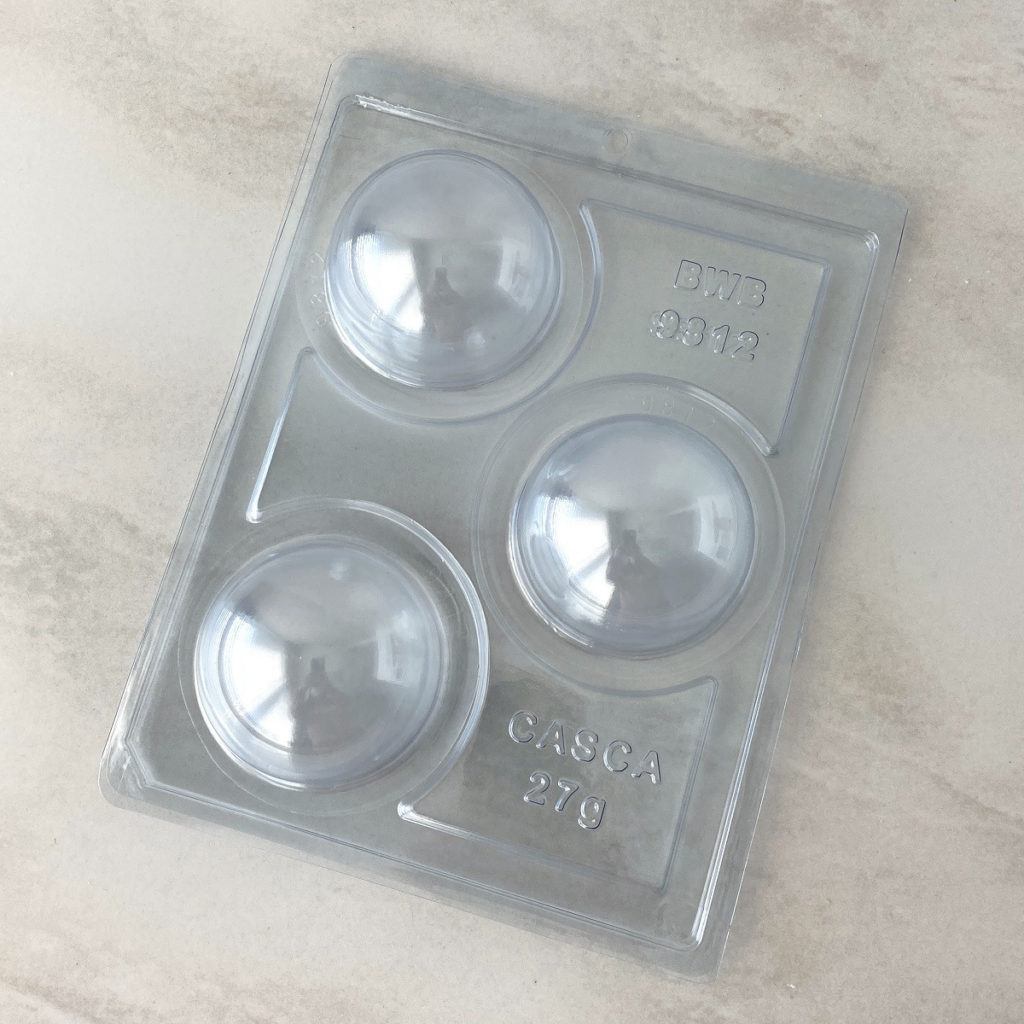
Meaghan prefers to use a 3-piece plastic mold to make her cocoa bombs.
These Special Mold styles are 3 parts mold (2 rigid PET pieces top and bottom and flexible inserts for each cavity.
- Before and after each use of the mold, clean with a damp cloth in warm water, then allow drying.
- Never use detergent, soap, or sponges.
- Between applications simply wipe your mold with a high-quality paper towel.
- For longer life, keep your mold away from direct sunlight.
- Do not expose to temperatures above 122 degrees.
How to use the mold:
- Determine which piece is the top and the bottom (the top is a little smaller and doesn’t have a fill line). Remove the silicone liner and set aside.
If you made them with us last year, then you’ll remember the silicone molds we used. We love those, but they can take a little more time to get used to using, and have their own challenges. If you already have these molds, you can follow Meaghan’s tips, just use the instructions from this post when it comes time to form the cocoa bombs.
The CHOCOLATE
Meaghan has a deep and abiding love for compound chocolate. The treats she makes have so many elements to them, and she relies on the consistency and performance you can count on when it comes to compound chocolate.
She prefers to use Guittard A’peels. But any of the Compound Chocolates we sell will work well for your cocoa bombs. You can swap it out for couverture, but just know that you’ll need to temper that chocolate to get the shiny snap you want with your cocoa bomb.
You can use white, milk, or dark– and you can even go wild with different chocolate flavors (peanut butter, salted caramel, etc). You can even add finely crushed oreo, peppermint pieces, or small sprinkles directly into the chocolate and use them in the mold.
Warm your chocolate in the microwave, 30 seconds at a time, and stir thoroughly in between each round of melting until the chocolate is nice and smooth. Then let the chocolate cool about 5 minutes before pouring it into the mold. This will help protect the mold from warping.
The FILLINGS
- 1 1/2 Tbsp of Hot Chocolate mix– use any flavor you like!
- Dehydrated Marshmallows
- Peppermint Pieces
- Sprinkles
- Powdered Food Coloring to change the color of the milk
- Candy Pieces
- Crushed cookies- oreos, gingerbread cookies, graham cracker
- Chocolate chips– any flavor
Once you’ve got it all set up, it’s time to make the cocoa bombs. here’s how it’s done:
- Pour your melted chocolate from your silicone bowl directly into the bottom cavities on the mold exactly to the “fill line.” Set the silicone piece inside the cavity. Place the “top piece” directly over the silicone pieces and press down. Flip the mold over, and use your hand twist around the bottom pieces around to help move the chocolate. This spreads the chocolate around and helps to prevent breaking. Leave the mold upside down and place the mold in the freezer. Leave there until the shell is completely hardened, about 3-4 minutes. If you seen uneven coloring, leave the shells in the freezer until the coloring is consistent. Don’t stack the mold in the freezer.
- Removing the chocolate shell from the mold: Lift your top piece out first, then use your fingers to remove the silicone piece with the chocolate attached. Using your fingers, you can flake off any extra chocolate around the edges. Then pull the silicone piece out from the inside of the bomb.
- Fill the cocoa bomb: start with 1 1/2 Tbsp hot cocoa powder, and then add in any other mix-ins you want.
- Sealing the Chocolate bombs: Take the empty side of the bomb and you’re going to warm the edge just slightly. There are a few ways to do this: You can warm a plate (heated in the microwave), use a heated griddle, or a fry pan on the stove. You don’t need it very warm, as you’ll just be warming, not melting the chocolate. Place a piece of parchment directly on the heat source, then gently rotate the bomb on the heat source just until the chocolate starts to warm.
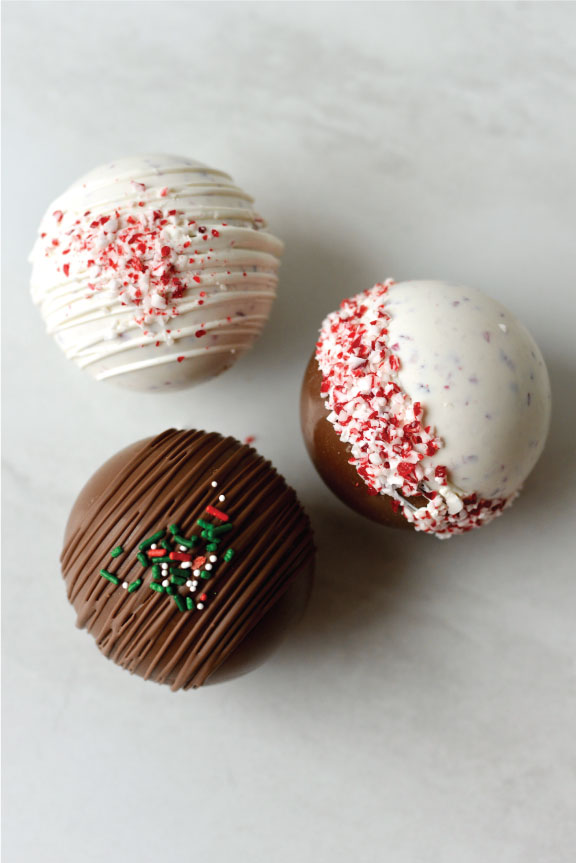
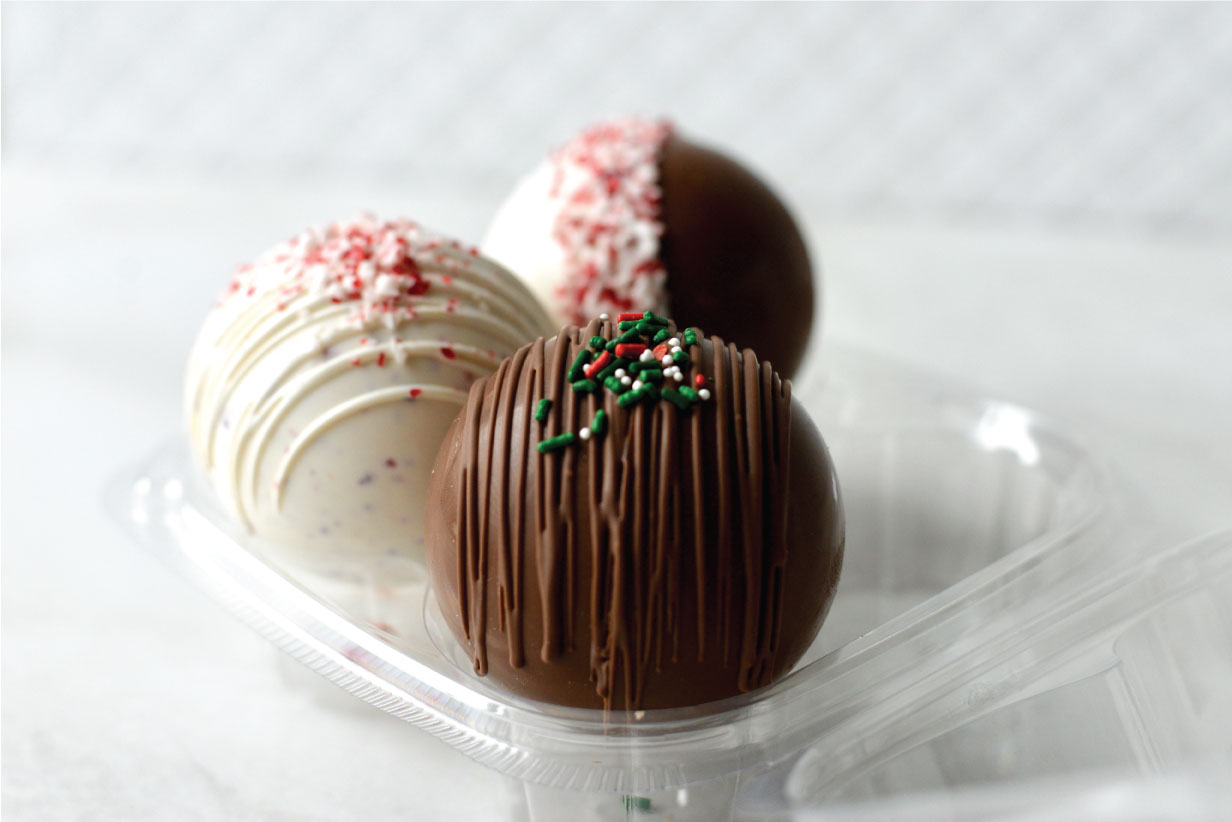
Decorating your Cocoa Bomb:
- Using melted chocolate in a piping bag, squeeze bottle or tip of a spoon, drizzle chocolate around the cocoa bomb and be sure to cover the seam to help keep it nice and sturdy.
- Dust on a few sprinkles, or roll in peppermint pieces to add a little flair!
Eating your Cocoa Bomb:
To melt your cocoa bomb you’ll need some warmed liquid. Meaghan LOVES using real milk for the best flavor. It will incorporate and create the best flavor. You can use a milk alternative, but it will likely take more stirring.
You can either start with 1 cup of steaming milk in your mug, and drop the cocoa bomb into the mug. Or start with the bomb in the mug, and cover with steaming milk.
A few other tips:
- Shelf life- this will depend on what you’re using. If you’ve filled it with hot cocoa powder and dry ingredients they will keep for at least 2 months. If you have any kind of moisture- ganache, or flavorings- this will shorten your shelf life to just a few days.
- Storage- keep them in a temperature stable environment. Away from the heat, and out of the cold (don’t put them in the fridge or freezer!)
- Packaging- Meaghan likes using cupcake liners to place the cocoa bombs inside. She also packages them up in plastic cupcake carton.
- If your cocoa bomb isn’t perfectly smooth around the edges, use the warm pan to melt the edge a little mor to make a good seal. You can also use more chocolate to patch any holes once you’ve sealed the bomb.
- To avoid fingerprints on the cocoa bomb, you can wear gloves.
Other ideas for Compound Chocolate:
- Chocolate covered Oreos– use an oreo mold. Use about a Tbsp of chocolate into the bottom of the mold, and tap on the counter. Lightly place Oreo on top of the chocolate, then cover the top with more chocolate. Use a toothpick or stick to fill in around the sides, and make sure all the cookie is covered. Tap on the counter to remove any bubbles. Place in the freezer. Once set up, pop out of the mold, and you have a beautiful chocolate dipped Oreo.
- Chocolate drizzled bacon– you read that right, cook up some nice thick bacon, let it cool, and drizzle with chocolate.
- Caramel Apples– Meaghan uses compound chocolate for all the apples she makes. For tips on caramel apples, check this out.
Make these Cocoa Bombs with Meaghan! You’ll love her casual, yet informed style. Feels like you’re making treats with an old friend!
Connect with Meaghan on Instagram and over on her Website.
This recipe is part of our Annual Gygi Chocolate Extravaganza. Check out all the classes (hands on, demo and virtual options!)