After trying several methods, we have established that the best way to prepare your bird before cooking is with a dry brine. It gives you tender meat, lots of moisture, delicious flavor, and extra-crispy skin. It is the only method you will ever need to know. And if you want to know what amendments you can add to the salt mix, what process to use, and how long it takes for dry brining a turkey, keep reading. We promise – it’s super easy! You should definitely try dry brining a turkey.
Step 1. Prepare Your Brining Mix
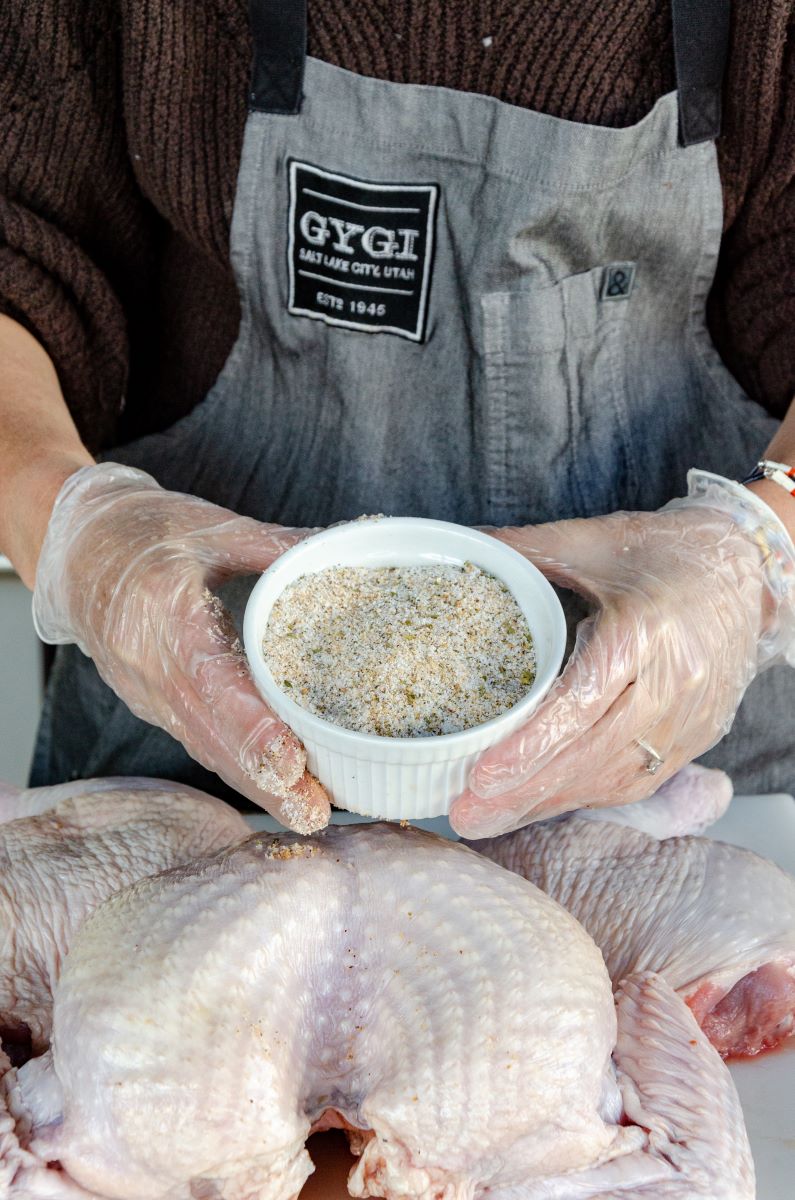
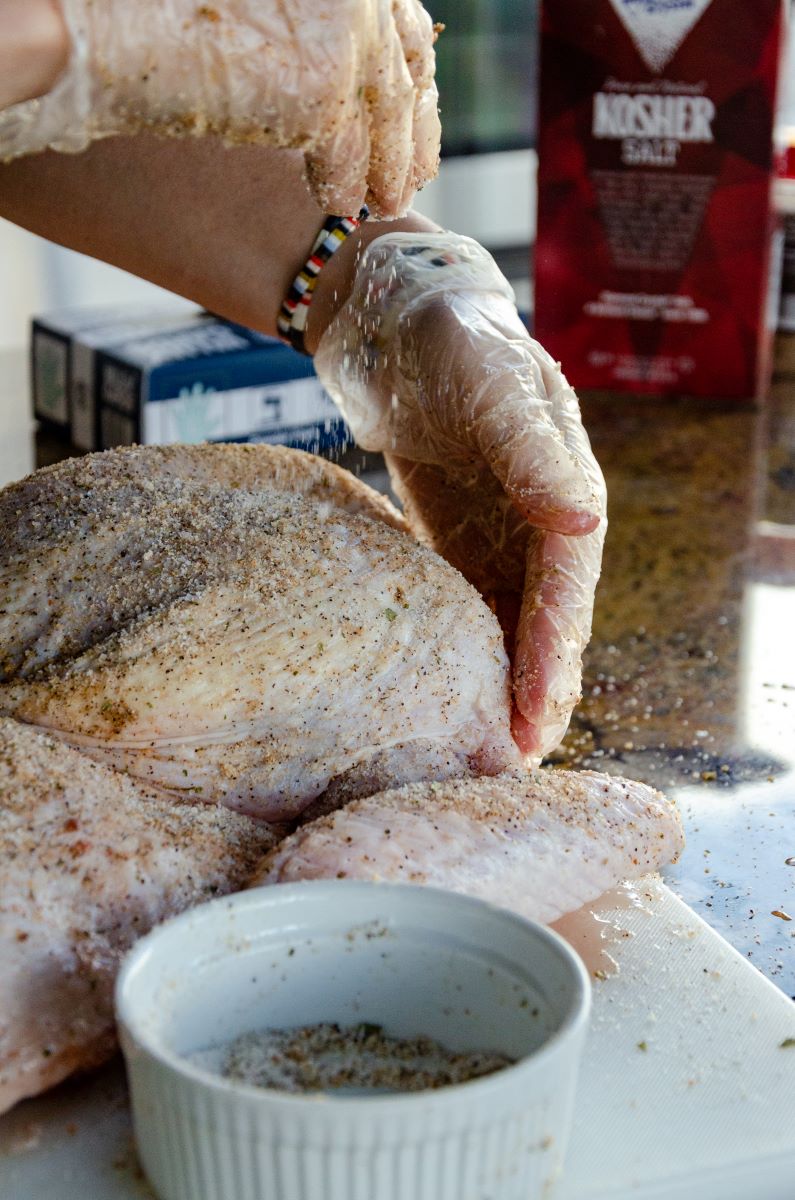
We recommend using one teaspoon of kosher salt – never table salt – per pound. We like Diamond Crystal Kosher Salt because it is inexpensive and delicious. The large grains are the key! Looking for more flavor? You can add some sugar, spices, or aromatics to your brining mix before rubbing it onto the bird. When adding sugar, use up to one-quarter the amount of salt you used, and consider adding some spices like black pepper, crushed fennel, mustard, sumac, or citrus zest. For our bird, we mixed in about a tablespoon of Chef Todd’s Gourmet Pit Seasoning.
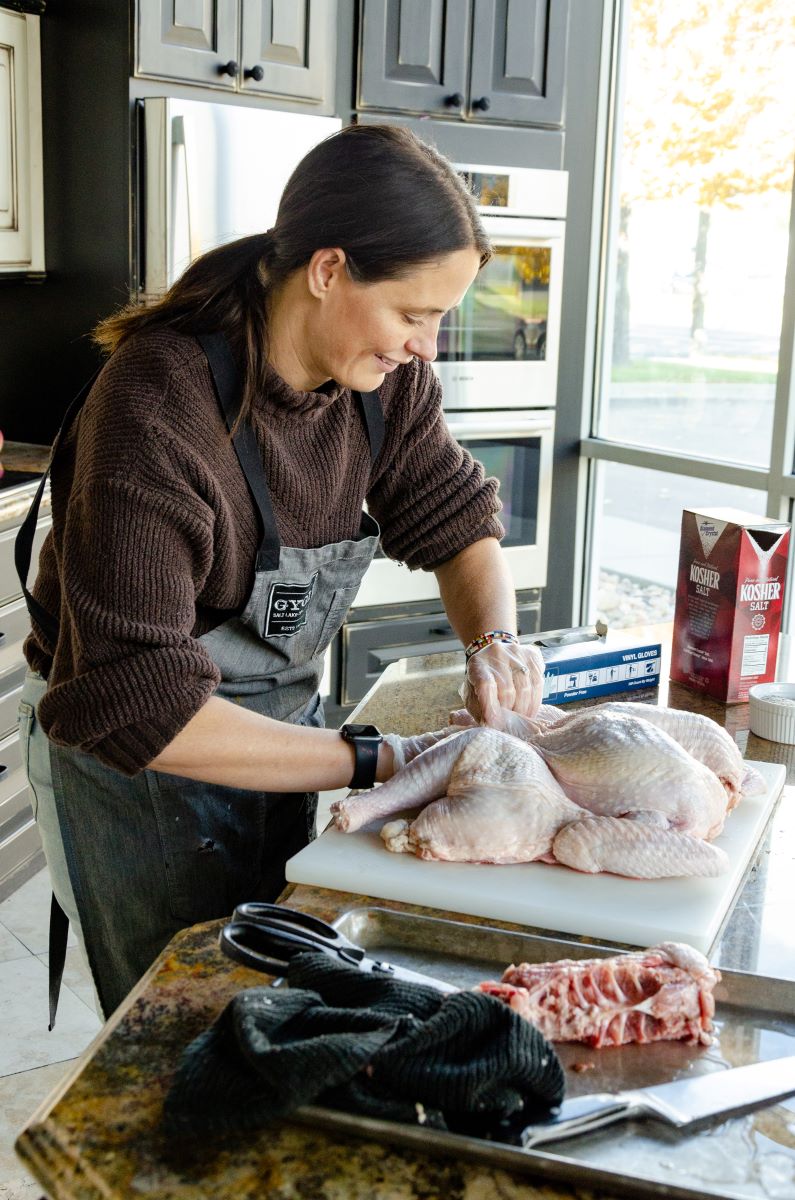
Step 2. Pat Turkey Dry
You should start the brining process at least one to three days before you intend to cook your turkey. We have found that two days is our sweet spot. Once the turkey has thawed and the neck and giblets have been removed, use paper towels to pat the turkey dry both inside and outside. That way, the salt can draw out moisture locked within the muscles instead of moisture from the grocer’s packaging.
Step 3. Cover Turkey in Salt and Seasonings
Next, rub the brining mix all over the outside and the inside of the bird. To help speed the process along a little, you can gently loosen the skin from the flesh and rub salt directly onto the meat under the skin. Make sure you get the rub into all the crevices – don’t miss an inch. This is where the Kosher salt really comes in handy, because you can see and feel it so easily. You can dry brine a turkey while it continues to thaw in the fridge, but just make sure the skin is soft enough for the salt to stick.
Step 3. Refrigerate Turkey Uncovered
Place the turkey breast side up on a roasting pan or a rimmed baking sheet lined with a cooling rack. The pan will catch any liquid that drips off. Place the pan in the fridge and leave it, uncovered, to brine. You should let it brine for a minimum of at least 1 hour per pound. And while you can’t really over brine, with poultry you do not want to go longer than three days or the meat will be too salty. If leaving the raw bird uncovered freaks you out, you can put it in a turkey bag or cover it with plastic wrap. But for the crispiest skin, you will want to uncover it for at least six hours before cooking.
Step 4. Don’t Rinse It
When you are ready to cook, do not rinse or wipe off the bird. After brining, the salt should have done its job and there shouldn’t be any salt residue left on the outside of the skin. And rinsing could ruin your chances at crispy skin. Just let the dry-brined turkey rest at room temperature for up to one hour while you let the oven get up to temperature and complete any other prep work you have to do.
Step 5. Cook Your Turkey
Finally, you are ready to roast your turkey or cook it however you like. You can stuff the cavity with a few onions, a couple of apples, and some sprigs of thyme. Or, if you spatchcocked your turkey, toss similar ingredients into the bottom of the roasting pan. Also note, dry-brined turkeys do not absorb extra liquid during the brining process, so you might have to add an extra cup or two of water to the base of the roasting pan so drippings do not burn. For traditional roasting, we recommend preheating the oven to 500℉ and roasting for about 30 minutes, undisturbed. When the skin starts to brown, shield it with heavy-duty aluminum foil. Reduce the heat to 350℉ and finish cooking.
Depending on the size of the bird, traditional roasting could take anywhere from 45 minutes to 3+ hours. This is exactly why we recommend spatchcocking your turkey. It can reduce cooking time by 75%. And when roasting the turkey, you cannot simply rely on the pre-inserted popper on your turkey. Instead, test the temperature to make sure the deepest parts of the turkey breast reach 165℉. You can use a leave-in digital thermometer or an instant-read thermometer to help you keep track. We recommend the Thermapen thermometer. Once done cooking, allow the turkey a few minutes to rest before carving. Then you are ready to enjoy this beautiful turkey alongside all your favorite sides!
What do you think? Ready to elevate your holiday meal prep this year? Then you should give dry brining a turkey a try.