A fun way to dress up a Bundt has nothing to do with adding decorations, but rather using the batter to create a show-stopping dessert. You have probably seen the inside of a traditional swirl cake, with different colors of batter combining together for a bright, colorful, contrasting slice of deliciousness. Well, you can use a similar methodology to create a two-tone Bundt cake. But instead of swirls, we wanted to create a cake with stripes. Hmmmm, how to tackle this challenge? Here’s how we did it:
First, you want to mix up your batters. You can mix up a full batch of a light colored cake and simply divide up the batter and add food coloring to each portion. Or, like we did for this Bundt, you can make a half batch of vanilla cake batter and a half batch of chocolate cake batter. We suggest tweaking this recipe for the butter vanilla Bundt cake. Make half of the recipe as is. Then make another half batch, but take out 2 Tbsp flour so you can add 2 Tbsp of Extra Brute cocoa powder. You want this batter to be a little thicker–you’ll see why.
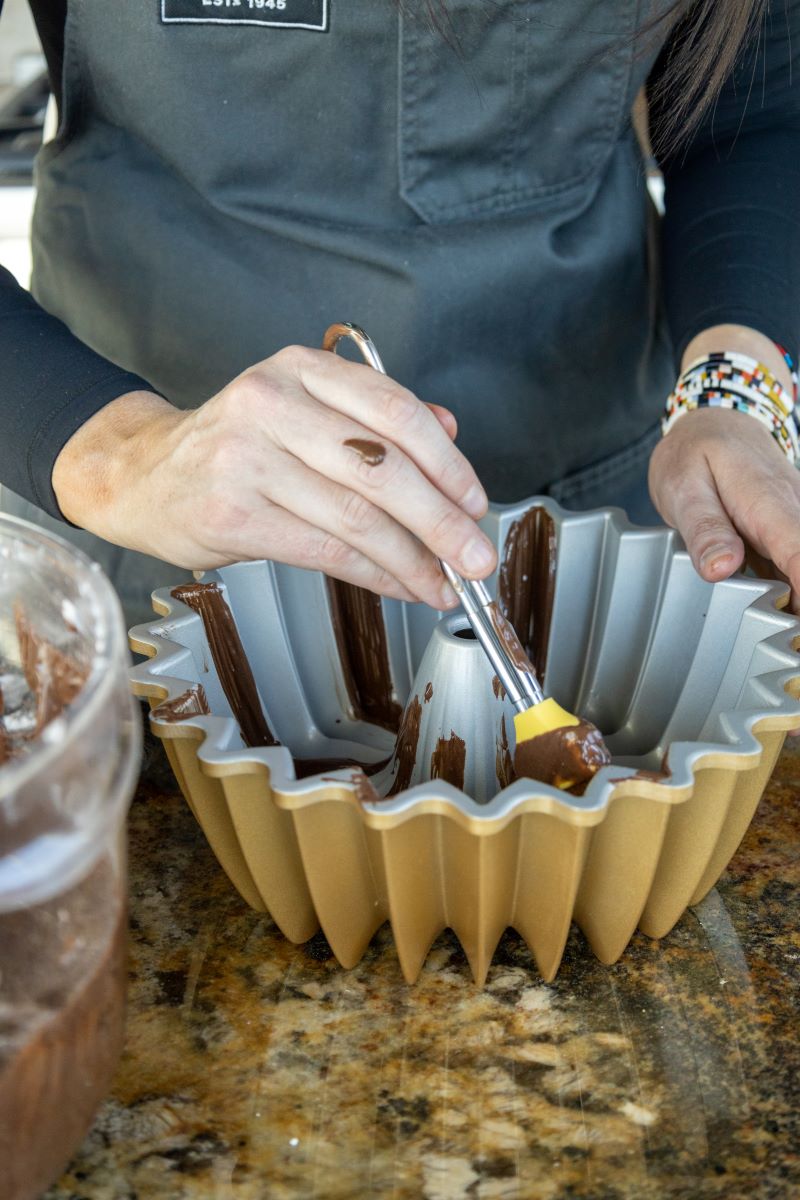
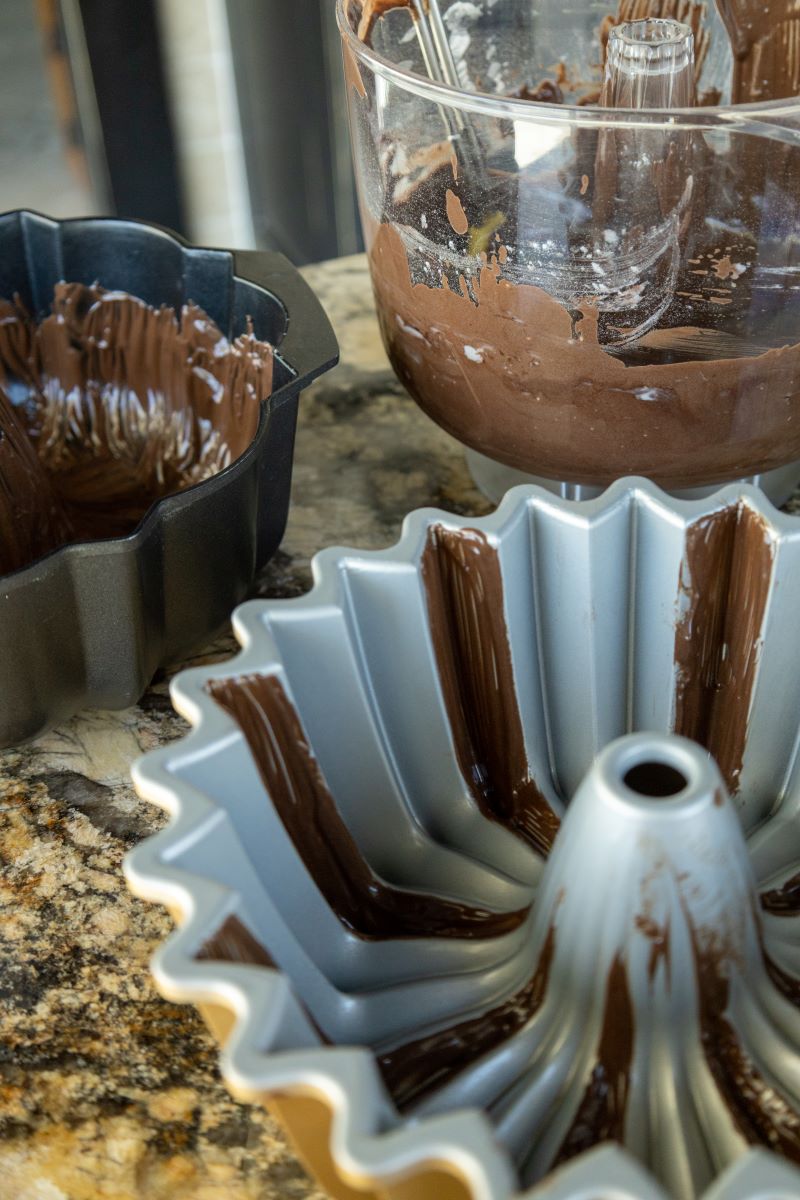

Next, once the batter is ready, you want to prepare your pan. Remember, you want to prepare the pan right before you pour in the batter so the pan release you use doesn’t have time to drip down the sides and collect in the bottom of the pan. For our two tone Bundt we chose the Brilliance Bundt pan, because it already had some distinct slices in the pattern. We plotted out the pattern we wanted to do and then prepared each slice according to the type of batter we would fill it with. For the vanilla cake, we used Baker’s joy to prep the pan. For the chocolate cake, we used the goop mixture (find the recipe here). This made it easy to know where to pour the batter for each section!
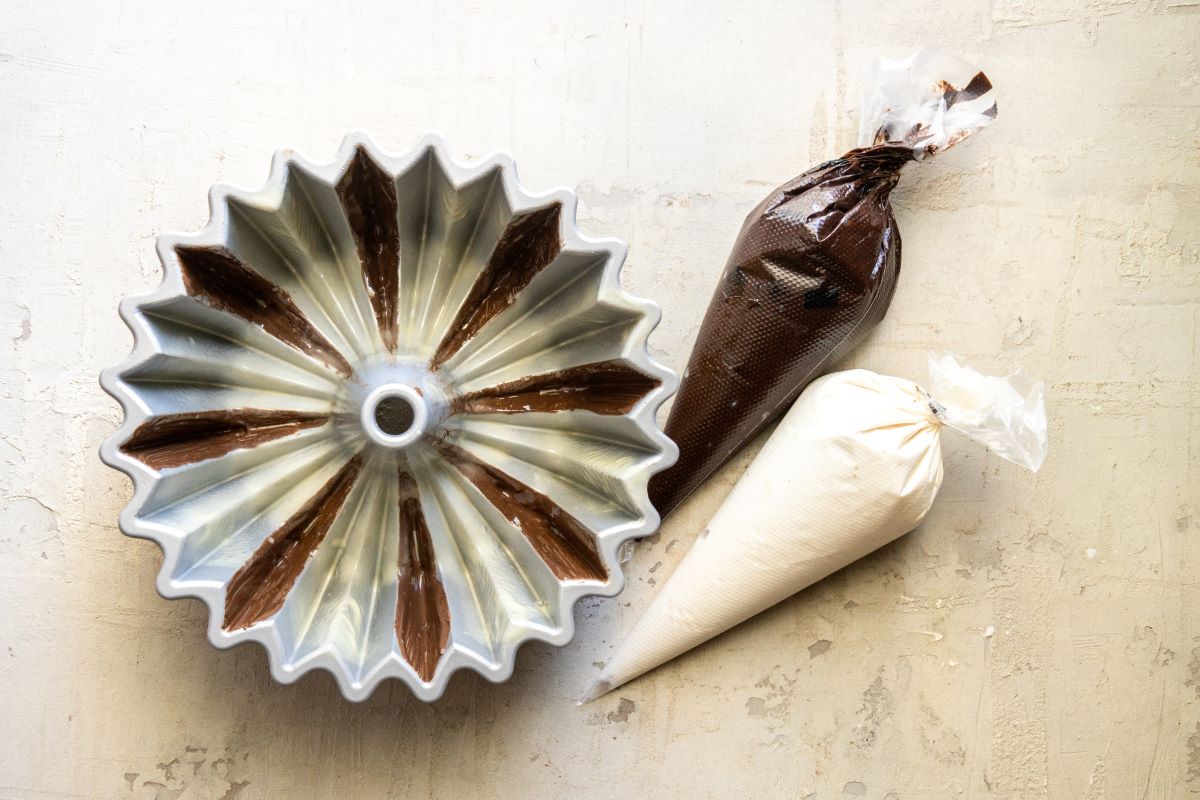
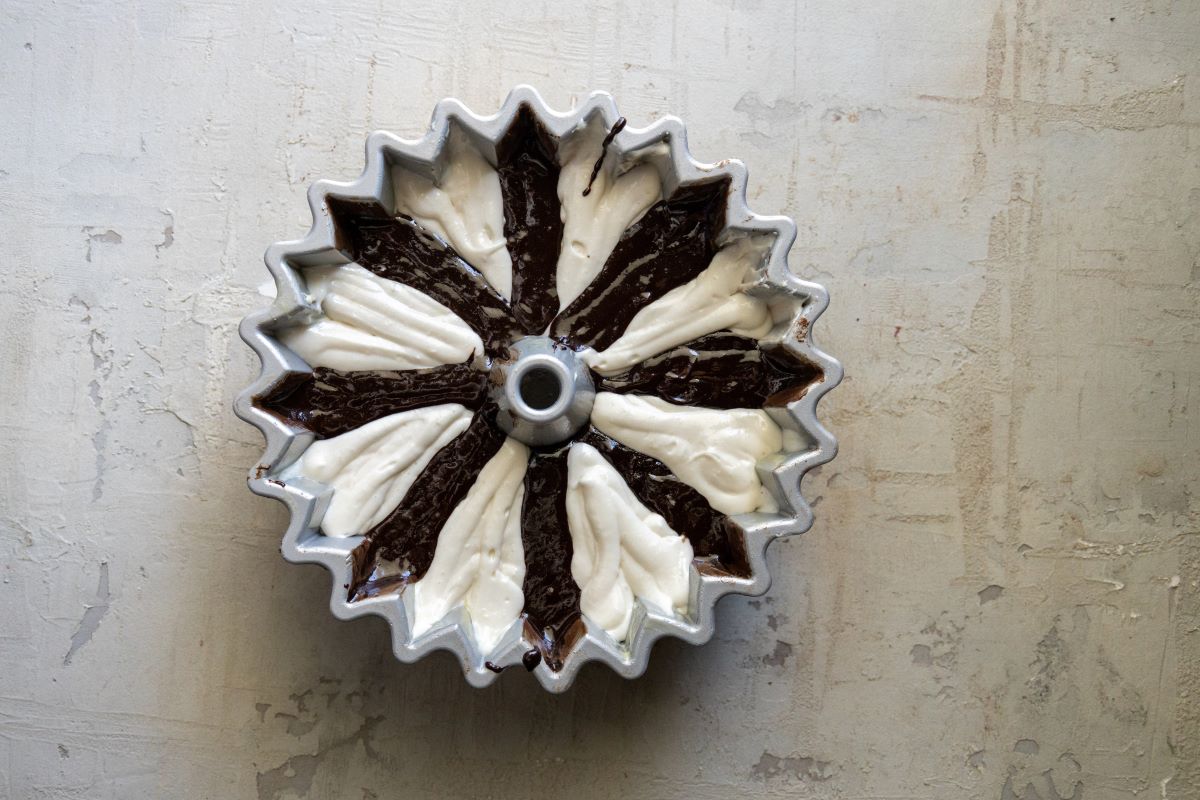
Now comes the tricky part. It is time to layer in your cake batters. There was no fool-proof way to do this that we could think of. But the easiest method was using piping bags to add a little batter to each section. You start at the bottom of the pan. Then going back around, add the next layer of batter. You continue going round and round, layering over and over, until each section is about 3/4 full (gotta leave a little room for that rise). This is where having a thicker batter really helped us out!
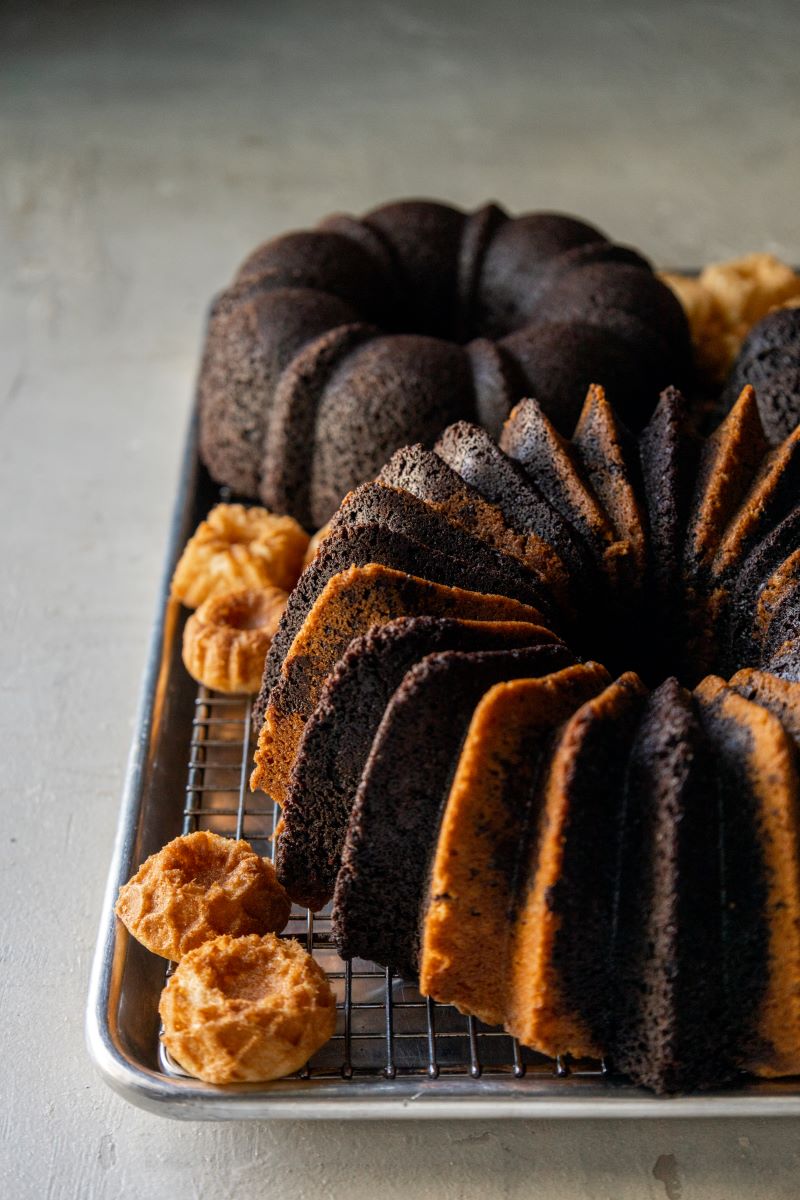
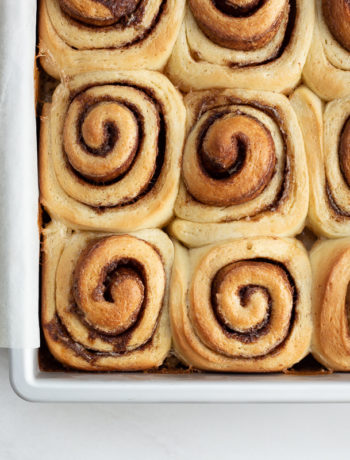
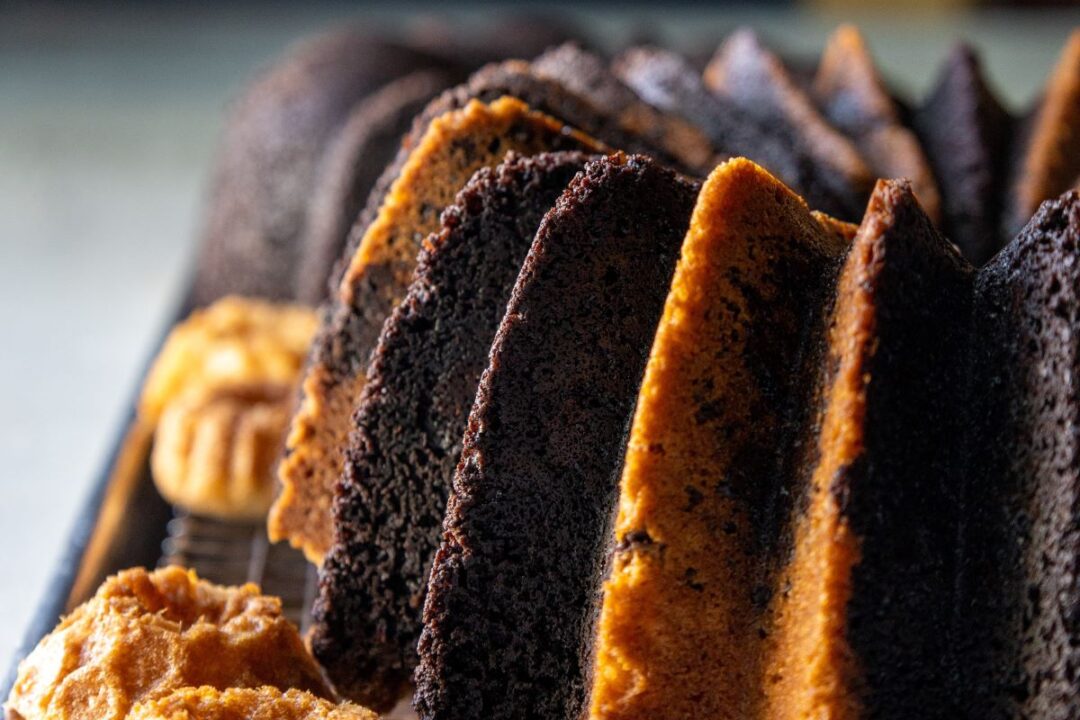
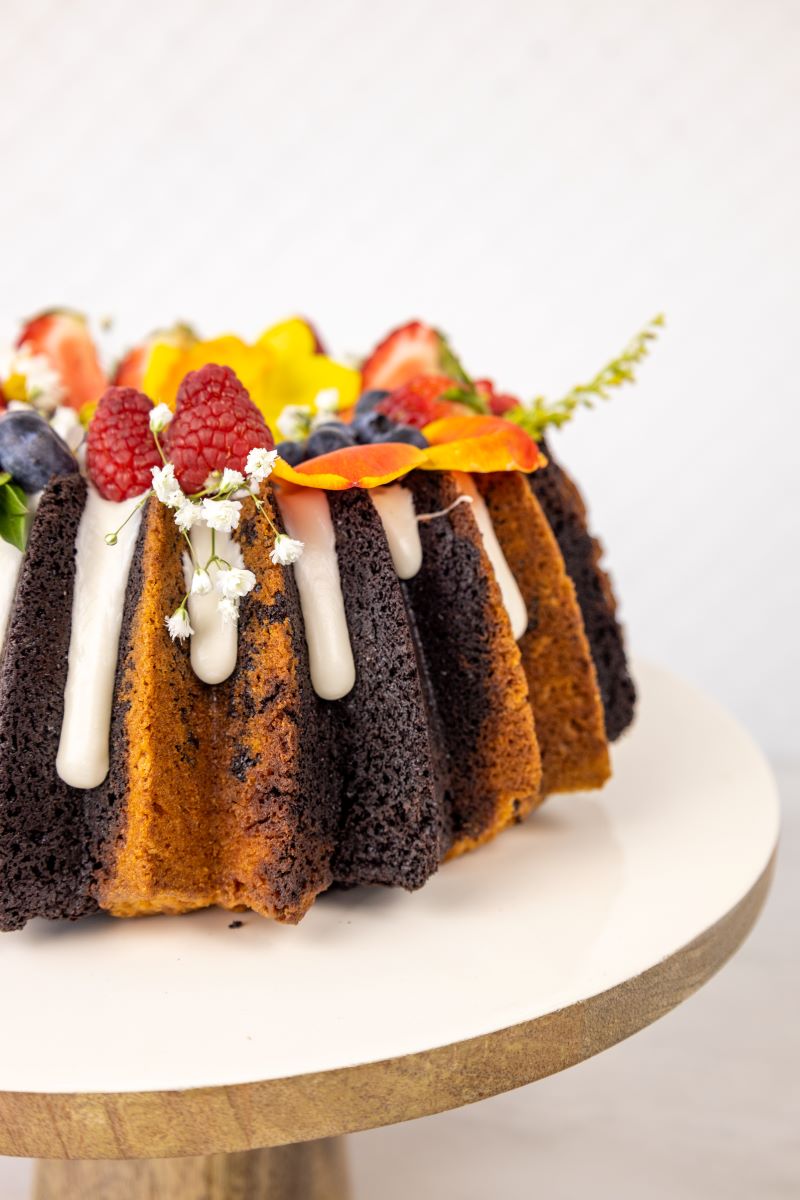
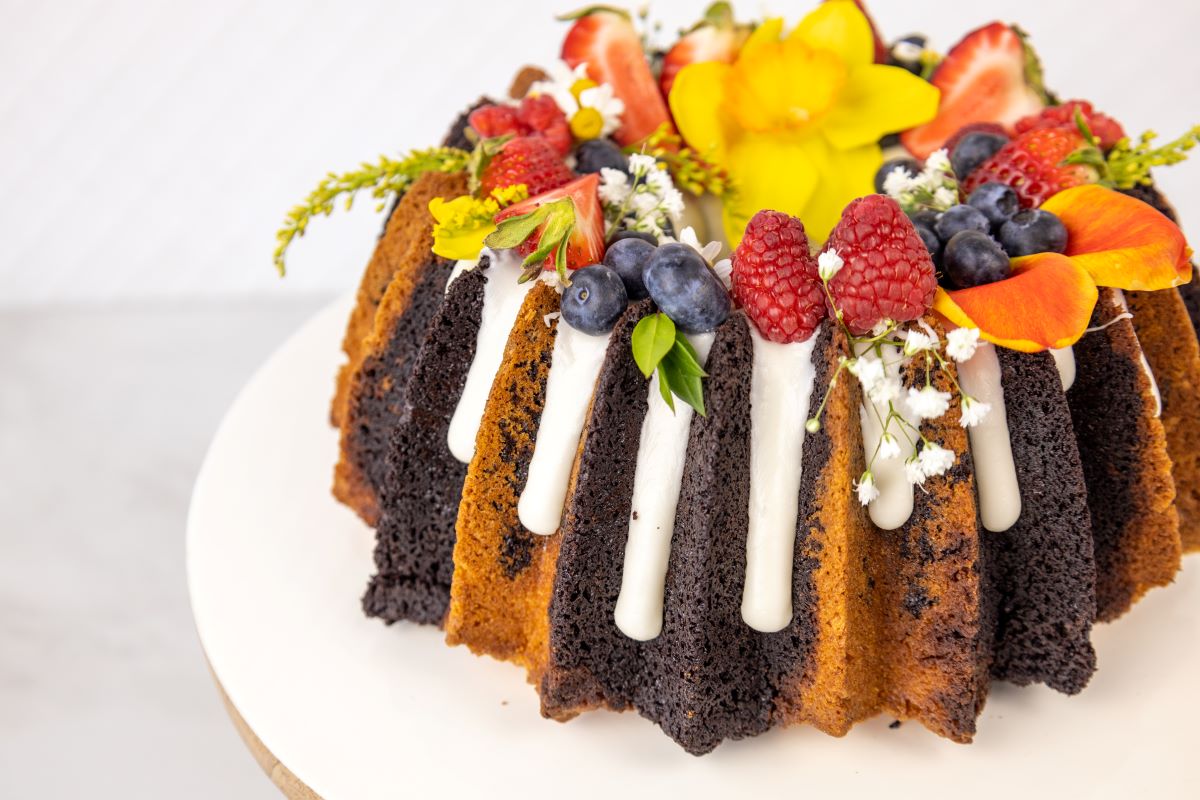
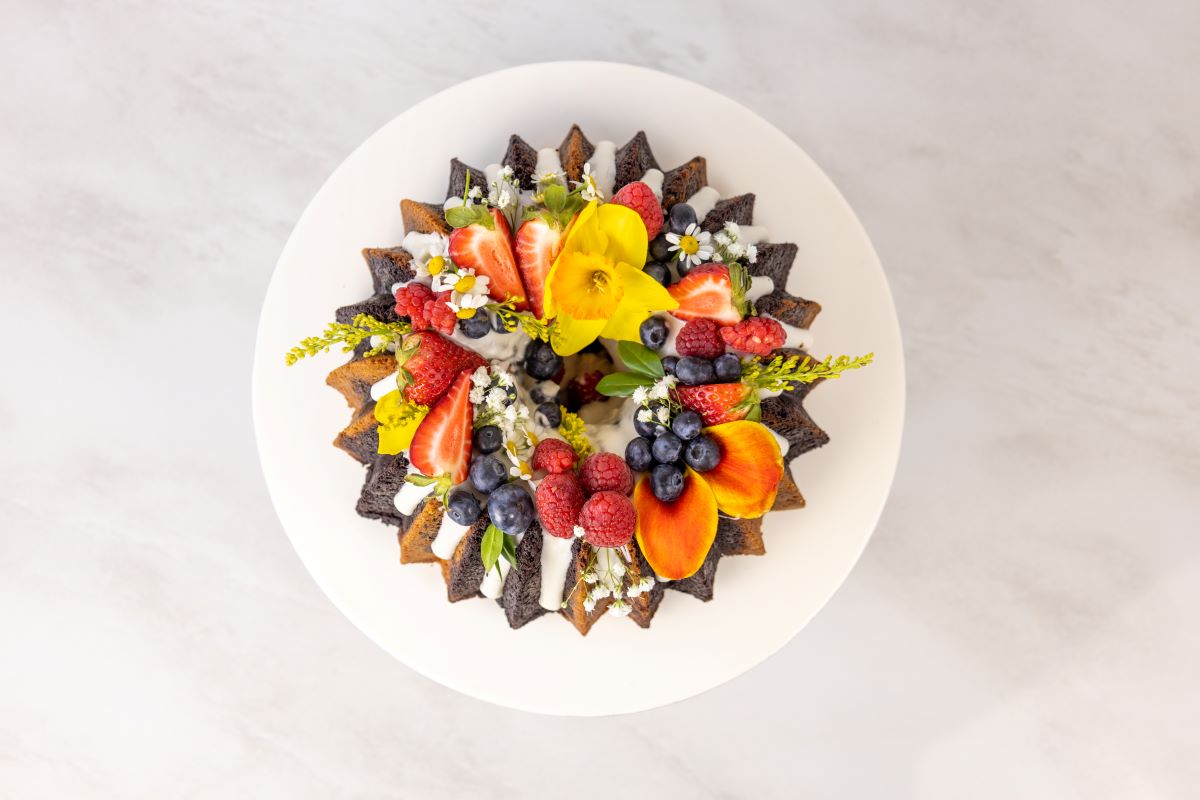
You can imagine that when it came time to turn out this cake we were all holding our breath. And the moment we caught a glimpse we all released that pent-up exhale. The stripes were by no means perfect. But the cake was still absolutely gorgeous! We could have easily left it as it was, and served the naked cake right alongside a scoop of ice cream. But we decided we had to go all in on this extra beautiful cake–so we covered it with glaze, fresh fruit, and flowers. All. The. Things. Because we just couldn’t resist all that contrast and color. And it came out stunning! Definitely one of our prettiest Bundt cakes. Mwah!
This two-tone Bundt was such a fun experiment. We weren’t sure what to expect or how things would come out. But it ended up being way better than anticipated and we can’t wait to see what creative and fun things you try the next time you make a Bundt cake.